Altitude Summit this year was insane. There were nearly 500 in attendance! Nearly 500 insanely talented, gorgeous, fashionable, down-to-earth men and women all there to improve upon what they're already awesome at. To be completely honest, I felt completely unworthy to be in the crowd. So unworthy, in fact, the first day felt like a giant kick in the pants.

(image by Uppercase Magazine)
I had a fantastic time socializing with friends and making new ones! The panels were all fantastic, but a big wake up call at the same time. To sum up my experience at Alt; here are a few things I learned, some good times that I had and the cool people I met.
• THINGS I LEARNED •
- Break out the good stuff (but not too much). Keep posts simple, unique & attention-grabbing.
- Include personal narrative & personality, but make and keep boundaries of what I'm willing to share.
- Be more aware of news (I should probably read drudge, but I never do) and current trends
- DON'T SIT ON IDEAS - I can always improve on them later
- Facebook is something I need to embrace, not avoid
- I need to figure out what I want to achieve from this blog (I'm a little aimless sometimes)
- I need to fix my about page
- Re-writing my media packet is a must
- I need to talk more with my brother (I don't call him nearly enough & he's a patent attorney)
While attending the various panels, I started a little to do list of the things I should change & improve on my blog & for you, my dear readers. The list is 3 miles long now. After the first day of sessions I felt completely broken: My blog sucks. My life is a mess. I'm not stylish enough. I'm not creative enough. I don't have enough time to do any of this.
The second day was a whole new world. Each session was more inspiring than the last. That second day helped me build more confidence that I can do this, and many bloggers that I look up to are also in the same I'm-not-good-enough boat.
• GOOD TIMES I HAD •
Wednesday night I enjoyed some fantastic sushi with
Pinhole Press. I had great conversations with
Jensie &
Melanie who I sat next to. It was a great & personal way to get the Alt Summit festivities started. Wednesday night I partied with fellow teachers and met designer pal,
Angie, for the first time ever. I got to meet
Natalie,
Timothy and joke around with the reps of
Mail Chimp. They gave out hand
crocheted monkey hats at the social & you better believe I grabbed a handful & plan on using them for Felix's 1st birthday. I do believe we will be going monkey-themed this year.
 (image by Justin Hackworth)
Thursday night was the Winter Whites party. Since I taught a panel in the morning I was able to get my hair professionally done by
She Lets Her Hair Down (Josphen was too adorable), so it didn't take much to get all dolled up for the party.
I wore an off-white top (
courtesy of ModBod, LOVE it!), necklace from H&M, earrings from the thrift store, belt from Grandma Newton, bracelets made by me (and one by my dad), floor-length skirt handmade by me, shoes from Amazon.
I had originally bought a white dress from Asos, but it failed miserably as it was practically see-through. Funny enough, I saw a girl wearing the exact dress that didn't work on me, but it worked on her! I felt like too much of a dork to go up to her & tell her it looked fantastic on her. Oh well.

The Friday night parties were absolutely nuts. So many photo booths & fun treats. I believe I collapsed from a sugar rush at the end of the night. I wore a turquoise dress from Asos, pink belt from Asos, red patent pumps from Target, earrings from the thrift store & bracelets from Target. The Uppercase living party was a hoot where we made beaded necklaces. We finished the night at the
Method +
Smilebooth party where they had some classic hip hop jams & we got a little crazy with our dance moves. Super fun times.

(Image by Gala Darling)
Saturday was more of a restful day with sewing, printmaking & calligraphy. It even started to snow! I had a great time at Eva's printmaking class & made some really fun prints that I plan on hanging around the house. I need to get on that! The calligraphy class went really well & both Jill & I were just floored at how quickly everyone picked up the pointed pen! Great times.
• THE PEOPLE I MET •
My roommies were fantastic. In previous years I've lived close enough to the Grand to just drive home at night. This time I had to drive 40+ miles each way, so I decided I'd rather spend that commuting time sleeping or socializing (it ended up being the latter). I had an absolute blast getting to know my roomies better. Nikki, Katie and Mica are so fantastically inspiring, beautiful and talented! What a fun group of women to be associated with!
It was an absolute thrill to meet Kathleen. She's so real and witty! Jessica, Gala, and Jessie were all on the same fashion panel. I loved how passionate they were & how transparent they were willing to be at the Q&A section. There needs to be more of that in the blogging community! They're all super adorable, too. At the Printmaking class I met my blog crush, Merilee, who turns out lives practically next door to me! We're totally going to be BFFs now.
There were so many fantastic people that I met at Alt, I'm trying to sort through all of their cards/sites & add them to a Pinterest board for you all to see & visit. It'll probably take a million years to add all of them on there, but I'll try to get them on there.
Did you go to Alt? Tell me, what was your favorite moment of the weekend?
 We made pendant necklaces, worked on projects, chatted about babies & husbands and ate delicious food.
 I had a great time getting together with my friends. There was no schedule, no twitter and no instagram to distract us from the good time we shared. I love moments like that.
What fun projects have you made lately? I'd love to see!
I had a great time getting together with my friends. There was no schedule, no twitter and no instagram to distract us from the good time we shared. I love moments like that.
What fun projects have you made lately? I'd love to see! Then. . . Chris gained over 30lbs. It seemed like it was over night. I was sad to see his wardrobe go. This was about the time when I was pregnant with Felix, so I stole a few of his awesome too-small-for-mr-muscles sweaters & put them in my wardrobe. This sweater was
  I've been avoiding thrift shops lately (no energy to do grocery shopping, let alone thrift), so I ask you. . . What have you scored on the cheap lately? Do you steal from your significant other's closet? Share in the comments below!


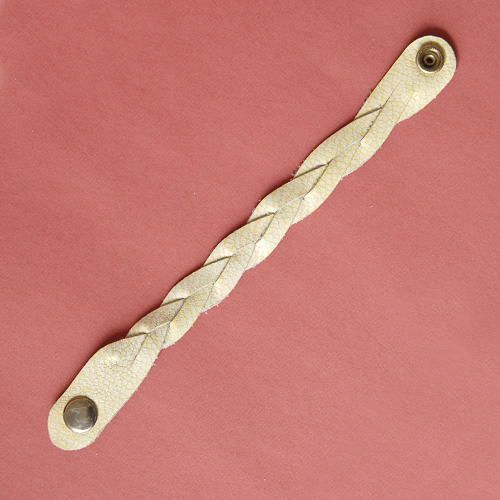
 I used a piece of leather to gather the back into a bow-like shape. It doesn't change much of the neckline, but it does tighten it down a bit so that when I bend over, my girls don't show.
I'm glad I took the risk! I'm excited to start working this into my regular wardrobe.
Read more for how to do it yourself! You'll find yourself finishing this refashion in a matter of minutes. It's really that easy.
I used a piece of leather to gather the back into a bow-like shape. It doesn't change much of the neckline, but it does tighten it down a bit so that when I bend over, my girls don't show.
I'm glad I took the risk! I'm excited to start working this into my regular wardrobe.
Read more for how to do it yourself! You'll find yourself finishing this refashion in a matter of minutes. It's really that easy.
 Put the top on a dress form & mark the centerline & where you want the gathering to stop. For me, this ended up being about 10-11 inches from the top of the dress. Grab a friend to help you mark the spot if a dress form isn't available.
 Figure out how big a "knot" you want. I used leather, but you could definitely use a tube of jersey or anything else for that matter. If it's not leather or felt, finish the edges. For me, it was 1 1/2 x 5 1/2 inches.
Make a slit slightly smaller than your "knot" piece, where you made your marking in the first step. Add fray check around the edges for extra stability.
Figure out how big a "knot" you want. I used leather, but you could definitely use a tube of jersey or anything else for that matter. If it's not leather or felt, finish the edges. For me, it was 1 1/2 x 5 1/2 inches.
Make a slit slightly smaller than your "knot" piece, where you made your marking in the first step. Add fray check around the edges for extra stability.
 Thread your leather/knot piece through the small slit & sew ends together along the back side. Since my top was actually a dress, there was a lot of weight pulling on the slit I made, creating an ugly gap. I reinforced the slit by hand sewing it into the pleats & the knot piece.
 Add more fray check for extra stability.
 Turn right side out & enjoy your family-friendly slouchy top!
 You'll love how it looks from the back, you'll want to wear your hair up. Enjoy!
 Before I got started the elements on the page had no heirarchy & the ads weren't very organized. A lot of the work involved in this redesign was on Chris's end of things, with reorganizing the sidebar so that it would read well on the page AND so that it could be easily editable on Lisa's end of things.
There were a few things I did like about her blog & incorporated in the redesign: unexpected color palette, stripes and handmade elements. Since her site is deal/ad-based, I felt like the handwritten details made it look more approachable, but then kept it professional looking. I made a very fine diagonal stripe for the background & softened her color palette to a charcoal/navy/purple color family. Doing this redesign was so satisfying; like organizing-my-closet-by color-with-all-matching-hangers satisfying.
Before I got started the elements on the page had no heirarchy & the ads weren't very organized. A lot of the work involved in this redesign was on Chris's end of things, with reorganizing the sidebar so that it would read well on the page AND so that it could be easily editable on Lisa's end of things.
There were a few things I did like about her blog & incorporated in the redesign: unexpected color palette, stripes and handmade elements. Since her site is deal/ad-based, I felt like the handwritten details made it look more approachable, but then kept it professional looking. I made a very fine diagonal stripe for the background & softened her color palette to a charcoal/navy/purple color family. Doing this redesign was so satisfying; like organizing-my-closet-by color-with-all-matching-hangers satisfying.
 What do you think? Head on over to
  We just bit the bullet recently & bought a grown-up table! It's our 7th (and hopefully final) table in the last 5 1/2 years. Now that we have a nice table made out of beautiful solid wood, we need to take care of it. This means no naked glasses on the wood! I was grocery shopping the other day & thought I'd see if I could find some cooler place mats than we have currently & had a brilliant brain wave. I also had to pick up some envelopes in the office supply section & came across bulletin board tiles. They were about the right size, a fantastic color/texture & a lot cheaper than the placemats I had been eyeing earlier. BOOM. there you go. We have cork boards for place mats.
I think this idea connected partially because we had placemats growing up that had cork on the bottom, to keep from scratching the table top. I loved those placemats! They had pretty illustrations of the English countryside. I wonder if my parents still have them.
So, do you use placemats for mealtime? What are your favorite ones? Link to resources in the comments below!
We just bit the bullet recently & bought a grown-up table! It's our 7th (and hopefully final) table in the last 5 1/2 years. Now that we have a nice table made out of beautiful solid wood, we need to take care of it. This means no naked glasses on the wood! I was grocery shopping the other day & thought I'd see if I could find some cooler place mats than we have currently & had a brilliant brain wave. I also had to pick up some envelopes in the office supply section & came across bulletin board tiles. They were about the right size, a fantastic color/texture & a lot cheaper than the placemats I had been eyeing earlier. BOOM. there you go. We have cork boards for place mats.
I think this idea connected partially because we had placemats growing up that had cork on the bottom, to keep from scratching the table top. I loved those placemats! They had pretty illustrations of the English countryside. I wonder if my parents still have them.
So, do you use placemats for mealtime? What are your favorite ones? Link to resources in the comments below! I've got access to a laser cutter, so I made little
  In the past, I've cut my vinyl stickers myself with my little Silhouette, but this time I didn't want to deal with all that. I had them done at Fast Signs. That lifted a bunch of stress off my shoulders to have that done for me.
I got a lot of help this time around with my business cards!! My sister-in-law helped with the bracelets, My intern helped stamp the cards & clean the leather and my cousin & his wife helped me assemble it all. I wouldn't have been able to do it in under 20 hours without them! Thanks, friends!!
So, are you going to Alt? What did you do for your business cards? Please do say hi to me at the conference! I have a little goodie for you & I'd love to meet you. If you're not heading to Alt, I'll be back here on Monday. Happy weekend!
In the past, I've cut my vinyl stickers myself with my little Silhouette, but this time I didn't want to deal with all that. I had them done at Fast Signs. That lifted a bunch of stress off my shoulders to have that done for me.
I got a lot of help this time around with my business cards!! My sister-in-law helped with the bracelets, My intern helped stamp the cards & clean the leather and my cousin & his wife helped me assemble it all. I wouldn't have been able to do it in under 20 hours without them! Thanks, friends!!
So, are you going to Alt? What did you do for your business cards? Please do say hi to me at the conference! I have a little goodie for you & I'd love to meet you. If you're not heading to Alt, I'll be back here on Monday. Happy weekend!


 I doubt I'm the only one with this problem. Or am I? I bought these PacSun jean leggings through Groupon at an insanely low price ($5? I'm in.). I was concerned that the fit was going to be a bit tight on my legs, but I ordered just as the size chart suggested. Sure, I fit in my jeans, but they weren't very comfortable. In fact, they're too loose in the waist & a bit too tight in the legs.
I'm sure I could've taken them back for a bigger size, but unfortunately I had already ripped off the tags. Instead I decided to make them bigger & thankfully it worked! Here's how:
I doubt I'm the only one with this problem. Or am I? I bought these PacSun jean leggings through Groupon at an insanely low price ($5? I'm in.). I was concerned that the fit was going to be a bit tight on my legs, but I ordered just as the size chart suggested. Sure, I fit in my jeans, but they weren't very comfortable. In fact, they're too loose in the waist & a bit too tight in the legs.
I'm sure I could've taken them back for a bigger size, but unfortunately I had already ripped off the tags. Instead I decided to make them bigger & thankfully it worked! Here's how:

 See how you can't even tell that I added 1/2 inch of leg room in my pants? I know for sure I'll get a lot more use out of these ridiculously cheap jeans.


 I love this coat! It's 100% awesome wool with a 100% silk lining. Oh yeah, you heard me, this coat is legit. Not even Anthro provides coats this nice at their $300 premium. The only problems I had with this coat straight off the rack were the short sleeves and the trench-like length. The sleeves were just about a half inch too short & the length about 8 inches too long. It took me a long while to figure out how I would adjust this coat & thought I would share with you my thought process & how I came up with the final refashion.
 So, once I finally figured out the vision, the coat didn't take a whole lot to revamp. Here's the list of final alterations:

 Found these boots on Amazon for a steal ($40) & thought I'd wear them out today. Took them on errands with both kiddos. For being a 4" heel, they're pretty easy to walk in!


 After seeing Nikki's


 Glasses are getting a lot easier to buy online, so I can collect a few pairs without feeling ridiculous for having spent $200+ on eyewear. Maybe one of these days my assortment of glasses will catch up to my assortment of shoes ( I do have a lot of shoes, though).


 One of the most stressful parts of the wardrobe situation is that they're hosting a winter whites party. Everyone is to wear white. AAAAHHH! I guess I could wear my
  I am excited about wearing the boots, though! I love these babies. I found them in Provo where thrift shopping is insane. Insane in a bad way. When I bought these boots I was wearing a vintage yellow jacket of mine & another girl in the store asked if I was planning on buying it.
"Excuse me? This is my jacket. I wore it in here."
"Oh. Oh, my mistake. Sorry."
I am excited about wearing the boots, though! I love these babies. I found them in Provo where thrift shopping is insane. Insane in a bad way. When I bought these boots I was wearing a vintage yellow jacket of mine & another girl in the store asked if I was planning on buying it.
"Excuse me? This is my jacket. I wore it in here."
"Oh. Oh, my mistake. Sorry."
 In some cases it's like day-after-thanksgiving shopping with ravenous sharks. Pretty darn hilarious. In any case, that makes this find even more miraculous. I didn't have to fight anyone or rip them off anyone's feet. They were just sitting on the shelf all by themselves in practically unworn condition for $8 (I've added scuffs & dirt since then). Did I mention thrift stores are more expensive where we're living, too?!? Crazy.
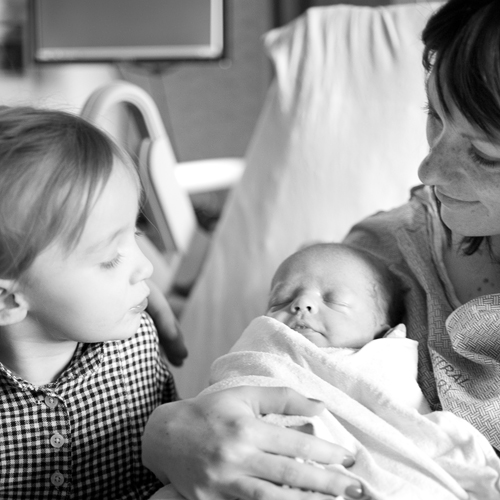
 We've all been under the weather around here. It's a real bummer, especially for little baby Felix. Just after taking these photos Felix started whining a bit. Very much NOT like him. Something didn't feel right and indeed something was not right. The poor guy
  Chris thinks this pose is hilarious. Agreed.


 Her before (above) wasn't terrible, but it lacked a lot of cohesion. The font she had chosen for her header wasn't bad & I definitely appreciate that she used it only in the header. With that in mind, I hand-lettered her masthead & used organic elements to keep things cozy & familiar.
 I didn't want to do a literal translation of Black & White the color, so I leaned more towards grasping opposites and mostly in font weight. The color palette we kept slightly muted to create more warmth & I included a large profile picture to add a personal touch. As someone who reads a lot of personal & commercial blogs, I want to know what the writer looks like. I want to see his/her face so I can get a sense of who they are. I love the about picture of Ellen. I don't know her in person, but I feel like her picture embodies someone approachable, creative & kind. Which I assume she is, since she was awesome to work with.
I'm totally in love with the
I didn't want to do a literal translation of Black & White the color, so I leaned more towards grasping opposites and mostly in font weight. The color palette we kept slightly muted to create more warmth & I included a large profile picture to add a personal touch. As someone who reads a lot of personal & commercial blogs, I want to know what the writer looks like. I want to see his/her face so I can get a sense of who they are. I love the about picture of Ellen. I don't know her in person, but I feel like her picture embodies someone approachable, creative & kind. Which I assume she is, since she was awesome to work with.
I'm totally in love with the  Firstly, it's amazing what a $5 white curtain can do for evening out lighting. Secondly, I love my glamping boots. I've worn them countless times this winter.
sweater: Wet Seal (nearly 10 years ago)
red jeans: H&M
boots: thrifted
Firstly, it's amazing what a $5 white curtain can do for evening out lighting. Secondly, I love my glamping boots. I've worn them countless times this winter.
sweater: Wet Seal (nearly 10 years ago)
red jeans: H&M
boots: thrifted
 NO makeup.