Melissa is in the process of scoring some extra Penelope time this evening by having me do her blogging for her. Apparently there's some interest in how to create the little "Add This Button" widget on the right-hand side of this blog, and since I made the widget . . .
Step 1: Upload your image to the web. You can post it to Wordpress or put it on Flickr or whatever. You just need to get it up on the web and copy/paste the image's URL into your code. Right-click on your image and select "Copy Image Address" to copy the URL to your clipboard. Then paste the image URL somewhere easy to find. I use a mac, so I the like to paste my URLs into a mac sticky note in the Dashboard.
Step 2: Find the page you want link to. Your button has to lead somewhere, so find the URL for the page you want to link to and copy/paste it a few lines below your image URL.
Step 3: Create your widget code. Take the full URLs for the image and the page you're linking to and copy them into the following code snippets, making sure to copy over the bold text with the appropriate URLs.
Button Code
<div align="center"><a href="http://PAGE-URL" ><img src="http://IMAGE-URL"/></a></div>
Text Box Code
<div align="center"> <textarea cols="19" rows="9"><a href="http://PAGE-URL"><img src="http://IMAGE-URL"></a> </textarea> </div>
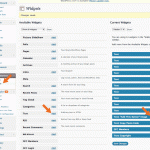
Step 4: Drop each code snippet into a Wordpress Text Widget. Go into the widget editor in Wordpress and add two new text widgets. Put the button code in the first and the text box code in the second. Make sure to click the "Done" button after editing each widget and then click "Save Changes". If you don't click "Done" and "Save Changes" you won't see any results on your blog.
[caption id="attachment_1878" align="aligncenter" width="500" caption="Click to Enlarge"]

[/caption]
Step 5: Tweak your layout. I can't give clear instructions on this, but you'll probably need to play with the spacing for your widgets.
You'll notice in the text box code the
<textarea cols="19" rows="9"> tag. The bigger the numbers, the larger the text box. So if you need a slightly smaller text box to fit your blog, experiment with fewer columns or rows. You might try <
textarea cols="10" rows="5">. Just make sure that the code is easy to copy/paste for your users. For instance, if the text box isn't big enough to fit all of your code, you may want to make it bigger or use a URL shortening website like
Bit.ly to shrink your URLs down to size.
Please post any questions or criticisms to the comments. If you would like to see more HTML or CSS tutorials, just ask and I'll see what I can do.
 [/caption]
Step 5: Tweak your layout. I can't give clear instructions on this, but you'll probably need to play with the spacing for your widgets. You'll notice in the text box code the <textarea cols="19" rows="9"> tag. The bigger the numbers, the larger the text box. So if you need a slightly smaller text box to fit your blog, experiment with fewer columns or rows. You might try <textarea cols="10" rows="5">. Just make sure that the code is easy to copy/paste for your users. For instance, if the text box isn't big enough to fit all of your code, you may want to make it bigger or use a URL shortening website like Bit.ly to shrink your URLs down to size.
Please post any questions or criticisms to the comments. If you would like to see more HTML or CSS tutorials, just ask and I'll see what I can do.