Silhouette sent me some flocked heat transfer a while back & I've made a couple of fun projects with it. It's great stuff & oh so fun to be able to have texturized iron ons! I made
Penelope's dino napkins & birthday shirt using the flocked material. She loves rubbing her hands along the soft dino decal.

Just today I finished a
project I've been meaning to do for ages. I found
this sweet banner via
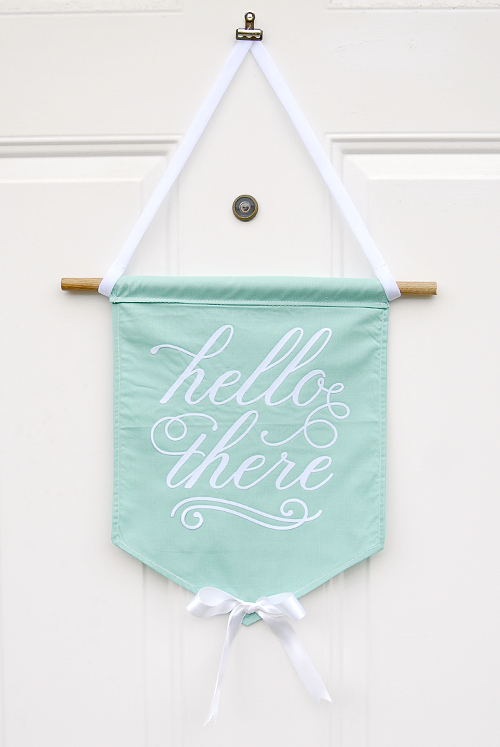
AnnilyGreen & before I even knew that these were being sold (I really hate to be a copy-cat, but let's be honest I totally am) I knew I had to make one for our front door. I thought instead of a wreath, this banner idea would be the perfect way to welcome friends & family to our home.

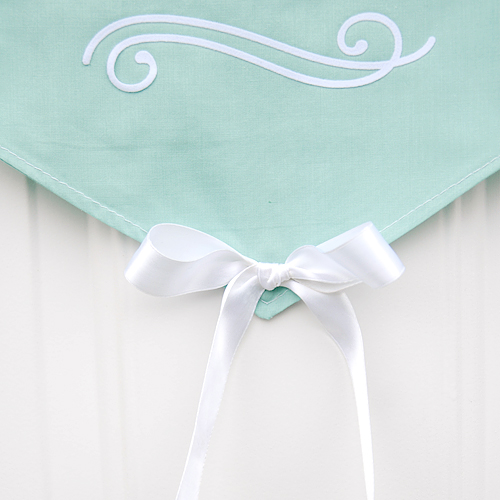
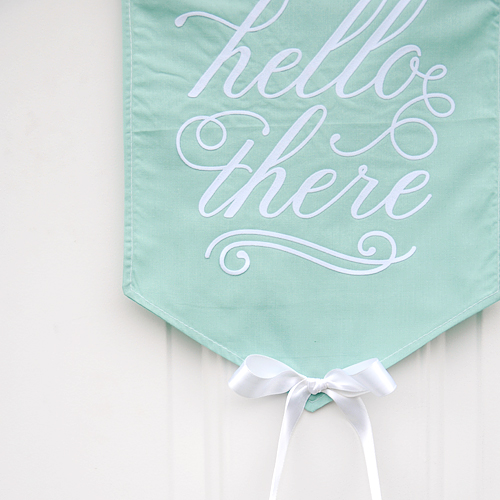
I used teal fabric from Hobby Lobby, a dowel that I had lying around, velvet & satin ribbon I scored on the cheap (less than $1) and flocked heat transfer courtesy of Silhouette. When I sewed the banner together, I stuck a
neodymium magnet inside at the bottom so that it would 1) weigh down the banner so it didn't fly off & 2) stick to the metal door, keeping the banner from flying around when it gets windy. It sure has been windy around our house the last few days. I heard there were 60 mph cross winds on the freeway yesterday. NUTS, hu?

I digitally calligraphed the phrase & if you'd like to use the artwork, feel free to download it by clicking one of the buttons below. The top button is to download the PDF, the bottom is to download the Silhouette Studio file. I'd love to see what you make out of the download so please send me pics!
As Usual, artwork is free for personal use only and should not be distributed or altered without my consent. If you would like to use this for commercial purposes, please email me. Thanks!


Speaking of Illustrator, when I first got the Silhouette I had Illustrator CS3. I've now since upgraded to CS5 & have been designing cutter graphics in CS5 then cutting them in CS3, as the CS3 plugin doesn't work with CS5. It's been really annoying to have to save a file, then open up illustrator
again in order to cut the stuff out. I've been fussing around the last few days trying to figure out how to get the plugin to work & frustratingly enough, it stopped working in CS3! Long story longer, I figured out how to get the plug-in installed in CS5!! First you need to uninstall the old driver (if applicable) then install the correct driver:
C-Master2forCraftROBO(M)ver180. I didn't have the correct software, so that's why it wasn't working. I somehow had the C-Master2(M)ver180. It's VERY different, because it doesn't include support for the CC3300L models. As soon as I followed the instructions on the
correct software, it worked like a charm. You also want to make sure that Illustrator is closed before installing.
On another note, it took 3 attempts to get this to look right. The first attempt, I had some crap on my desk & the cutter got bumped & ruined the piece of flocking.
Clear off the area around your cutter before cutting! The second attempt was ruined because the iron was too hot & I didn't put down a sheet of cloth covering the wax paper, so it just crumpled up. I ended up having to turn the banner around & use the back side, because that completely ruined the front. All worked out okay though. Despite my swearing. If everything had worked according to plan, this project would've taken less than an hour.

If you're interested in
buying a Silhouette, use the above code at check out for:
- 1 Silhouette SD
- 1 package white flocked heat transfer material
- 1 package teal smooth heat transfer material
- 1 package dark pink smooth heat transfer
for $219 ($125 savings) Valid May 17th - 25th
Or, if you already have a Silhouette (or any other cutting machine for that matter) save 25% using the above code on
heat transfer materials.
 Just today I finished a project I've been meaning to do for ages. I found this sweet banner via AnnilyGreen & before I even knew that these were being sold (I really hate to be a copy-cat, but let's be honest I totally am) I knew I had to make one for our front door. I thought instead of a wreath, this banner idea would be the perfect way to welcome friends & family to our home.
 I used teal fabric from Hobby Lobby, a dowel that I had lying around, velvet & satin ribbon I scored on the cheap (less than $1) and flocked heat transfer courtesy of Silhouette. When I sewed the banner together, I stuck a neodymium magnet inside at the bottom so that it would 1) weigh down the banner so it didn't fly off & 2) stick to the metal door, keeping the banner from flying around when it gets windy. It sure has been windy around our house the last few days. I heard there were 60 mph cross winds on the freeway yesterday. NUTS, hu?
 I digitally calligraphed the phrase & if you'd like to use the artwork, feel free to download it by clicking one of the buttons below. The top button is to download the PDF, the bottom is to download the Silhouette Studio file. I'd love to see what you make out of the download so please send me pics! As Usual, artwork is free for personal use only and should not be distributed or altered without my consent. If you would like to use this for commercial purposes, please email me. Thanks!
 Speaking of Illustrator, when I first got the Silhouette I had Illustrator CS3. I've now since upgraded to CS5 & have been designing cutter graphics in CS5 then cutting them in CS3, as the CS3 plugin doesn't work with CS5. It's been really annoying to have to save a file, then open up illustrator again in order to cut the stuff out. I've been fussing around the last few days trying to figure out how to get the plugin to work & frustratingly enough, it stopped working in CS3! Long story longer, I figured out how to get the plug-in installed in CS5!! First you need to uninstall the old driver (if applicable) then install the correct driver: C-Master2forCraftROBO(M)ver180. I didn't have the correct software, so that's why it wasn't working. I somehow had the C-Master2(M)ver180. It's VERY different, because it doesn't include support for the CC3300L models. As soon as I followed the instructions on the correct software, it worked like a charm. You also want to make sure that Illustrator is closed before installing.
On another note, it took 3 attempts to get this to look right. The first attempt, I had some crap on my desk & the cutter got bumped & ruined the piece of flocking. Clear off the area around your cutter before cutting! The second attempt was ruined because the iron was too hot & I didn't put down a sheet of cloth covering the wax paper, so it just crumpled up. I ended up having to turn the banner around & use the back side, because that completely ruined the front. All worked out okay though. Despite my swearing. If everything had worked according to plan, this project would've taken less than an hour.
 If you're interested in buying a Silhouette, use the above code at check out for: