Last weekend I got together with a couple of creative ladies & got my hands messy in a bunch of dye baths! I'll be recapping my experience as a whole with
Rit Dye later this week, but I couldn't wait to share with you this little update.

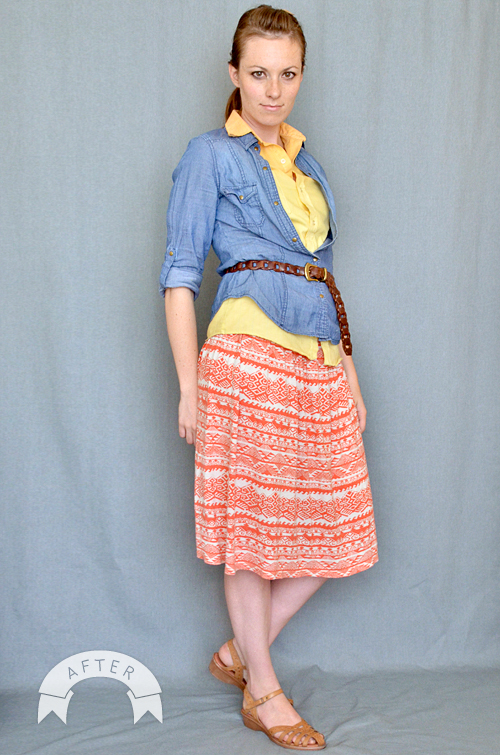
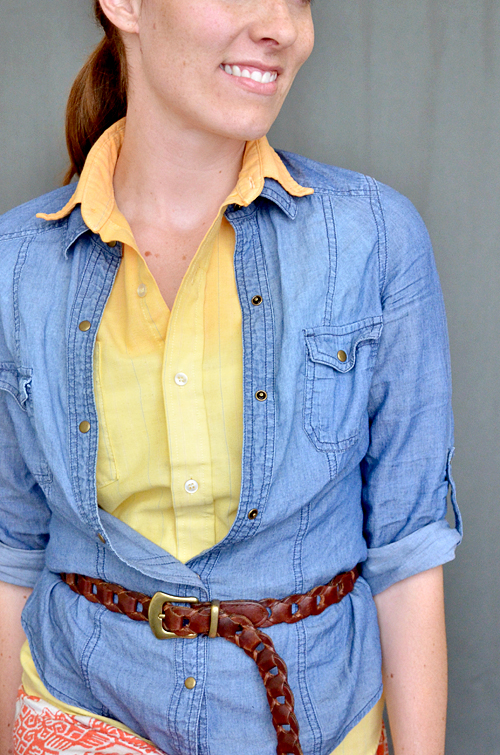
I've had the above button-up since before Chris & I were officially dating. Chris, a bunch of his super-hip buddies & I ventured up to Salt Lake (we were living 40 miles south at the time) and went thrift shopping. We had a great time. It was during this excursion that I scored this button up and
this funky jacket - all in the boy's department. I've had this fabulous oxford for over 6 years. It's been through a lot. It started out with the pocket on the left side and long sleeves. The color has been looking a bit ratty recently, so when the ladies came over for a little dyeing fun, I added this one to the pile of things to dye.

With everyone riding the ombre train, a big part of me wants to steer clear from it entirely. It's beautiful, but I don't want to be the kind of person to
put a bird on something just because it's the hip thing to do. I thought I'd do a different take on the ombre & do a few things differently. Most ombre dyes are light to dark. This is dark to light. Also, most ombre dyes are different saturations of the same tone. I kept within the same color family & gradated the yellow to a sunset orange. I love how the ombre effect woke up my shirt from its deep sleep.
 Liz
Liz &
Susan both have great tutorials on ombre dyeing, but I took a different approach on the method. I've never dyed before Saturday, but having a lot of experience with watercolor (and watercolor gradients), I took more of a watercolor approach. Here's how I did it:
- start out with a weak dye bath (using liquid Rit Dye for the bath - powder wouldn't work as well for this technique)
- dip the garment all the way in the bath for 10-30 seconds getting it completely wet and creating a base layer
- ring it out
- add more yellow dye to the bath & mix thoroughly
- place the garment in about half way through - Susan & Liz both measured their steps out, which is a good idea
- let the garment soak for 10 or so minutes bobbing the garment in and out of the bath to see how the color is coming along
- add tangerine dye to change the color of the saturated end
- take the garment out more. I clamped my shirt to the wall of the bath to keep it from sliding down
- soak the edges of the garment for another 10-15 minutes bobbing it in and out
- add dye as needed and lift the garment out even further
- keep repeating steps 8 & 9 until you've reached your desired result
I did this technique with a few other items & I can't wait to share the rest with you later this week!
Click here to see more pictures & outfit details.
Dye courtesy of
Rit Dye. I've had the above button-up since before Chris & I were officially dating. Chris, a bunch of his super-hip buddies & I ventured up to Salt Lake (we were living 40 miles south at the time) and went thrift shopping. We had a great time. It was during this excursion that I scored this button up and this funky jacket - all in the boy's department. I've had this fabulous oxford for over 6 years. It's been through a lot. It started out with the pocket on the left side and long sleeves. The color has been looking a bit ratty recently, so when the ladies came over for a little dyeing fun, I added this one to the pile of things to dye.
 With everyone riding the ombre train, a big part of me wants to steer clear from it entirely. It's beautiful, but I don't want to be the kind of person to put a bird on something just because it's the hip thing to do. I thought I'd do a different take on the ombre & do a few things differently. Most ombre dyes are light to dark. This is dark to light. Also, most ombre dyes are different saturations of the same tone. I kept within the same color family & gradated the yellow to a sunset orange. I love how the ombre effect woke up my shirt from its deep sleep.
 Liz & Susan both have great tutorials on ombre dyeing, but I took a different approach on the method. I've never dyed before Saturday, but having a lot of experience with watercolor (and watercolor gradients), I took more of a watercolor approach. Here's how I did it: