Inspired by this month's style theme for the
Fiesta Movement, I wonder what styles are out of your comfort zone? Bold patterns? Hats? Harem pants?
Have you seen those little challenges they post monthly? It's cool what Fiesta Agents have been doing, taking on challenges outside their respective comfort zones. Last month I went outside my comfort zone and sewed up some harem pants, and I'd say they were a hit! I wear them at least once a week (which is tight rotation considering my closet).
I don't do hats. Maybe that's next. What clothing item would you like to find within your comfort zone?
I love this skirt. I didn't know how much I would wear it because of the bold pattern, but it gets just as much play as the other skirts in my wardrobe. It's been amazing to wear this fall. My legs don't freeze to Otter Pop status.
This skirt (as mentioned in the
original post) has a super power. It's a full-coverage wrap skirt. It's not going to show off my lady bits with a small gust of wind. NO. It's going to take 15+ mile an hour winds to achieve that.
When you've got winds that crazy, you don't want to be wearing any kind of skirt anyway.

Now let's make ourselves a maxi wrap skirt that won't give you a red-faced Marilyn moment, shall we?
Full-Coverage Maxi Wrap Skirt Tutorial
Supplies
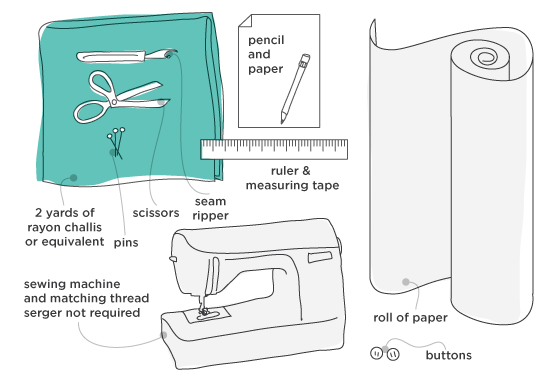
- 2 yards rayon challis
- pins
- scissors (paper and fabric)
- seam ripper
- ruler
- measuring tape
- pencil
- paper
- large roll of paper
- sewing machine
- coordinating thread
- coordinating buttons
- iron
You could get away with any drapey fabric. A knit, a silk georgette or a cotton lawn. Rayon challis is going to give you a lot of drape and it's not terribly expensive.
If you don't have a large roll of butcher paper on-hand, several small sheets taped together will do. You'll still want a large-ish floor or table space to draft up your pattern.
Let's get drafting!
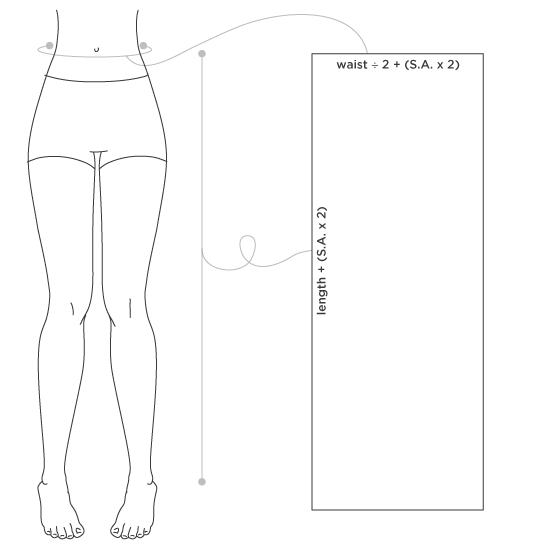
Take your measurements. See the above diagram for the rectangle you're going to make. Draw out your rectangle.
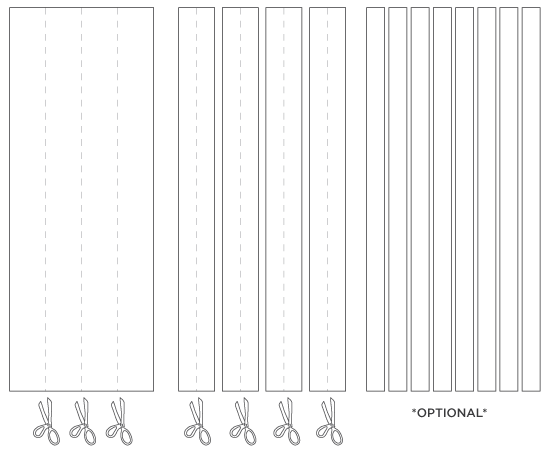
Now I want you to fold your paper into fourths hot-dog style. Cut the strips. It's optional to cut the strips into strips again, but recommended.
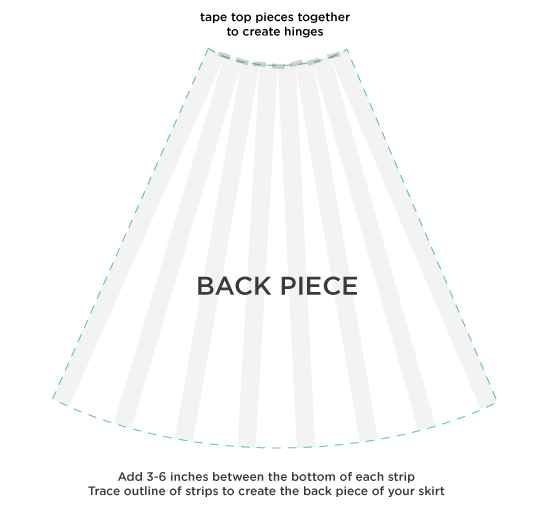
On a large sheet of paper, tape the top of the middle two strips together and spread the bottom of the strips about 3-6 inches apart. Add strips to the top with the same spread on the bottom. This will create an even curvature and proper drape for your wrap skirt.
Quickly measure your widest hip measurement and make sure that the hip on the drafted pattern is 2-3 inches bigger than your measurement. This will allow for a comfortable fit.
Trace and cut the outline of your back piece.

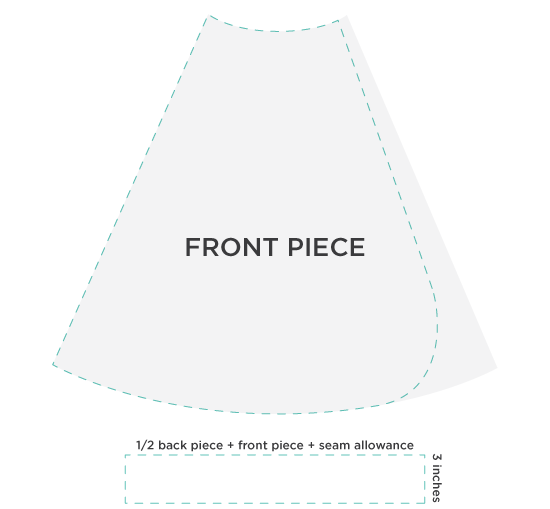
On another sheet of paper trace out the back piece. About 1-2 inches shy of the full width of the back piece, draw a line all the way down the skirt, curving into the bottom hem. This will be your front piece.
For the waist measurement, add half of the width of your back waist measurement, 1 full front piece measurement and two seam allowances. That will be the width of
half your waistband. Make it 3 inches tall.
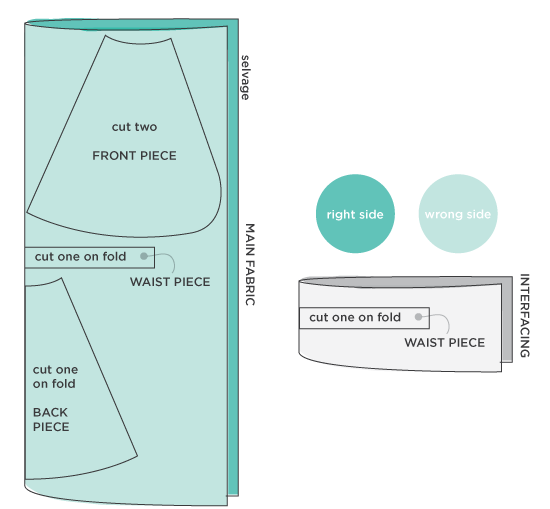
Fold the fabric in half, right sides together. Fold your back piece in half and cut one piece on the fold line. Cut two front pieces. If you can't fit the front piece on a folded fabric,
don't forget to reverse one of the panels.
Cut one waistband from the main fabric, one from the interfacing.
Iron interfacing onto the waistband.
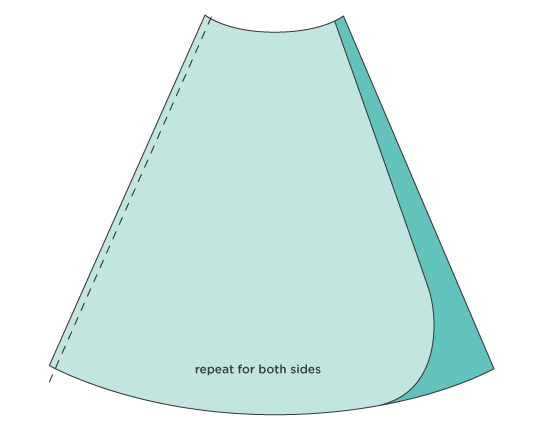
With right sides together, sew the straight side of the front piece to the back. Repeat for the other side.
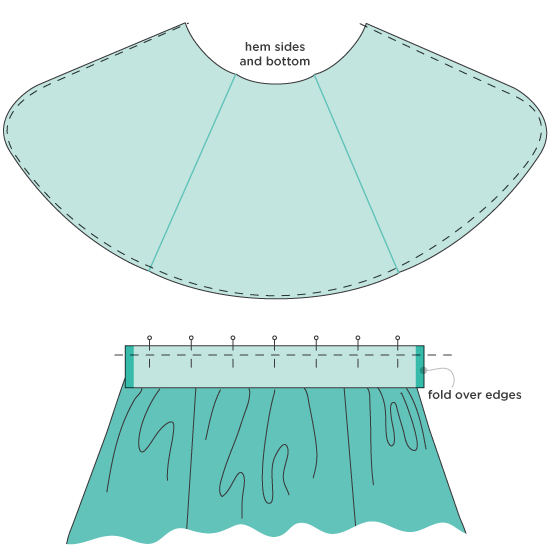
Open up your skirt and press seams. Hem the sides and bottom. A
rolled hem is easiest with the curved lines.
You'll also want to stay-stitch the waist (just baste stitch the opening of the waist before sewing the waistband on so it doesn't get distorted).
With right sides together, sew the waistband to the skirt. Having ends folded over on each side.
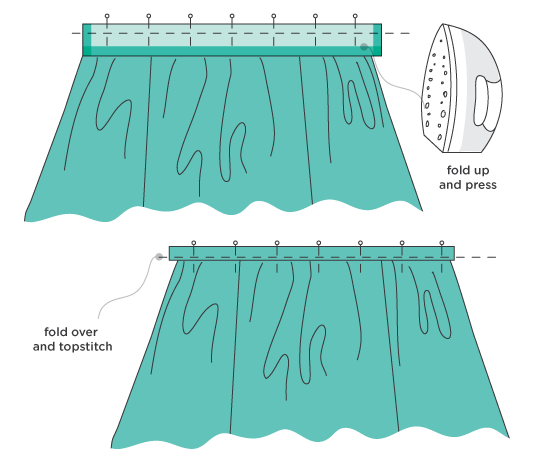
Fold the raw edge of the waistband up (I used 5/8 on all of my seams) and press with an iron. Then fold the waistband in half so the folded edge meets the inside of the skirt. Press flat and topstitch into place.
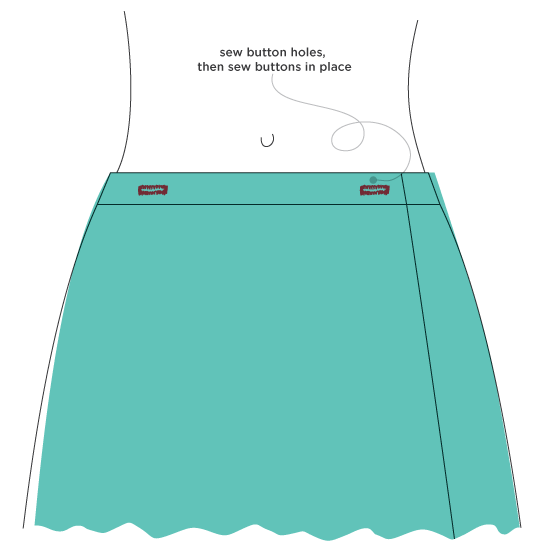
Try on your skirt and pin where the button holes are to go (they go on the top flap) where the skirt and the end of the waistband meet. Make sure button holes accommodate your buttons.
Sew buttons. Enjoy!
This is a sponsored post and I was compensated for my participation. The opinions expressed are my own.
This tutorial/freebie is free for personal use and should not be distributed/republished without my consent. Altering any files is NOT ALLOWED. If you would like to use this tutorial for commercial purposes, please email me. Thanks!
 Now let's make ourselves a maxi wrap skirt that won't give you a red-faced Marilyn moment, shall we?