
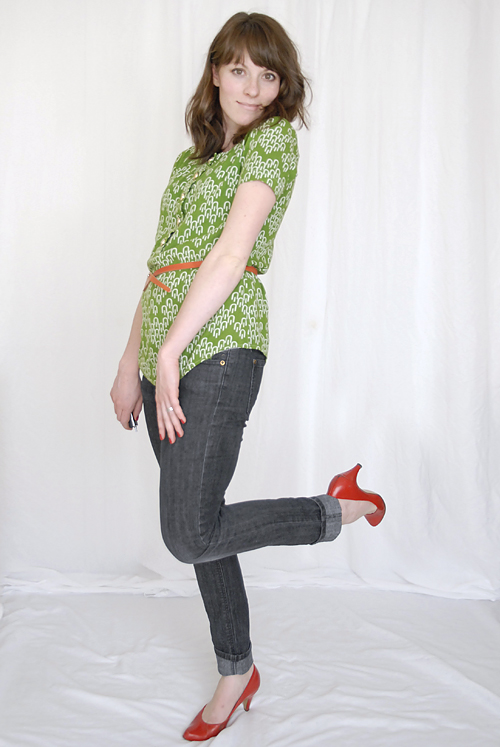
- necklace: Rite Aid, $3
- top: Forever 21, $17
- belt: thrifted, $1
- skirt: Ruche, c/o Ruche
- shoes: Forever 21, $9

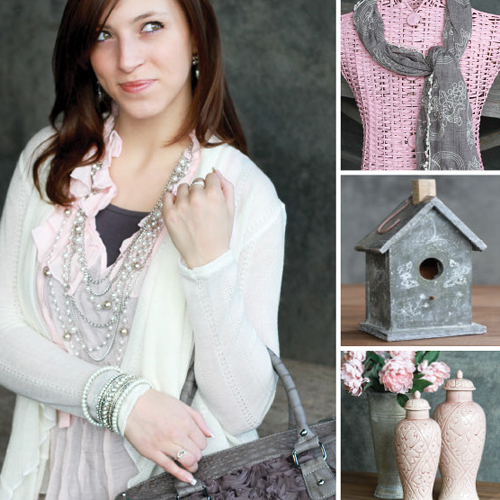 While I typically try to avoid any sort of travel this Saturday; I think I'm going to go. I need a night out and, I really want to gawk at their serving ware. I have it in my head that I want to update my cabinets to be a tad more cohesive. Their serving ware is awesome AND cheap. Wanna meet up there? I'll be there around 6-ish. Also, they're offering 25% off everything in their fashion section (aka their awesome purses and necklaces), a free pair of sunglasses with every $25 purchase, refreshments and giveaways! Click here to print the coupon. I hope to see you there.
Check out Tai Pan's Blog to see more of what they have & for more details about Friday & Saturday night.
This is a sponsored post.
 Last month in an evening of frustration over how my blog looked, I contacted ProPhoto to see if they'd let me review their theme. I squealed when they sent it to me in exchange for this review & I am here to tell you that I am in love with it. It is, hands down, the best theme I've ever worked with. I'm no wordpress theme aficionado, but I have worked with the popular Thesis & Canvas themes (you know, the ones that cost monies). Lemme tell you, ProPhoto is leagues better than both of those.
Here's why. . .
1. Prophoto is one of those click-of-a-button themes. It doesn't just allow you to put in a drop shadow here & a repeat image there. Oh no. It allows you to adjust pixels, kerning, leading, text case, drop shadows, direction & distance of drop shadows, background images for the menu, comments, background, etc. Really, it's super easy.
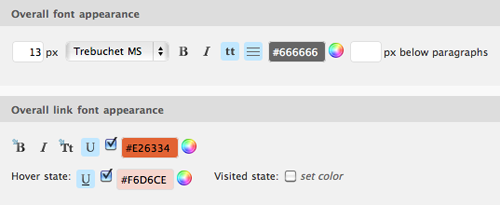 In fact, I didn't even start this current redesign until about a week & a half ago. I designed as I went along & the process for adding & manipulating graphics was so slick I had most of the site fleshed out in a matter of an hour or two. Most of my time was spent deciding how I wanted to design the whole thing. It's so hard to design for yourself.
2. Prophoto is clean. The back-end is easy to navigate & the different stock designs are clean. No crappy clutter of 6 different fonts blaring at you, making your eyes bleed.
3. Prophoto has a community. Once I installed the theme, there was a step by step tutorial taking me through the features of the theme. PLUS there's a little button at the top right of every element that takes you to specific articles & tutorials on how to best customize that area. If that's not enough? You can post your questions to the forum where expert contributors can help you figure things out. I had a question that was answered within an hour of posting to the forum. Super sweet.
While redesigning I had a list of the features that I would like in any updates of the theme, and as I got closer to finishing the layout, I crossed off practically everything on my list. They have thought of everything from Prophoto-specific widgets (like regular wordpress widgets, just on acid) to slick slideshows. The only thing I see missing is the fact that there are no settings for viewing on a mobile device. I'd LOVE to see that in any future updates.
This theme isn't cheap. It's $199. If you're serious about low-maintenance themes & want a one that's beautiful, easy to use & manipulate this is it. It's so good, even a cheapskate like me would invest the money to buy it.
Do you blog? Do you use wordpress? I'd love to hear what kind of theme you're using & what you think about it.
A big Thank you to Prophoto 3 for providing me with this theme. I'm in love.

 Truly there must be something about the spring air that makes me want to do a million projects.

 We spent most of the afternoon measuring, drawing, cutting & gluing. It was a surprisingly easy DIY once we got the measurements down. When we were figuring out how long to make the strap, we didn't look online at guitar straps to see how long they were. NO. That would've been too easy. Instead, I used a measuring tape as a "guitar strap". According to our calculations, Chris needed a 65" guitar strap. However, once we finished the DIY, we quickly learned that the strap was about 12 inches too long! It's absurdly long.
Better too long than too short, right?
 This pose would be a lot more convincing if I knew how to play the guitar. Too bad Chris isn't around at the moment to take my place in the frame.

I blurred out their address on the bottom, FYI.
When I asked her what she wanted, she said, "let the universe be your oyster." Um, okay! She was hands down the easiest client to work with. I kept the design simple with a touch of elegance. I digitally lettered the calligraphy & scrolling. I sort of went to town. I've been on a little digital calligraphy kick lately. Lindsay just printed them on white cardstock with black ink. Simple. Easy. Classy. I also made little thank you postcards to send out. Postcards are the best for sending out thank yous. I will, however share with you a little project I did about 3 years ago & never blogged about. I refinished a boppy pillow that a friend gave me. It was a light blue velvet hand-me-down that was uglier than sin (like this one, but blue
 Covering this pillow was a lot easier than I thought it would be. I covered this pillow with upholstery weight cotton material (found at Fabmo). I just took the old cover, flattened it and used it as a guide to cut the fabric & sewed them together. I thought I'd be clever & put the zipper on the inside curve. I didn't want to see a zipper; but as it turns out, putting a zipper on the inside of a curve makes it nearly impossible to put the pillow form in the case. I think I fought with the pillow for about 40 minutes to get the cover on. That's okay though. I'll gladly pay that price to avoid a yucky velvet cover.
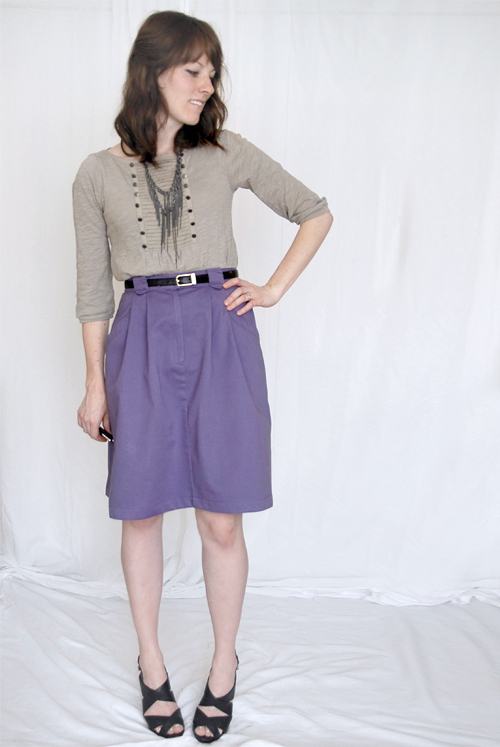 I didn't take a before photo of this bad boy, but I didn't change much. You know how long skirts are in vogue right now? Well, it was too short to be one of those, but too bulky where it was at. It's still a pretty bulky skirt (at least I feel like it anyway), but the length is much more flattering now. Part of me thinks it'd look even better another 6 inches shorter than that, but that's not how I roll. It's got a nice elastic waistband in the back that eliminates the muffin top. I like. This skirt cost $4. This look? $74. Mostly because of the shoes. I splurged on the shoes. They were so worth it, though.
I'm still on the hunt for a dresser. Madeline found exactly what I wanted, but unfortunately the guy that was selling it had just loaded it into someone's car as I called. Big bummer. I've just got to keep the faith that the right dresser is out there for me. And headboard. I just know it. It took me a while to find the perfect man for me, but I did it. How hard would a dresser be?
 Outfit March 23:
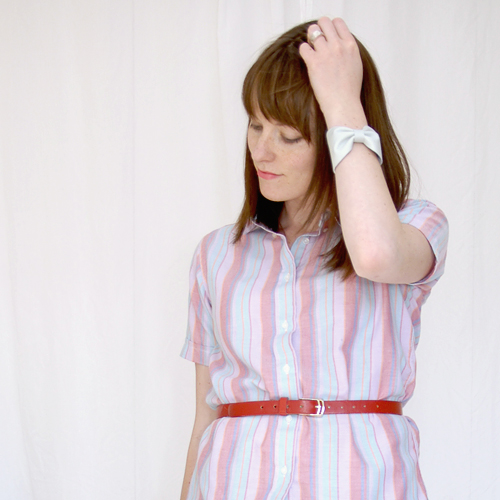 I'm very pleased with the end result of this little project. It's a simple project that anyone half-decent with scissors could master. It's another 15 minute craft. Also, I'm totally digging the hard/soft contrast of the button-stud & the bow. For the full outfit, click over to my fashion section.
Now without any further ado, here's the tutorial.
• B O W C U F F T U T O R I A L •
• S U P P L I E S •
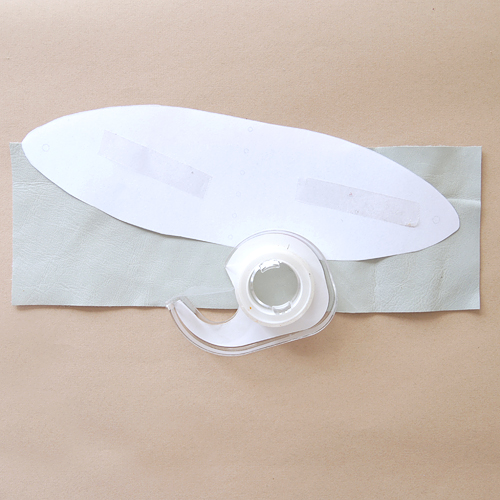 Cut out your pattern pieces, affix double-stick tape to the back & place on your leather. Cut out leather.
 Punch holes in designated spots on pattern. If using a button stud, punch one of the end holes larger than the other.
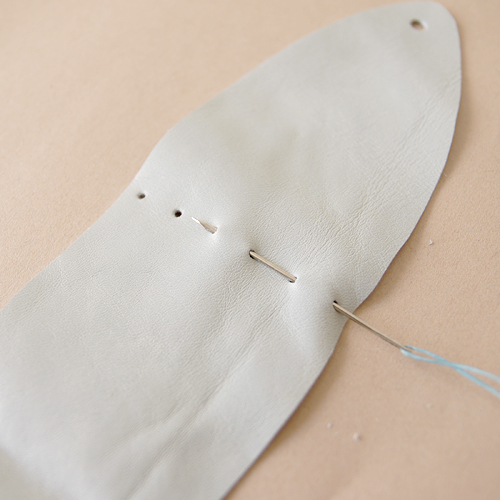 Sew through middle holes with needle & thread, starting from the front, weaving in & out.
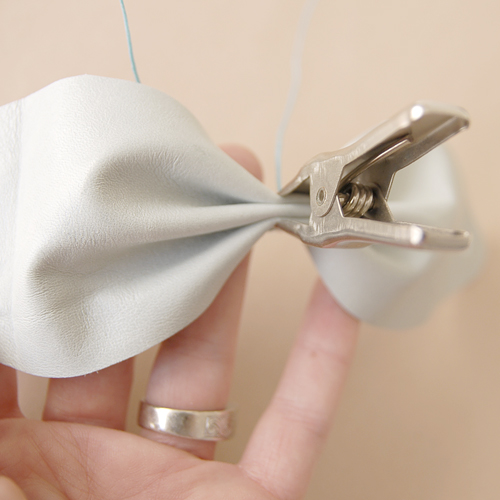 Pull thread together to create pleats & cinch together with your clamp. Tie a square knot on the back side.
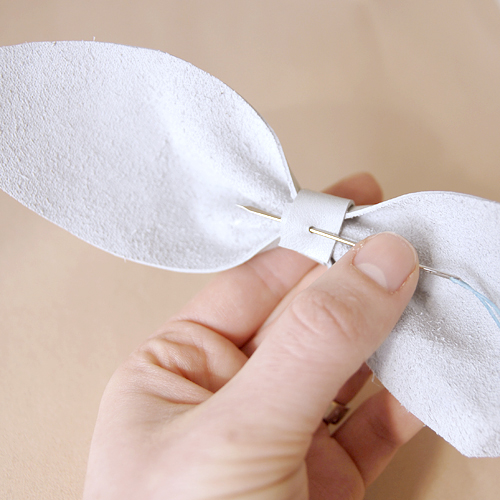 Wrap the smalls trap around the middle of the cuff, making the holes at the end match up. Insert needle from outside to inside.
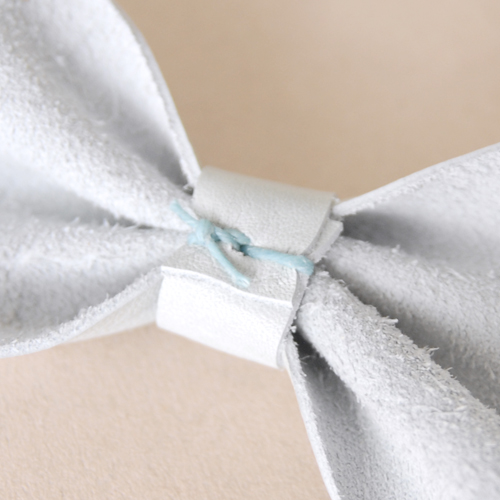 Wrap the smalls trap around the middle of the cuff, making the holes at the end match up. Insert needle from outside to inside.
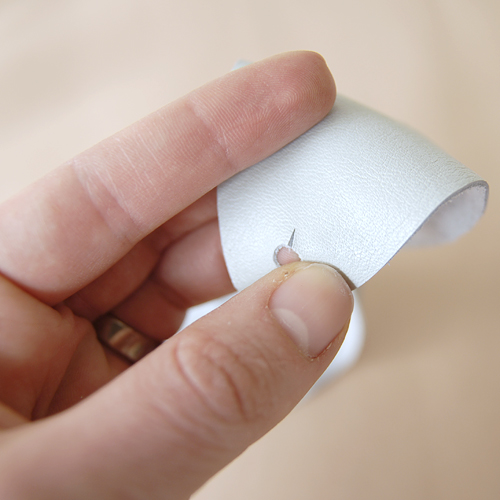 Cut a 1/4 inch slit in the larger hole to allow for the button stud. Affix the button stud to the other end. Button & wear.
I'm flaunting my left hand because I *FINALLY* found my wedding ring on Sunday. HOORAY!
• O P T I O N A L •
This project could easily be done with fabric or other vegan materials. Additionally, the button-stud is my attachment of choice, but snaps or decorative buttons could easily be used in its place. If you make one of these, I'd love to see how it turns out! Add your pics to the IS•LY flickr page. Click the download button below for the printable pattern & tutorial. This tutorial is free for personal use and should not be distributed/republished without my consent. Altering the file NOT ALLOWED. If you would like to use this tutorial for commercial purposes, please email me. Thanks!
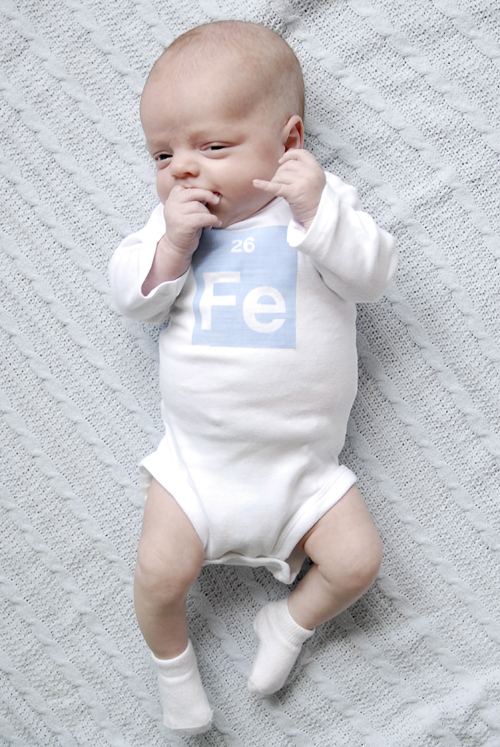
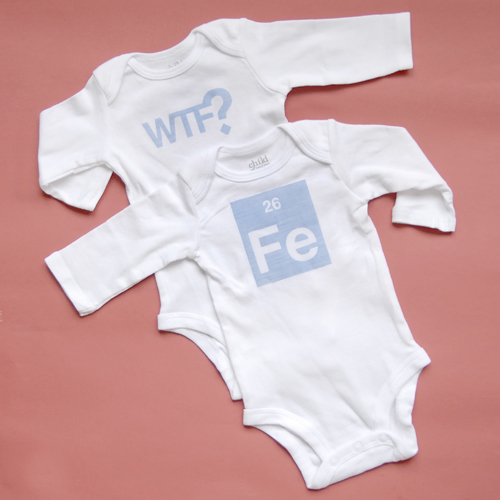 One is the periodic table for iron. Simple. Subtle. Libby pointed out to me (don't know why I didn't see it before) that Felix's initials are FE. IRON. So pefect!
 The other is WTF. Simple. Hilarious.
See, for Christmas I gave Chris a WTF stamp (many thanks to Knock, Knock) & Penelope is obsessed with it. She's stamped her belly with it as well as my own. When I told Chris that my mom wasn't too excited to see WTF plastered all over Penelope's belly, he said, "What's so bad about that? It stands for 'What the Felix'!" So it stuck. He's WTF = What the Felix, or Where's the Felix. I like it.
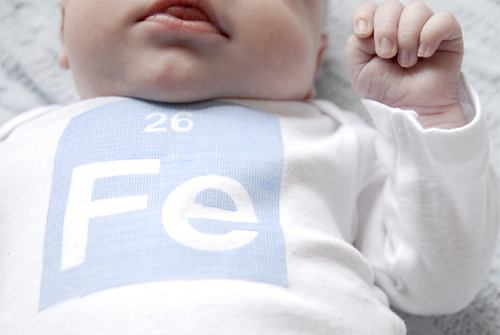 For these decals I used something new! In the past (onesie, hat, halloween), I've used Silhouette's heat transfer (which is mighty cool & great for ironing on detailed designs), but this time I used their fabric transfer material. Silhouette sent me some to try out & I'm totally digging it. I can use whatever fabric I want, which means I can switch up colors as often as I want. Also, I don't have to remember to reverse the image when making my graphics. I always forget to do that!
If you're looking to buy a Silhouette; you can get a Silhouette, clean cut & sewable interfacing & white flocked heat transfer for $229 with the below discount code. If you already have a one, you can get 25% off heat transfer material with the below discount code. Offer valid March 21-27, 2011.


 About (gosh!) 6 years ago, I went thrift shopping with Chris (yup this was pre-marriage) and his oh-so-hip buddies. While us girls were waiting for the boys to try stuff on, we were wandering around the boy's section looking at all the cute blazers. I just happened to find the above blazer & fell in love. I also found a button up shirt in the boy's section that I still wear often. A good tip if you're an awkward size: try a different department. I've had great success finding sweet deals in the boys, girls & mens departments on clothes for me! Try it next time you're at the store (I do this at Target all the time). You're bound to find something unexpected & fun!

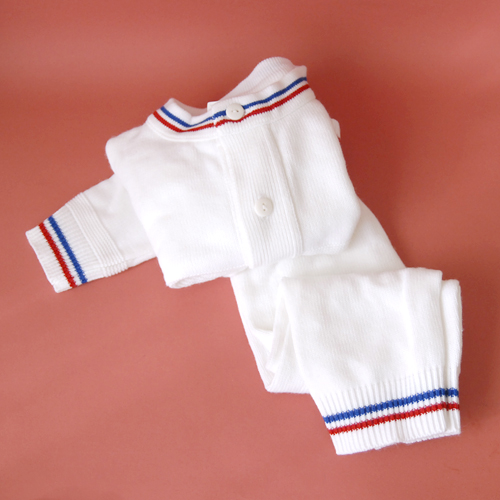 While at D.I. today, I saw a sweet little knit track suit (brand = Ameribabies. Isn't that awesome!?) for Felix that's pretty much the man-child version of Chris's track suit. I couldn't pass it up and since it was only $2 I would've had to check myself into a mental institution if I hadn't bought it. It's size 9 months, but I'm going to dress Felix in it as soon as possible. Perhaps tomorrow. I'll be sure to get (and post!) pics of Chris & the F-bomb in their matching outfits.
Have you found any sweet deals? Unfortunately the two rad dressers that I had found via KSL were sold before I could get to them. This dresser hunt is driving me crazy! I just want a solid wood Mid-century style dresser. For under $100. Is that too much to ask?! ;)
Hi, my name is Melissa & I am a cheapskate.
While at D.I. today, I saw a sweet little knit track suit (brand = Ameribabies. Isn't that awesome!?) for Felix that's pretty much the man-child version of Chris's track suit. I couldn't pass it up and since it was only $2 I would've had to check myself into a mental institution if I hadn't bought it. It's size 9 months, but I'm going to dress Felix in it as soon as possible. Perhaps tomorrow. I'll be sure to get (and post!) pics of Chris & the F-bomb in their matching outfits.
Have you found any sweet deals? Unfortunately the two rad dressers that I had found via KSL were sold before I could get to them. This dresser hunt is driving me crazy! I just want a solid wood Mid-century style dresser. For under $100. Is that too much to ask?! ;)
Hi, my name is Melissa & I am a cheapskate.• D I Y B U T T O N - S T U D B E L T •


 I want to help out in some way. Seriously, sometimes I think what difference can a girl like me make? It's not like I have all the time & money in the world. Maybe we can all pitch in and make a difference. So I'd like to send a fun sticker* to anyone who donates their time and/or money to the relief efforts in Japan & fill out the google form below.
Click here to donate to the Red Cross.
Click here to watch Love Letter to Japan music video by the bird & the bee.
• U P D A T E ! •
The stickers have all been spoken for! However, feel free to still donate to the Red Cross & other organizations. Help is still needed. Cheers!! If you've signed up for a sticker, I'll be sending them out mid-week next week. Thanks for your donations!
*While supplies last.
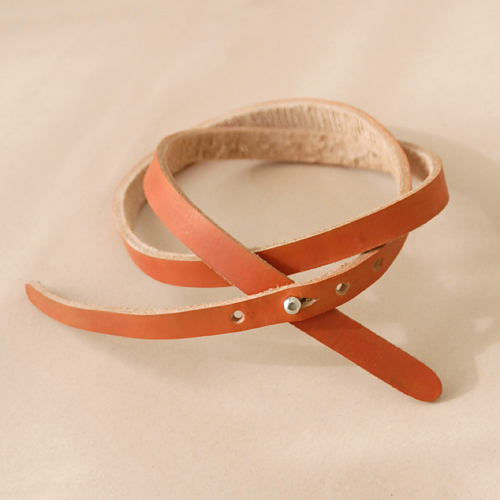
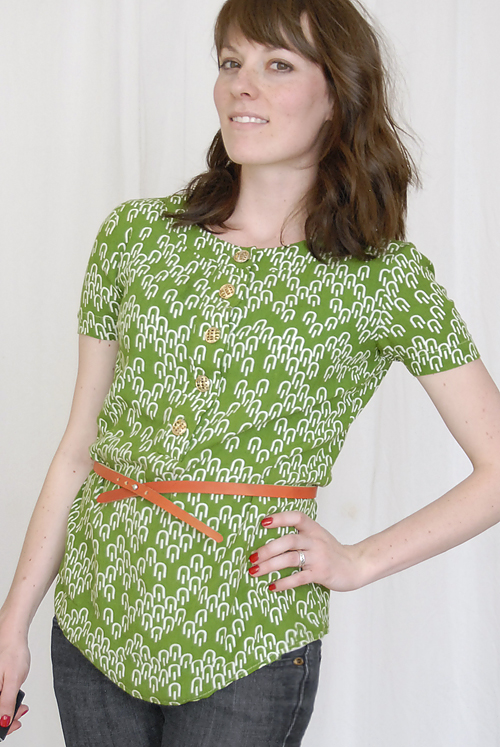 It took me about an hour & a half of trial & error to get the color just right & the holes the right size. The next belt I make will be much less time consuming as I've learned from my mistakes. I'm totally loving the color combo in this outfit. The green top reminds me of spring (btw, my open studio window is blowing in the most delicious spring breeze, I'm in heaven). The little pops of orange & red make everything so happy. Colors totally affect my mood.
 What are your weekend plans? I'm going to work on some design stuff & hopefully get my organizing on. My closet is a complete disaster area, my studio pales in comparison.
CLICK HERE TO SEE THE TUTORIAL!

 This method is best done if you have artwork on a wooden panel (I have loads of those from my BFA days). With the cork boards in my studio, I could've easily put framing hooks on the back of each panel, but I wanted the board to be flush against the wall so this method was optimal. ALSO? I think it's pretty.
 SO there you go, there's another peek at the decor in my studio. I do have to mention, though. . . it's far from being clean or organized at the moment. Let's keep it real:
 See the giant mess? Oh yeah. This is practically the state of our entire house currently. I can't seem to keep anything clean these days. I'm over it, though. I've got a three week old & a two & a half year old to cuddle instead.
For those interested: The Dachshund nightlight is via Clever Tomato • brown camera print is via A Vintage Poster • Clipboard is via Urban Outfitters (and spray painted by yours truly) • Globe is a hand-me-down • Corkboards & silver baskets are via D.I.
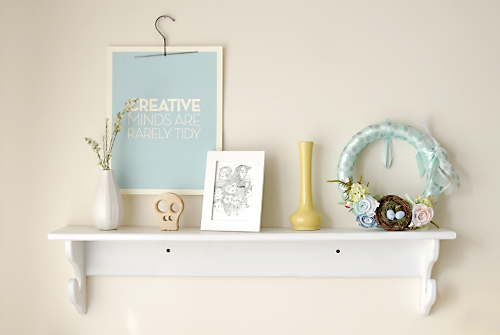 You better believe that I didn't shop at JoAnn's for a good year & a half. I still have quite the fabric & wallpaper stash from those lovely events. I also have a TON of the above hangers. I snagged as many as I could find when they were there. They were used at one point to display & organize fabric samples. They're super simple metal hangers; not meant to hang clothes, but perfect for hanging prints.
 I have so many prints from my lithography & intaglio days and from other wonderful artists & designers, it would be a lot of money to frame each & every one of them. Many of them would have to be in a custom frame, too. Instead I just clip the print between the metal bars & hang. A perfectly simple way to display art without a frame.
If you'd like to find something similar for your home, wooden trouser hangers
 While talking to my cousins this weekend I told them about his slightly unfortunate nicknames & James (or was it Natalie?) mentioned something about using the F-bomb idea in the baby announcements. Of course this spurred all sorts of ideas, namely the shirt you see above. I think it's pretty awesome & perhaps I'll use this "logo" on more things of his. We'll see.
 Do you have any ideas for nicknames for baby Felix? We've sort of been calling him buddy for lack of anything else, but considering I dated a guy named Buddy for two years, I'm sort of put off by that idea. Plus, it just seems too unoriginal. Ideas, pretty please?
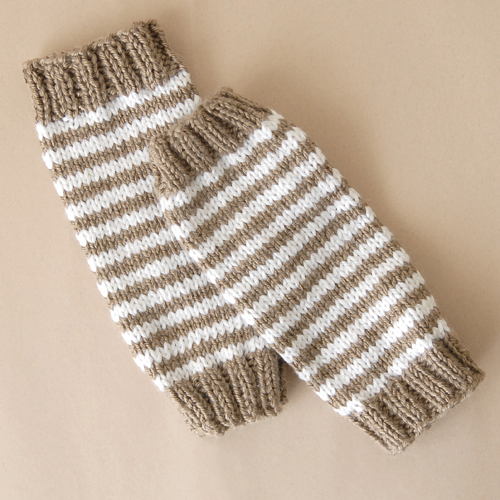 She made these sweet little striped legwarmers. Stripes are so adorable. Perfect for a man child.
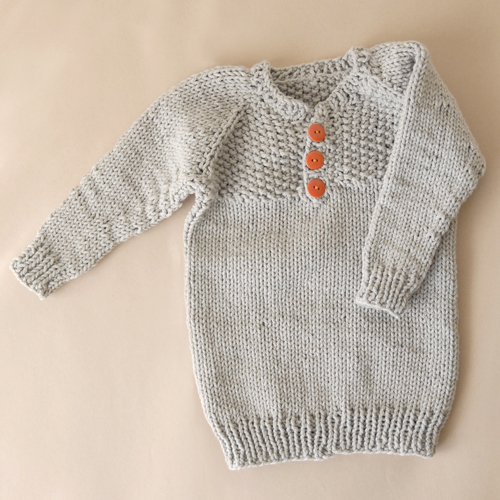 I'm completely in love with this sweater & I can't wait until Felix can fit into it! The orange & grey color scheme melts my heart.
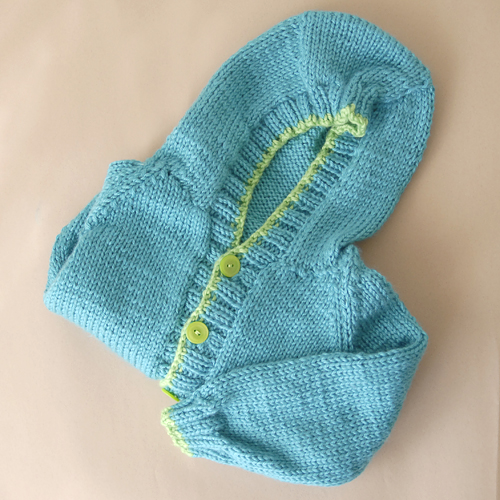 A hoodie?! How could it get better? After we opened these gifts, Penelope quickly snatched this hoodie, tore off her clothes & put this sucker on. She wouldn't take it off for about two days!
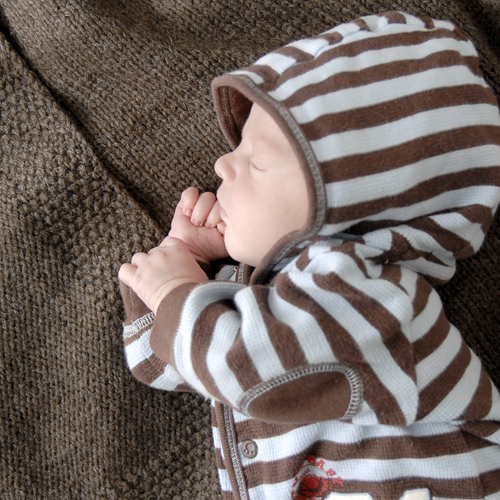 And this baby blanket is la piece de resistance! OH gosh, it's awesome. It's soft, wool, stretchy & perfect for a little cuddle session with my man child. Best. Blanket. EVER.
I can't imagine all the time Natalie spent on making such beautiful things & I'm just blown away at her kindness & thoughtfulness. Every time Felix uses/wears these treasures we'll always think of her. Thanks, Natalie! We love you!
EDIT: Natalie just posted this, for any of you who would like more info on the patterns & yarn she used - For anyone interested in the patterns I used I got the 2 sweaters and blanket off of Ravelry. I have a username: nannersboo. I don't ever upload pictures, but I include the yarns I used. The pattern for the gray sweater is called Organic Guernsey by Fawn Pea, the hoodie (also available through the Bernat website) is called Lil' Bear Hoodie and leggings, and the blanket is called NuckNuck and is by Gina Bonomo.
 I hand wrote the little quote & "framed" it using design*sponge's idea for a paper frame. I think I'll play around with the quote until I get something that I want to be completely permanent, but for now, we have a semi-permanent "I love your stinky guts" quote above his toilet.
Just a little side story: Since Chris & I moved into our new place 5 months ago, we decided to divorce our bathrooms. Mine is in the studio & his is attached to our bedroom. I can't tell you how wonderful it's been for our marriage to have separate bathrooms. So for any of you newly weds (or soon to be newlyweds) out there, get separate bathrooms as soon as you can. You can thank me at your 50th wedding anniversary.
 This thing was UGLY. Honestly, if I had seen this in a thrift store I wouldn't have given it a second glance, but for some reason I saw the hidden beauty in it at the swap party. All it took to spruce up this chair was some spray paint, padding, a zipper & just over a quarter of a yard of fabric.

 I just so happen to have some extra padding from a random project I did a while back, so I added that to the cushion before covering it. GOOD IDEA. I'm glad I did it. The little bench is much more comfortable now. I also think it looks better to have a more substantial cushion on there anyway.
 I thought this bench/stool/chair thingy would be perfect for Chris's "guitar corner" in our bedroom, but I'm not so sure he really digs it. He'd much rather practice on an old school chair that's cool, but hardly matches the decor of the bedroom. I'm hoping he'll have a change of heart now that the thing is complete.
What do you think? Would you sit on it now?
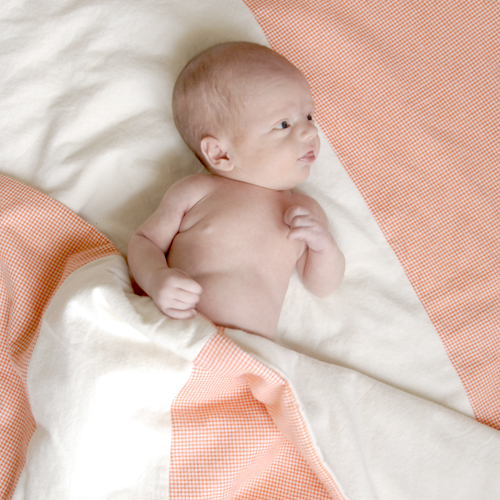 Top on my list of things to make for Felix are baby blankets. Felix is a pansy about being cold, so he has to be swaddled in as many blankets as possible in order to stay happy. So far the only blankets he uses (besides the one my cousin-in-law made) are all pink. He needs more manly blankets! I bought some flannel last week, but got around to making a blanket today. I used a plain off-white flannel & an orange & white plaid. I had originally planned on plainly sewing the two pieces together, but that's just not my style. I'm going to make these blankets as difficult on me as possible. I'm going to cut them up and then sew them together.
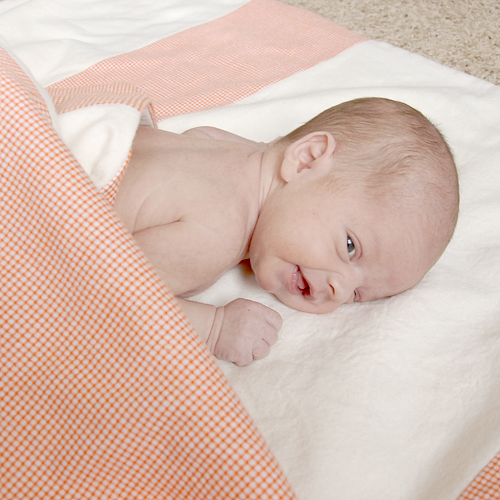 I'm not a quilter. Not in the least, but I decided to experiment a little. Here's what I did:
 It was simple enough & took just over an hour to complete. I have plans to quilt the whole thing, but my plans were foiled by my sewing machine which has decided to go on strike. I've got to take it in to get fixed. Every sewing project takes about twice as long because my thread keeps breaking. BLERG.