MelissaEsplin.com

Crazy Cat Lady Vinyl Decal

May 31, 2010
Have you seen the vans/suburbans/people carriers with the stickers of stick figures of mom, dad, kidlets and pets? You know what I'm talking about, right? Well, I made a pretty hilarious set of vinyl decals at my aunt's request. When I made Scott's decal, she commented,"Can you make those family decals that are so popular to have on your Utah minivan? Uncle Loren wants one for his truck that looks like a crazy lady and then about 12 cat decals!" How could I not make those?? Seriously. I didn't make 12 cat decals, but you get the idea. I hand illustrated the lady & the cats. Surprisingly, the cats were easiest to illustrate; it was the lady that irked me. I ended up getting inspiration from the Simpson's cat lady and Hang Mioku (a woman who injected cooking oil into her face). I also whipped this up the other day. This was one of my favorite quotes in seventh grade. It's just so obvious, you know?

Sweetheart Bow T-shirt Tutorial

May 28, 2010

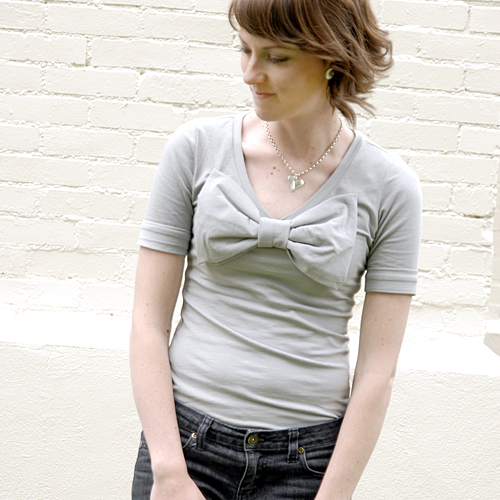
I've been slightly obsessed with bows recently in case you haven't noticed. I'm really digging them. I'm seeing bows pop up in the most fashionable of places like Anthropologie, J.Crew, Ann Taylor Loft and Urban Outfitters. As soon as I saw this bow pillow tutorial, I knew I needed to have a shirt with a giant bow on it.

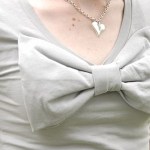
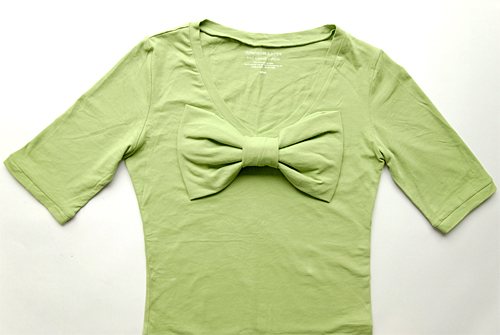
I bought two DownEast Basics v-neck shirts and transformed them into what you see above. The project cost a total of $5 and 45 minutes. Winging it and hand-sewing slowed me down a tad. The finished product is feminine & accentuates my tiny bust, so it might not be suitable for the well-endowed. I've included a tutorial on how I did it, if you'd like to give it a try. I sure hope you do!

• • • • •

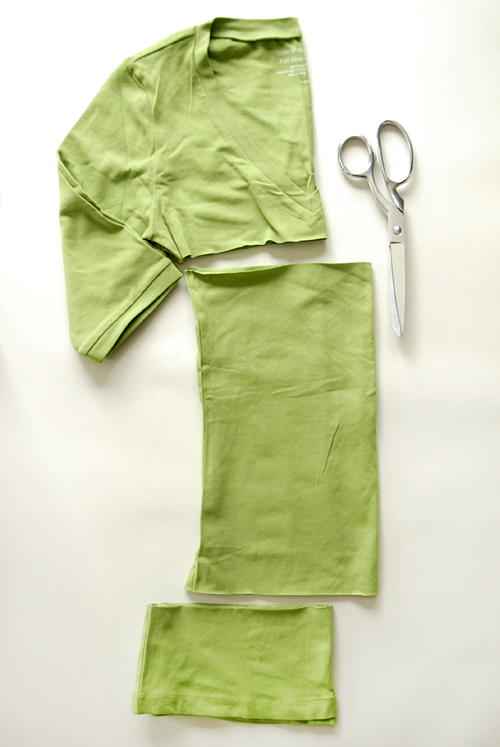
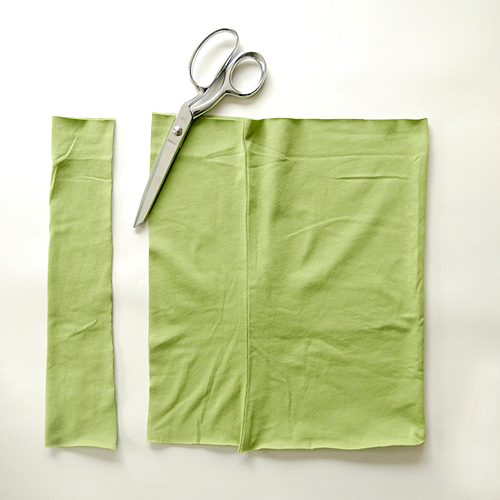
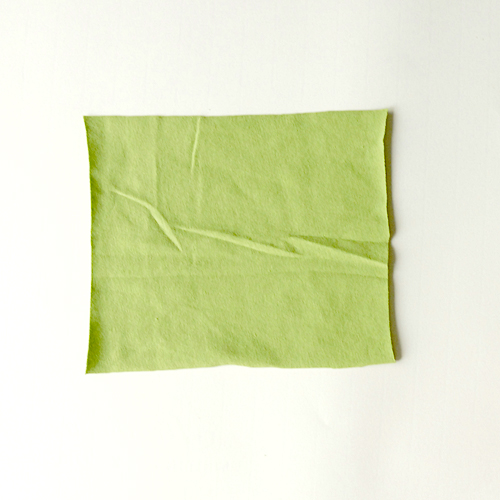
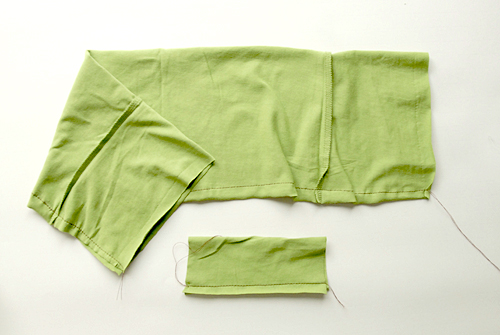
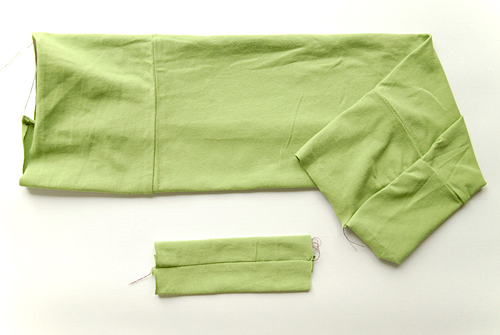
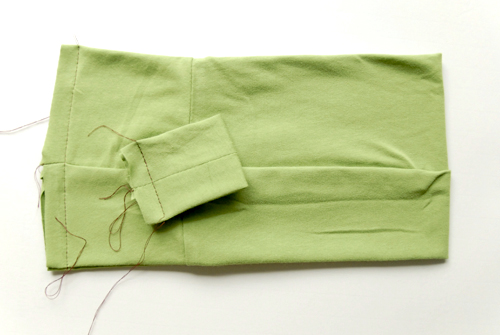
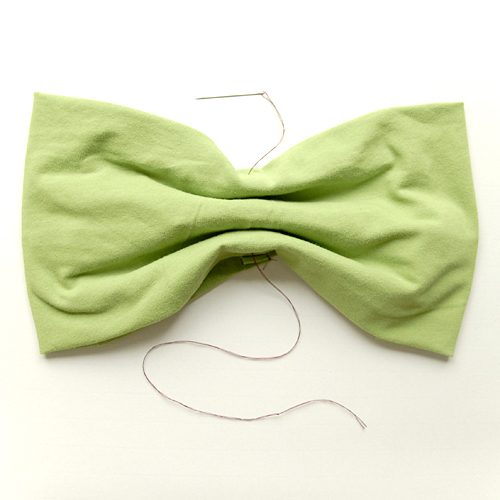
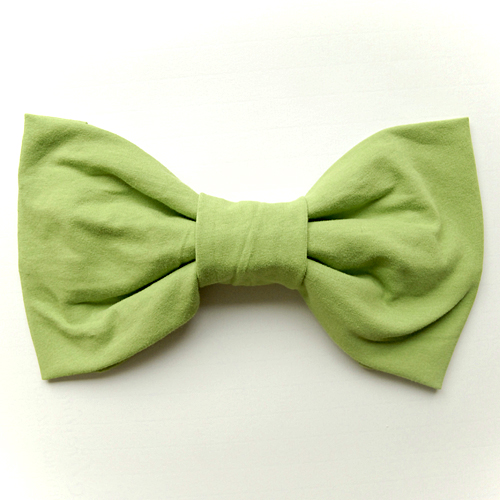
To make this t-shirt, you’ll need two shirts; one of which needs to be v-neck. I chose two of the exact shirts, in the same color. Feel free to get creative! Grab the extra tee and set the good tee aside for later. Fold the extra tee in half lengthwise and cut just below the armpit and about 3 inches above the hem. No need to be exact, just eyeball it. Grab the middle section and align side seams together. Cut off about 2 inches of fabric. Unfold the extra two inches and cut a 4x6 inch rectangle. I eyeballed it. Fold both bow pieces in half lenghtwise with right sides in. Sew along open ends with a half inch seam allowance. Turn fabric right side out and center the seams along the middle of the back side so they won’t show when you assemble your bow. fold both bow pieces in half width-wise with the good side facing in. Sew along open ends with a half inch seam allowance. Turn loops right side out and center the seams along the back side so they won’t show when you assemble the bow. Turn big loop to the back(seam facing up) and accordion fold along the middle to create the pleats. Anchor pleats by hand stitching the center together. Slide small loop over the pleated bow and sew into place. Snag your nice tee and lay it flat on the ground, smoothing out wrinkles. Place the bow at the base of the V and hand stitch into place. Stitch into place by anchoring undersides of the bow to the tee. Enjoy! Click the button below to download the tutorial in PDF format.

This tutorial is free for personal use and should not be distributed without my consent. If you would like to use this commercially, please email me. Thanks!

A Hand Calligraphed Quote

May 27, 2010
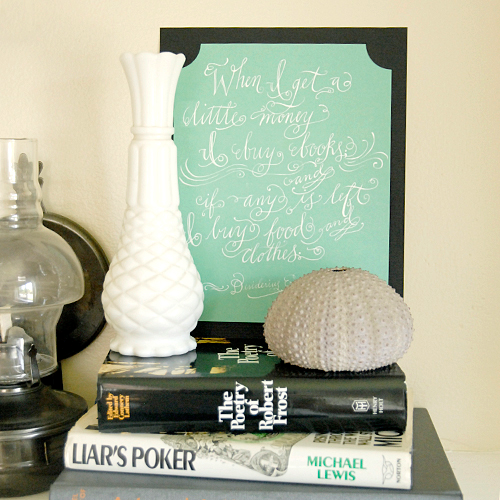
Last weekend I worked on a little calligraphy project for a very lovely lady. I enjoyed it, because it gave me an excuse to stock up on pen nibs and pretty ink. Penelope keeps breaking my pen nibs and Chris says it's because she wants to secure her position as the only working Pen in the house. He's probably right. Here's what it says:

"When I get a little money I buy books; and if any is left I buy food and clothes."

– Desiderius Erasmus

I went for a very spontaneous look and just winged it. It was fun, but as soon as I was half way done I started to think crazy thoughts like: What if I mess up? Do I remember how to write a 'y'? Oh crap! I'm going to mess up! I hate it when I start thinking thoughts like that. When I used to play the organ for weekly church service those same thoughts would go through my head then I would lose my place and skip a note. It was so embarrassing. Thankfully, my crazy thoughts of self-doubt and stress didn't get to me; I was able to finish my quote with success. I wanted to use white ink for this project, but the Higgins "waterproof" white ink that I have totally blows. I know, I know. It's cheap ink. I should stop buying cheap supplies! I went to my local art supply store and stepped it up a notch and bought Dr. Ph. Martin's Bombay India Ink. I love how smooth the inks are, especially the white ink! I really like my new inks a lot. What brands of inks have you tried? Which have you liked/disliked? I'd love to hear!

Thrifty & Chic: Sexy Shoes

May 25, 2010
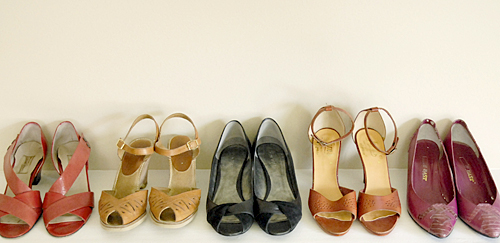
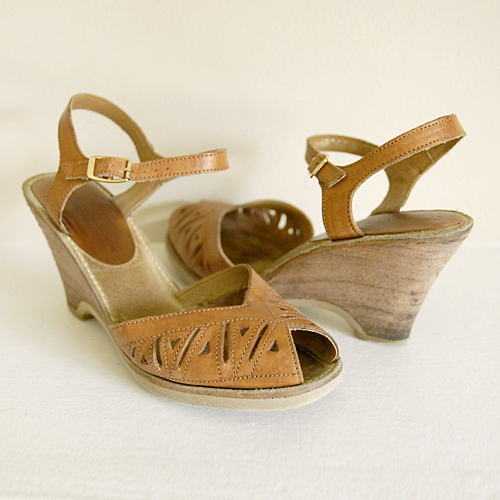
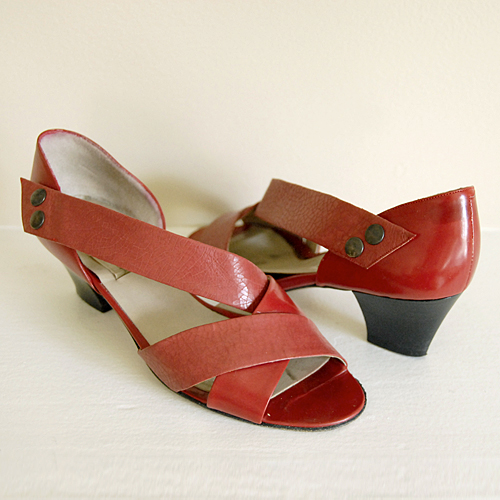
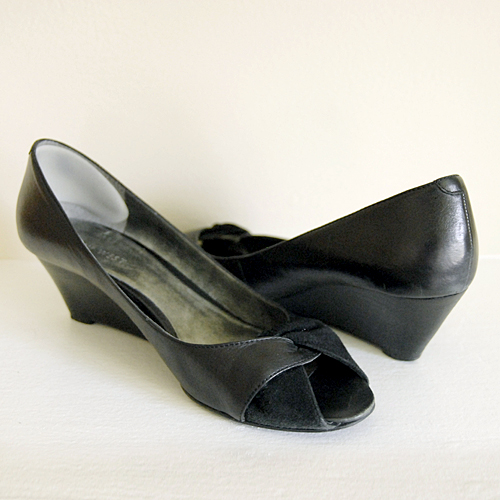
If you've been following the Thrifty & Chic series, you know I'm weak in the knees for gorgeous shoes on the cheap. I love shoes. The end of my freshman year of college was rather stressful, so what did I do to cope? I bought shoes. I bought 15 pairs of shoes in 2 weeks. It was nutso. I've since gained more self control and different ways to cope with stress. Regardless, I still buy more shoes than my mom thinks any normal human being should own. I like them! Today I'd like to show you my favorite shoes that I've snagged for $4 or less. I found these beauties at the beginning of fall/winter this last year which was very timely since the boysenberry color started popping up in clothing stores. These shoes were $4. They're leather with real snake skin details. These shoes were featured in my first Thrifty & Chic post. Remember? I still love them dearly! I'm not huge into wedges, but I love these. I snatched them up for $3. The upper and wedge are made out of leather. Nice. These classic red beauties are so chic paired with skinny jeans. I immediately spotted them while shopping because of the gorgeous button details on the sides. I snatched them up for $4 and later found out that shoes from this label normally go for $250-300. Score! I found these black beauties while thrifting this weekend! I was just thrilled to find Nine West shoes in my size! They're very comfortable and add a certain flavor of chic to any outfit. I snatched these up for $4. Last but not least, I found these gorgeous babies this weekend in the same trip where I scored the Nine West beauties. Aren't they so elegant? I love the strap, but there's something about perforated leather that makes me squeal. I wore them to church on Sunday and felt SO chic. Love.

Penelope's Birthday Party Part III

May 24, 2010
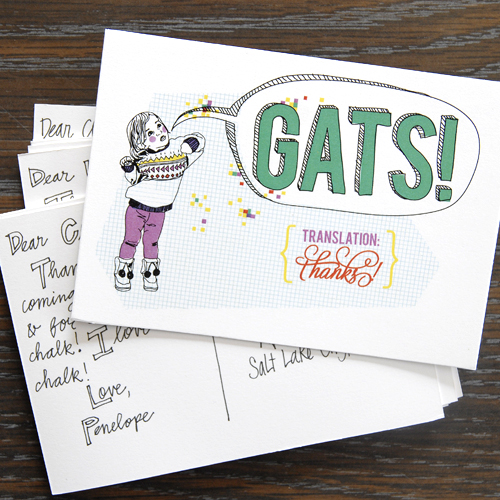
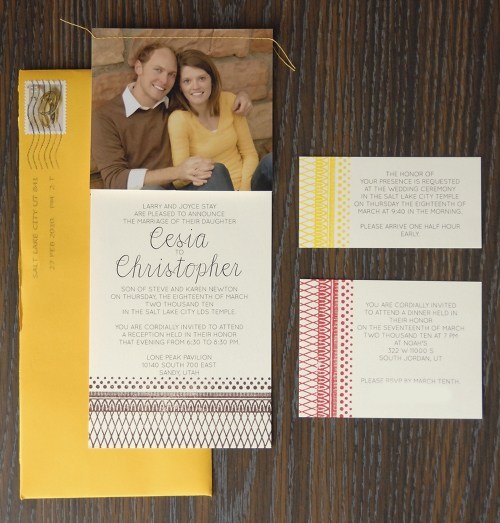
A late thank you is better than no thank you, right? I finally around to making and sending off thank you postcards from Penelope's party. It's been three weeks. Penelope isn't to the point where she can express gratitude on Paper, so I ended up writing them all from her perspective. As soon as she can write a thank you note; she'll be writing her own! Thank you cards take me forever to write. I kept with the theme of her birthday invitations and added her saying, "thanks!" (which sounds more like GATS). I discovered the glories of thank you post cards when Chris and I got married and needed to make and send a bunch of thank you's on a limited budget. Post cards are where it's at – they're so inexpensive to print and send! Have you used thank you postcards before? What do you think?

Click here to read part I: The Invitation

Click here to read part II: The Party

Thrifty & Chic: Small Frye

May 21, 2010
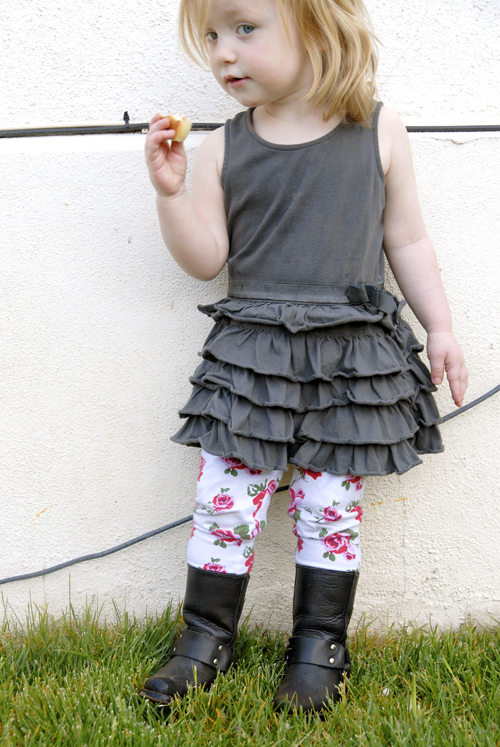
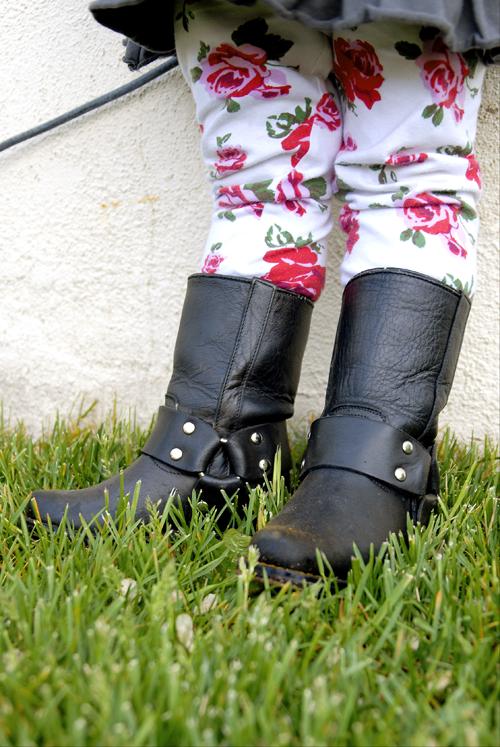
Last weekend I went on a little thrift outing with my cousin-in-law. We had some great success! Natalie found a rad leather sling bag and I found some small Frye-like boots for Penelope! While we were shopping I found a bunch of awesome finds, but really held back. Do I need an 8th pair of boots? Perhaps not, but there was no way I was going to pass up these gorgeous black leather motorcycle boots. They were $10. Isn't she a little diva? Penelope wasn't shopping with me when I found the boots, so it was a gamble whether or not they'd fit on her chubby feet. Luck was on my side because they fit perfectly!! She'll probably grow out of them in the next month, but we will be having another kid sometime in the future, who could also benefit from my thrifty find. I have to admit; I'm a little jealous that they're Penelope's size and not mine. Oh well. Everything is cuter when it's micro-sized anyway. I'm not sure anyone else I've bragged to has had the same enthusiasm about these boots as I do, but I am more than thrilled about my wallet-savvy find! Have you found any good deals lately? Leave a comment and tell me about it (links are welcome)!

Penelope the Pomegranate Princess

May 20, 2010
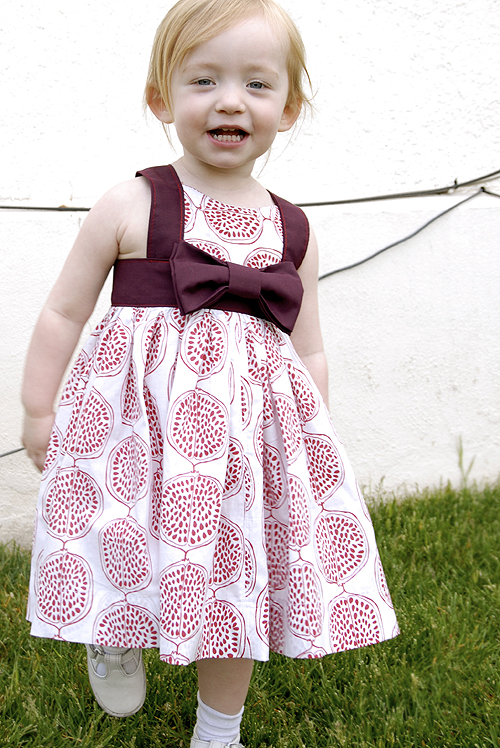
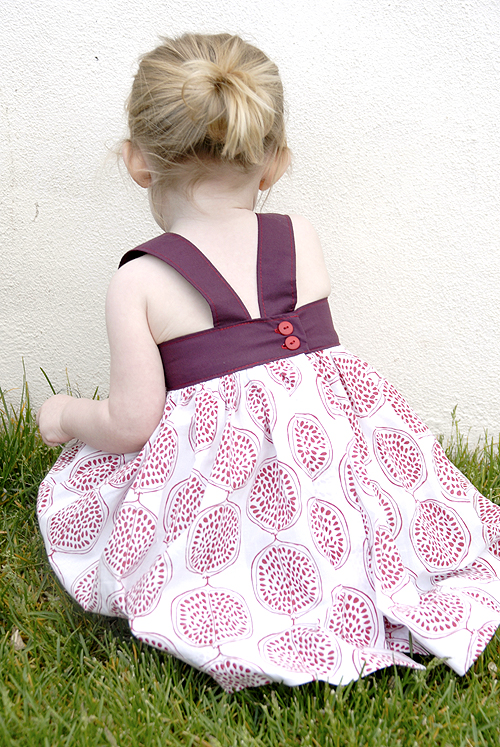
Sara Jensen of Lost Bird Found sent me the most adorable pomegranate print fabric in the hopes that I'd make something fun out of it. I definitely though it was adorable when I saw it online, but when I got it in the mail I got a completely tipsy with delight. I love this fabric! I wasn't sure which to do first: a skirt for me or a dress for Penelope. Penelope's dress won. I'm pretty sure I have enough fabric left over to make a sweet skirt for me, so you might see more of this fabric really soon! I had so much fun working with Sarah's fabric. The pattern is simple and sweet, printed on a light-weight cotton that is so easy to sew. I finished the dress right in time for Penelope to wake up from her nap. I showed Penelope the finished dress and the first words out of her mouth were, "OOooOOO! Pretty!" Awww. Penelope! She just made my day. It melts my heart see her appreciate the things that I make for her. Bows are the new ruffle, folks. I'm serious. Above is a detail of the back. I sewed two sets of buttons (the second set are hidden), so when she grows she can use the second set of buttons & wear the dress longer! The dress encloses using the two buttons and has an open back. I made some baby shorts in the pomegranate fabric (not pictured) so you don't see her cheesy Mickey Mouse diapers when she bends over. All in all I think this dress took me two hours to make. Not bad, considering I made the whole thing up as I went along!

Little Sleeve Update

May 18, 2010
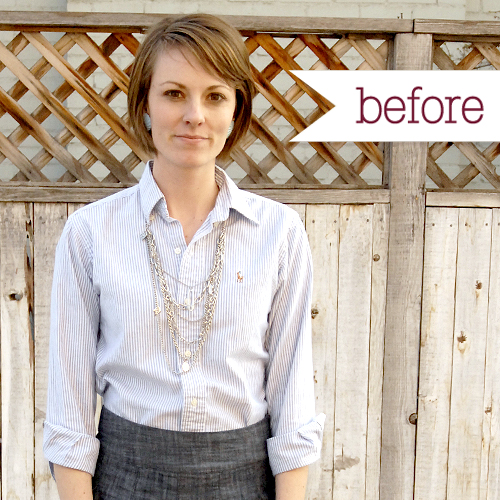
When I go thrift shopping I usually stop by the little boys section to search for button-up shirts. Most of the time I find shirts that fit everywhere but the arms; I guess I have longer arms than the average 12 year old boy. When sporting little boys shirts, I have to go for the nerdy high-water look or roll up my sleeves or refashion them into something that's a little more fitting. I felt like this shirt needed a little update. Here's the before: To update/feminize this shirt, I:
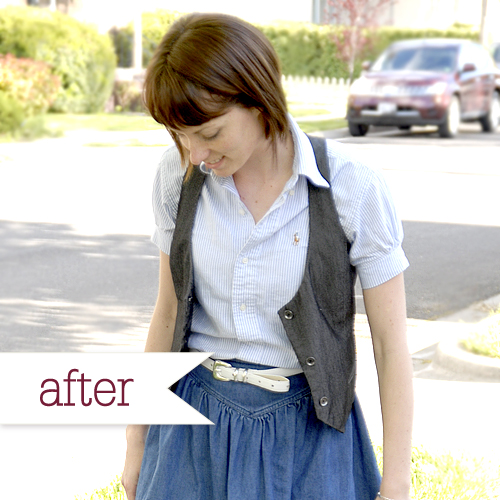
  • chopped the sleeves
  • added a gather to the outside of the sleeve
  • added a small cuff from leftover fabric
I think it turned out cute, but I'm not really sure if I get more use out of the shirt now that I've refashioned it. It's probably about the same. The cropped/gathered sleeve definitely makes the shirt look more feminine. Which do you prefer? The before or the after? I'm still not quite sure.

Flash!

May 17, 2010
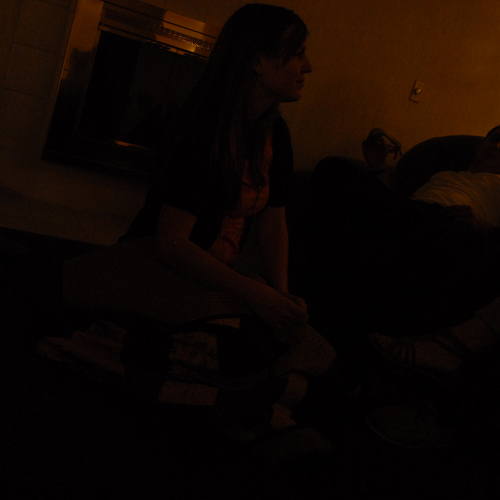
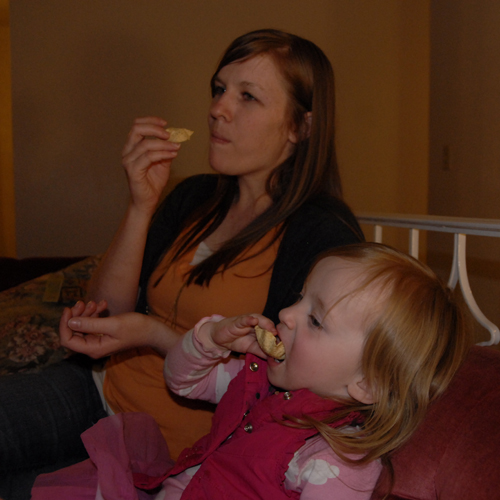
I bought a Nikon SB-600 flash unit for my camera nearly a month ago. I'm loving it. I feel like a free woman now that I can take decent photos in low-light situations. When I say low-light, I mean practically pitch black. Really. Can I brag about it for a minute? I love this thing. Let me show you how awesome this thing is: I took these photos at my cousin's house at midnight. Each photo was taken from the same spot on the couch using the same settings. The above shot was taken without a flash of any kind. So sad. This shot was taken using my pop-up flash. It's not horrible, but it looks pretty bad. Right? It's still really dark. Now this is what I'm talking about!!! The above image was taken using my new flash pointed at the ceiling with a diffuser cap. WOW. Isn't it nuts the difference between this and the rest of the photos? I love my new toy, I just have to start working out my arms so I can better handle my giant camera/lens/flash set-up.

Thrifty & Chic: Prairie Skirt Refashion

May 14, 2010
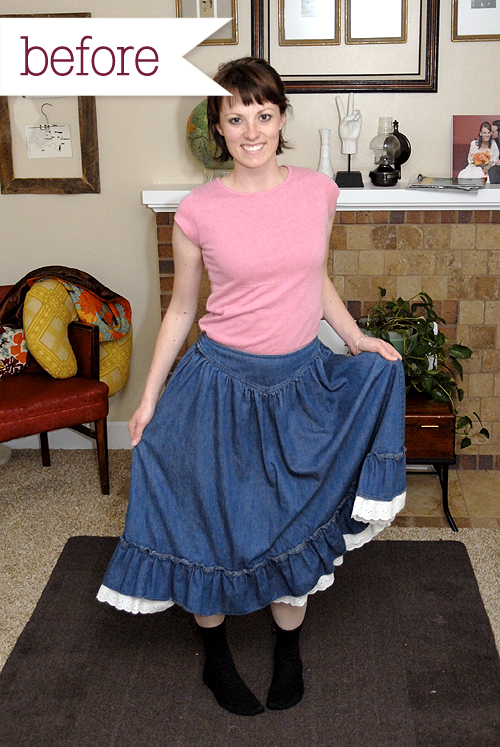
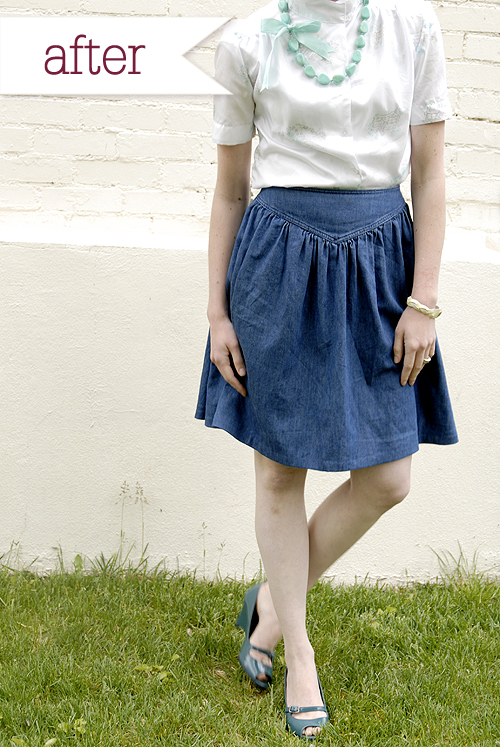
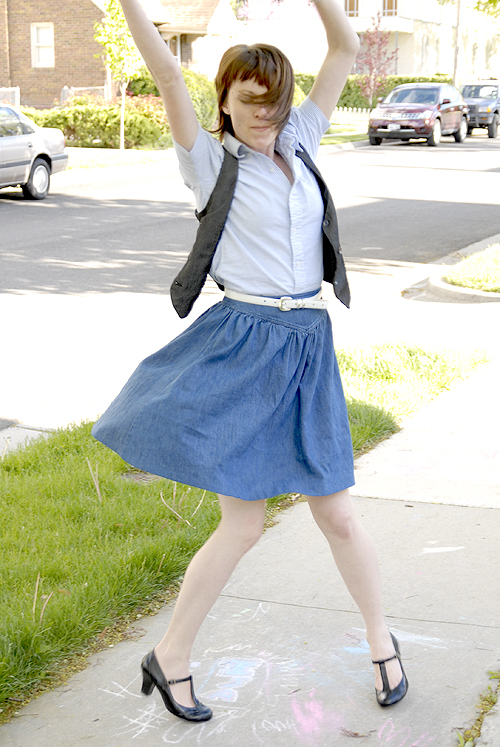
I bought this skirt for $2 my junior year of college at CTR–Community Thrift Relief; a janky old thrift store that occupied an old women's gymnasium from yesteryear. I loved that place. It's also where I found this pleated skirt and my husband's rainbow brite hoodie(it's really cool, btw). That place was full of all sorts of cheap, cheap gems. Too bad it's no longer there. *sigh* In college, I really liked dressing in theme. I would practically show up to class in costume. One day I was a cowgirl, the next I was a lawyer, the next I was a 12 year old girl in galoshes, the next I was a tortured artist. Funny story, my freshman year I vowed to never to show up to school wearing a t-shirt and jeans. The one day I broke my vow, half of the guys and girls in my apartment building wondered what was wrong. This skirt was what I wore when I dressed up as a pioneer/wrangler girl. I'd show up to class wearing a graphic tee, this skirt & some cowgirl boots. I may have even sported braids. Not sure. Now that my tastes have matured and I'm a responsible mommy, my themed skirt seems a little out of place. So I opted to update! Here's what I did:
  • Took in the waist by using Susan's side seam tutorial for jeans. (P.S. Those are my jeans pictured in that tutorial. I LOVE them so much more now that Susan took them in! This tutorial is GENIUS!)
  • CUT OFF THE RUFFLE BOTTOM. Gross.
  • Shortened the skirt by 10 inches.
  • Hemmed the skirt using an adhesive hemming tape.
There you have it! This fix was so simple, yet took me about 3 hours to complete since I had to unpick 9 different seams to take in the waist. This skirt has awesome construction. I probably wouldn't have taken the time to update this skirt had I not been completely in love with the "V" waist band. Those waistbands are so hot right now.

Strawberry Lemonade Cupcake Recipe

May 13, 2010
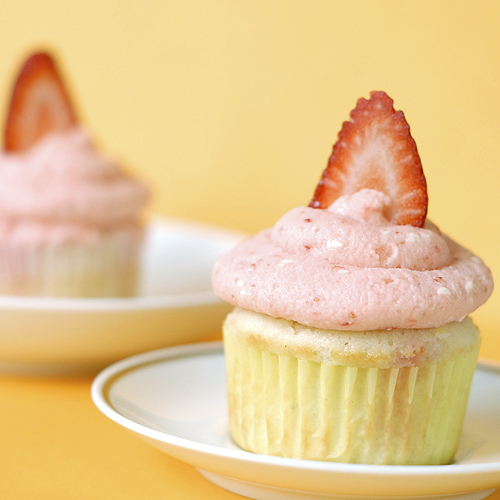
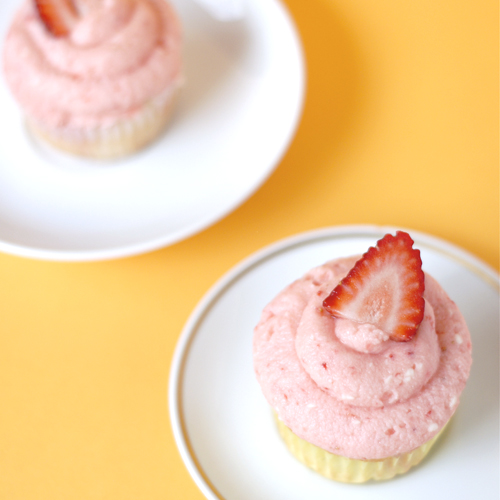
Monday night I made the most delicious cupcakes ever. They were so delicious, some folks in the tweetiverse even asked for the recipe. I was very flattered to see the response. So here it is. How to Make Strawberry Lemonade Cupcakes:
  • Make the fluffy white cake from epicurious. (this makes over 3 1/2 doz cupcakes, so you may want to half the recipe). I'm sure any white cake recipe would do, but I really like this one.
  • Fill cupcake cups with a heaping spoonful of batter and bake at 350º for 15-17 minutes.
  • Allow cupcakes to cool. Put the cupcakes in an airtight container and allow to rest for a few hours or overnight. If you don't cover the cupcakes, they'll dry out!
  • Make the lemon curd recipe from epicurious. You'll want to half the recipe if you don't want loads of leftovers & even if you're making the full 3 1/2 dozen cupcakes. You could always just buy the curd if you wanted to.
  • Poke a hole in the middle of each cupcake using the back of a fork or knife.
  • Fill pastry bag with lemon curd & fill each hole with curd.
  • Make strawberry lemon icing (recipe below).
  • Fill pastry bag or plastic bag with frosting and frost each cupcake.
  • Garnish cupcakes with sliced strawberries just before serving.
Strawberry Lemon Icing from the kitchen of Melissa Esplin makes enough to frost about 1 1/2 dozen cupcakes 1 tablespoon lemon juice 4-6 fresh strawberries 1 cube or 1/2 cup butter, softened 2 cups powdered sugar Puree strawberries & lemon juice in a blender. Allow strawberries to macerate for about 10 minutes; it helps with the flavor. With a hand mixer beat strawberry mixture, butter and sugar until consistency is smooth. You may want to add more sugar or more lemon juice to get your preferred consistency. Frosting is perfect for sugar cookies, cupcakes, cakes, etc. Hope you like them! Let me know if you have any questions about the recipe. I used the fluffy white cake recipe for Penelope's birthday cake. It was really good, but I think this recipe works better as a cupcake. I don't know what it is, but that's just how I feel about it. Enjoy!!

Sunday Best: Ode to My Mother

May 10, 2010
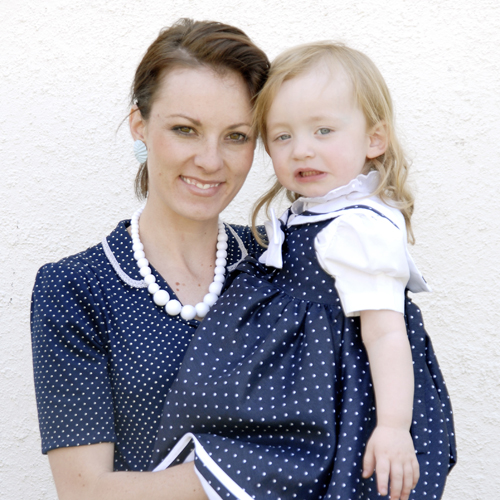
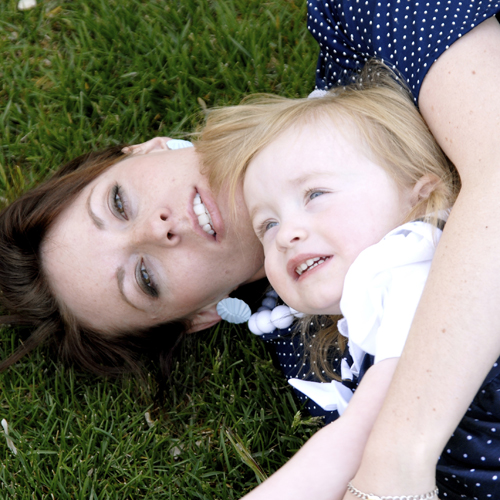
Yesterday was my third Mother's Day being a mom; it was so wonderful! Chris let me sleep in, let me take a three hour nap in the afternoon, made me breakfast in bed & made me dinner. Glorious! I also made Chris snap a few photos of me & the nels. It meant so much to me that he took photos of Penelope & me together. I think that needs to be a Mother's day tradition from now on.
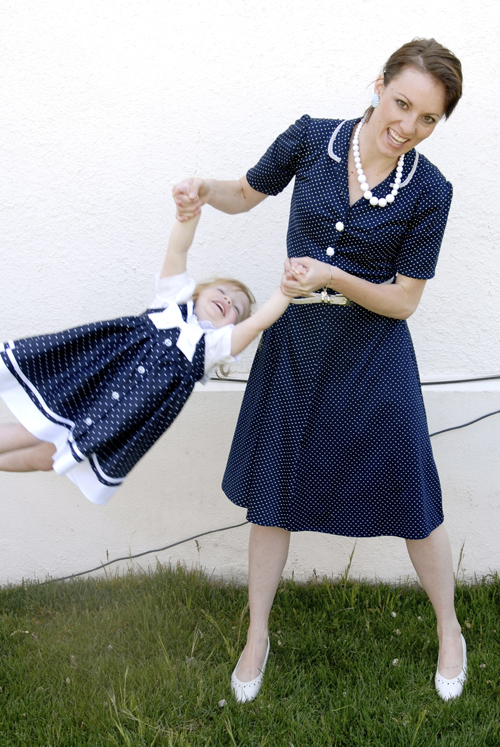
DO you like our vogue pose? That wasn't on purpose, btw.
Our outfits also made the occasion rather special. My grandmother bought my dress for my mom in the early '80s; just after she had my sister, Emily. I love this dress. I love that it fits! I love that it's so stylish! Coincidentally, my mom bought Penelope's dress for her birthday and it matches my outfit perfectly! Maybe my mom has a thing for navy & white polka dots. I have such an inspiring mother & mother-in-law. They're both so uniquely creative, smart, resourceful, beautiful & loving. I am so thankful for both of them! Mothers are the best. I hope you all (and/or your moms) had a great Mother's day yesterday! Stay tuned for a new flickr challenge! I'll be announcing it early tomorrow morning. It's going to be awesome!

Thrifty & Chic: Springy Dress Refashion

May 7, 2010
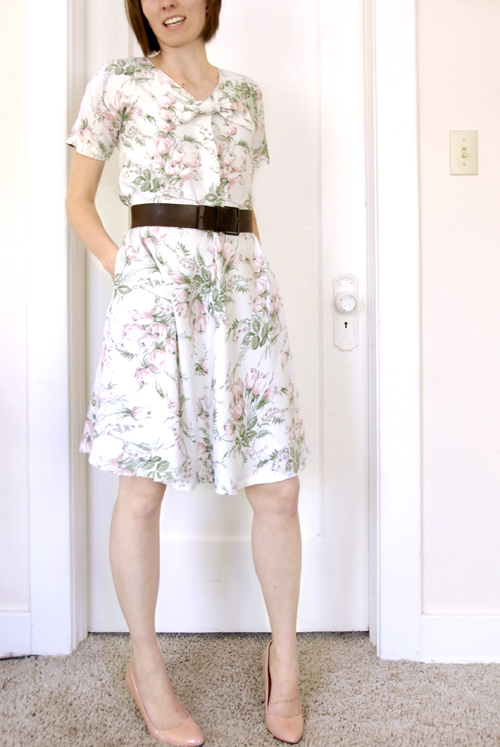
I bought dress at a thrift store a few weeks ago for $6. It was a little bit of a splurge for me, since I could tell right off the bat that it needed some work. I didn't much care though, because I really liked the delicate pattern and the demure nature of the dress. I forgot to take a before picture; I was a little too eager to get started on the project. It fit so poorly. The sleeves were too long and baggy, my little twiggy arms got lost in all the fabric. There was a pocket over the right breast, which made me look like I sagged unevenly. Ew. The high, sans-collar neckline and the long dress length just screamed matronly. I'm 25. My clothes should make me look like I'm 25, not 65. It kinda looked like this dress from my flickr stream, but worse. So, this is what I did:
  • Shortened the sleeves by 3 inches(!)
  • Took in the sleeves and sides of bodice by 2 inches
  • Removed the breast pocket
  • Shortened the skirt by 8 inches
  • Turned the collar into a V-neck
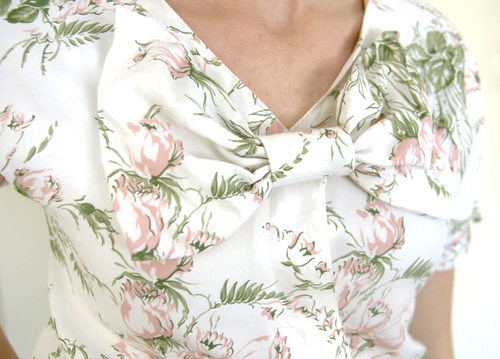
  • Added a giant bow to the neckline
Much better! You can't see the bow very clearly from my pictures, but it looks far more pronounced in person. It probably would've made more of a statement had I attached a bow in coordinating fabric rather than the same fabric. Next time, perhaps. I was a little worried that I was going to hem the skirt a little too short, but it turns out it's the perfect length! It covers what it needs to & shows off the rest. It'll be the perfect summer dress if the weather ever decides to warm up past 50º.

Make You Over Mother's Day Post

May 6, 2010
I'm a guest over at Make You Over today, sharing a Mother's day gift idea. Chelsea of MYO is hosting a Mother's week where she's invited several bloggers to post about their favorite Mother's day gift items. That's not all, though. For every gift idea there's a chance to win it! Big Kudos to each company sponsoring the giveaways! Click here to see my post Click here to see Gabrielle Blair's Post Click here to see Azúcar's Post Click here to see Caitlin Creer's Post Additionally, Chelsea is offering a unique e-consulting giveaway with prizes from Shabby Apple, Roxie Heart Vintage & others. Click here to enter her giveaway.

Penelope's Birthday Party Part II

May 5, 2010
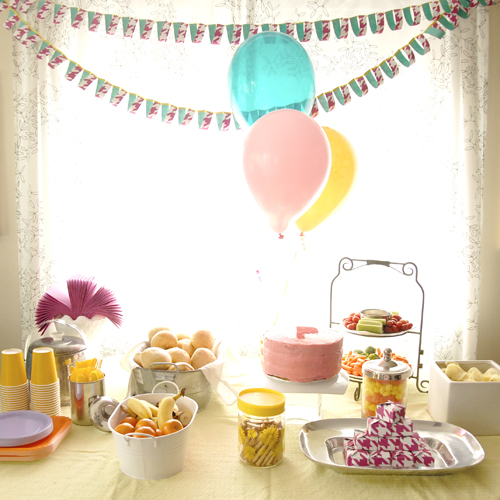
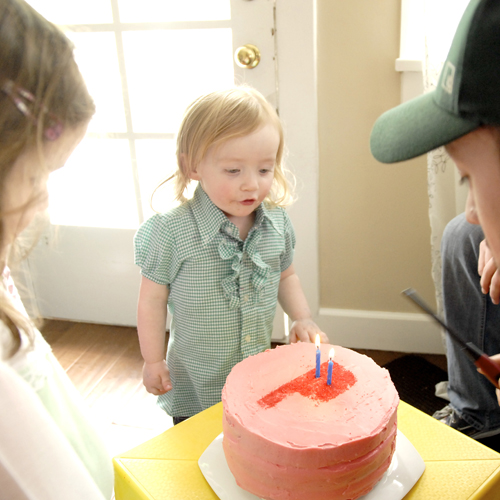
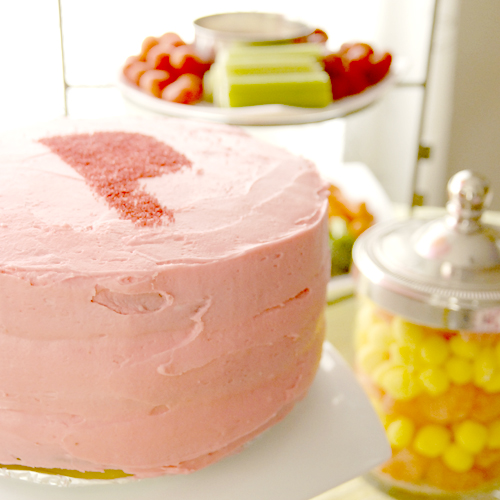
The party was organized chaos. I didn't take very many photos of the festivities, but I did manage to document the food table. We had Bee's lemon water (a delicious homemade beverage that's clear - perfect for living room dining), pulled pork sandwiches, clementines, bananas, cut veggies, chips and cake. The food was all pretty low-key except for the cake, which took a few hours to make entirely from scratch. I made a white cake with lemon curd and lemon frosting. It was deliciously moist and dense. MMM! I'll make it again and share the recipe with you, if you'd like. I used the Silhouette to cut a P out of paper to use as a stencil for the decorative sugar. It kind of looks gritty as if I spray painted the P on there. I like that. I kept the decorations simple by using balloons and a handmade garland using the same paper I used for the envelopes. It was really easy to make. If you'd like a tutorial for the garland, comment! I was going to make the vellum mobiles as seen on Oh Happy Day, but I didn't have enough time to run to the store for more paper, so I opted to make the strips into a garland instead. The vellum mobiles would've looked really rad, had time been on my side. I also made Penelope's party favors using the envelope paper and a variation on the petal box template (cut with the Silhouette). I filled the boxes with hard lemon candies and candy orange slices. The festivities were really simple: eating and dancing. It was great to keep things simple, otherwise it would've been like hearding cats. Plus, after spending so much time on the invitations, I wasn't about to plan a creative party curriculum. I'm much too lazy for that. The kidlets enjoyed dancing, screaming, fighting over balloons and playing hide and seek in the ikea garbage cans that we use for storing Penelope's toys. I say it was a great success! Also, the kids were so entertained, us parents had a great time catching up.

Click here to read part I: The Invitation

Click here to read part III: The Thank Yous

Penelope's Birthday Party Part I

May 4, 2010
Phew! It's over! I really wanted to make a big deal out of Penelope's birthday this year. I've never planned a party for a little one before, so it was definitely new territory for me. I had a lot of fun being creative, but it was SO MUCH WORK. I see why most parents only do parties every other year, or so for kids. I'm still exhausted. GEEZ. Penelope's invitation took hours and hours to put together. Mostly it took so long because I was a loser and didn't read the Silhouette manual on how to cut vinyl. Yeah. I figured it out after 8 hours of trying. Not kidding. Turns out Silhouette's FAQ's are really helpful. Go read the manual, then go read all of the FAQ's. You'll thank me later. I also wasted hours and hours on brain-dead printers. At first, I wanted to avoid printing at FedEx Office because they're expensive and slightly annoying. I thought printing at the local UPS store would be smart. Worst idea, ever! First, it took the ladies 3 days (THREE DAYS!) to print 10 color copies on card stock. Seriously? Second, the colors were not even close to what I had designed. Third, the employees were annoying and told me that colors always come out different than the computer screen. Yeah, always is right if you have a crappy printer and don't know how to use it. By the time I gave up on printing at the UPS store, I was in a bind and needed the files printed ASAP. I headed over to the FedEx Office down the street thinking they'd get the job done fast. NOPE. After an annoying conversation with the employee there, I left. UGH. I sat in the car with my iPhone (hallelujah for the 3GS) calling around different print companies to see what they could do on such short notice. I remember DownEast had done some printing with Documart just downtown so I called them. I explained the type of print job I needed and asked how long it would take him to do it. His response, "Seriously?! They'd be done in less than five minutes." NICE. The guy at Documart was on the ball, and he didn't charge a million dollars per copy, either. Hooray! Seriously. Three cheers for competent and kind printers!! The Envelopes:
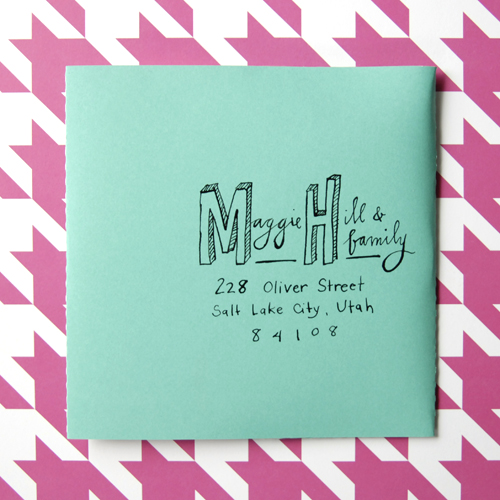
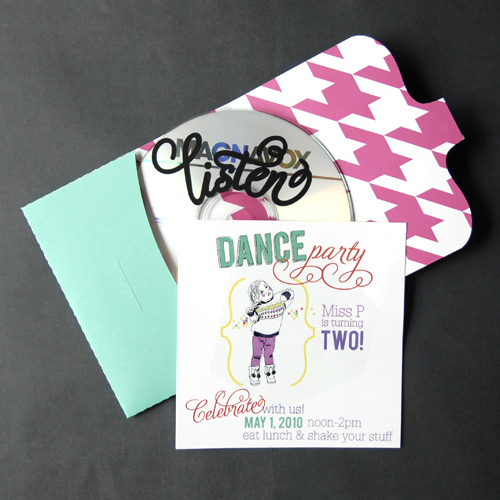
  • I used American Crafts Moda Bella craft paper
  • I designed a CD case template in Illustrator and cut it out with my handy dandy Silhouette
  • I hand addressed each envelope
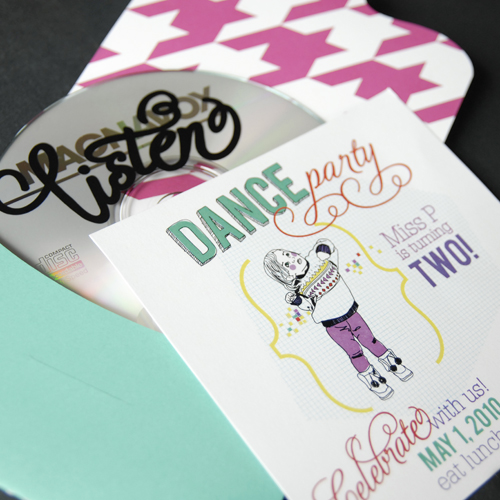
  • I designed the circular PEN sticker to secure the envelope closed and cut it with the Silhouette
The CD:
  • I burned 4 of Penelope's favorite dance songs to CD for attendees. They aren't children's songs, but they had clean lyrics (CD included: Calvin Harris, Discovery, Yeasayer and Hey Champ)
  • I designed the LISTEN sticker and cut it out with the Silhouette
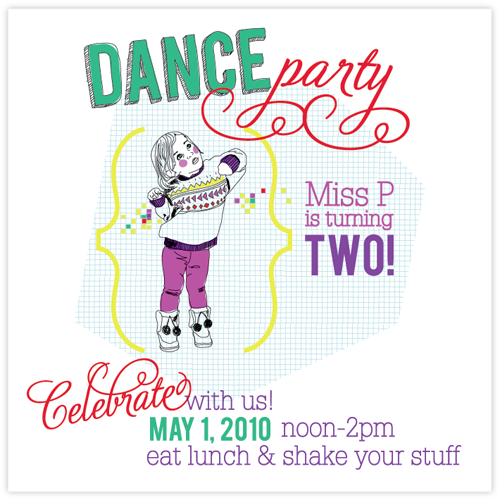
The Invitation: I was really excited how the invitations turned out, despite all of the setbacks. After I mailed them, it was like a huge burden had been lifted off my shoulders! This invitation would've been much more labor intensive if I didn't have the Silhouette to do half of the work for me. I love it! Stay tuned for Part II, the party!

Click here to read part II: The Party

Click here to read part III: The Thank Yous

Scott's Self-Referential Vinyl Decal

May 3, 2010
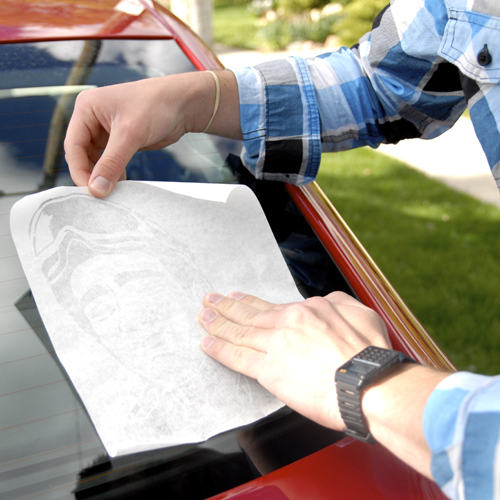
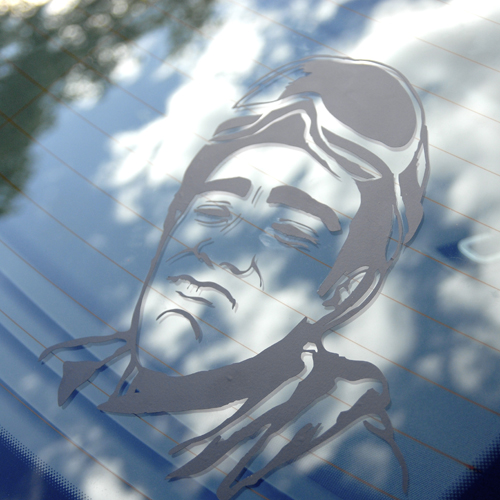
My brother-in-law and I were having a conversation about vinyl decals when I told him that I could now make my own my new Silhouette machine. Seriously, I think I've told each family member about this machine four or five times. Yeah. As soon as I told Scott about my lovely new cutter, he got so excited about making custom decals for his car. Chris and Scott brainstormed for about an hour trying to figure out what they should do to decorate Scott's car. They decided on a decal of Scott's face. Chris did a similar thing with a stencil and spray paint on a briefcase he used to take to school. It's cool to mark your belongings like that. We spent an hour or so trying to pick out a picture that would work, and settled on a skiing pic Scott took with his iPhone. This is how the design turned out after playing around with the image in Photoshop & Illustrator. I finished the design in about an hour. The Silhouette took about a minute to cut the vinyl (it would've been faster, but I had it at it's slowest setting). It took some skill to weed out the negative space properly because of the nature of the design, but I was able to save the negative of his face for Scott to apply on his computer. I didn't get a picture of it, but the black sticker on his black MacBook looks pretty slick. Here's Scott, applying the decal. Here's Scott, trying to make the same face that he made in the original photo. Here's the final product! Pretty slick, right? Now how fun would it be to have an entire family of decals on the back window? I love my new Silhouette machine. There are just so many things you can do with it! Click here to read my review of the machine. If you're in the market to buy one, or if you know your mom would like one (Hello, Mother's day!), use the above coupon code for $50 off a machine and 10% off everything else in the Silhouette store. Hurry and get one before the code expires!