Getting the studio finished this week was a necessary evil. I kept dragging my feet, but once I started working on it, I was on a tear. It was great to have today's reveal as motivation to get it 100% done.

Working on this project forced me to go through a lot of boxes and throw out quite a bit of miscellaneous crap I've not used or needed in some time.

I think I'll hang
this banner somewhere, but for now, it just rests on the door nob. I made this last year, two houses ago.

Remember what this space looked like on Monday? Nothing productive can happen in this space.

A lot more junk can get done in here. I added wall storage for calligraphy supplies, business cards, stamps, envelopes and more. The goal was to get as much off of my desks as possible, so I can use that for work and to keep it from Penelope's grubby little fingers. I had some of the
white Ikea boxes and
shelving before, but I had to supplement to get it all up there and done. That was less than $20.
The table is currently covered with my cutting mat and cutter. I'd be inclined to take the mat off, but the paint is really wrecked. At some point I'd like to paint this little table. We scored that table ages ago in California on the side of the road with "FREE" written all over it. I love that table.

I put some miscellaneous artwork up to keep my sewing books and receipts company up top. I don't get as much utility out of the shelving up top besides inspiration and resources.

Artwork (from left):
Birds of Ashmae temple, photo of Penelope, unfinished painting in back,
Kantan Designs quote, Love painting by
Mer Mag, Esplin by me, tiny illustration scored from a housewares swap, empty frame for Felix (couldn't get the printer to work).
In order to fit the white boxes on the shallow shelves, I oriented them sideways, making it impossible to read the label for what's on there. I cut out little squares of chalkboard contact paper and applied it to the sides. It looks nice, and if the contents of the box ever changes, I can just rewrite it in chalk.

I decided it was time that I permanently set up my easel. It's a constant reminder to paint. This piece is about a third of the way done, so it taunts me every time I walk in the room. It's a good taunt.

I organized my fabric, again. I've recently scored several yards of fantastic prints, which give me no excuses! I must make some awesome clothes with them now. I had this fabric storage set up in the last two places we've been, and I love it.
It's cheap, I can use the top for laying out patterns, I can see the contents and everything's neatly contained.

My ironing board isn't a standard size, so I need to make a new cover. Can you tell how baggy that cover is? Yikes. Artwork (from left): scored at a housewares swap, mine, mine, cork board with various inspiration.


I took advantage of the storage space in the closet and used that to stage the tailoring and refashions I have queued up. Last night I knocked out about 1/3 of the mending, but I still have my work cut out for me.

Back in my California days when I taught bookbinding, one of my students was a teacher at a local school district. The school was dumping REAMS of strathmore parent sheets, so she snapped them up. She asked if I wanted any. Of COURSE. Over 3 years later, I've not even gotten through half the ream! It's fantastic warm-grey paper, but it's heavy and takes up a lot of space. I had a brilliant brainwave to hang the paper over the clothes rod in the closet. It feels pretty fantastic to have it all right there, so neatly put away. Below is my assortment of clothing patterns. I have quite a collection! I have a fair amount of white storage boxes, most of which are empty. It's nice to keep a few empty spaces in this room to allow for growth. Below are bins of packaging supplies and leather.

Opposite of my desk is my sewing desk. We bought the legs over a year ago to DIY a kitchen table that totally failed. I ended up just buying a top from Ikea and moving everything to my studio instead. It all worked out nicely. The green table elevates the trash nicely, so I can throw away threads as I'm working feverishly on projects. I made that table like 9 years ago. It's a favorite of mine, for sure. I wanted to make sure that I got the thread and scissors off the desks to keep Penelope and Felix from getting into trouble. Felix absolutely LOVES thread.

The yellow box has my current projects inside, neatly organized. I can easily store it under the table if I need the extra table top space. Artwork (from left):
SeeSaw,
A Vintage Poster, Me, Penelope, Thrifted

And here's the wall that connects the sewing with the crafting. It's so fantastic to have my own dedicated room for creative projects and to have it all organized (for now).
Decorating and organizing this room came just under $20 with the extra shelving and storage boxes. Not bad! I've debated on changing up the color of the walls to match the rest of the house, but the blue fits for now.
Check out my old studio here (two houses ago).
I think I'm in a great place with this room. However, if budget were not an issue, I would put in wood floors to match with the kitchen, paint the walls a light grey, and get a couple of odds and ends for organizing. See what I have in mind on my
Pinterest Board. Next week, it's on to my office!!

 I just measured, zipped up one side with the sewing machine and handed it off to Penelope. She loves the print and the length is great for her, too. At this length, Penelope can still do everything she loves, but her underwear still gets covered. We're finding that Penelope + short skirts and dresses don't quite work for Penelope much, as she sits with her legs uncrossed and hangs with boys almost every day.
 I should really just make her little boy shorts to go under everything. Next week, perhaps.


 I'm over at the


 No make up and crazy hair today. I'm going to a clothing swap tonight so I'll probably get make up on before I go. Maybe. I'm itching to layer with sweaters soon, but I have to remind myself to enjoy these warm days of late summer/early fall. We're in for a long winter, up here in the mountains.
 I sorta want to foil the tips of these shoes in silver. Not sure how well they would wear, but the idea sounds nice.
 My grandma has killer taste. She turned 88 on Sunday, but she still acts like a 70 year old.
 I've taken jeans in from the back seam, but it always looks glaringly noticeable. Susan took some jeans in
  Then I had this genius thought while Chris was complaining of the same thing with his pants. I was pinching and thinking of how to take his pants in, then it dawned on me. DARTS. It's virtually invisible and takes less than 5 minutes. That's my kind of fix!
 I was so proud of my original idea, then I remembered that I saw it somewhere else way before I thought of it. Liz has two tutorials on how to
  Much better silhouette.
 See, I smile when my pants fit right. Also, I smile when I've just gone clothes shopping. I went on a bit (for me) of a clothes shopping binge last week. It feels so nice to have new duds!
Outfit Details:
See, I smile when my pants fit right. Also, I smile when I've just gone clothes shopping. I went on a bit (for me) of a clothes shopping binge last week. It feels so nice to have new duds!
Outfit Details:
 This room really just called for some tidying and styling. It's not a huge reveal, but I put in a few surprises that makes this space fun.
 See, not much has changed from the before (above).
 First on the list was to hang art. The photograph on the left was taken in front of a store front with a sort of comic message on the door. As I snapped this photo, I just about got beat up by whomever owned this "shop". From the looks of things at that time, I wouldn't have been surprised if illegal things were going on. I like the photo because it reminds me of the joys of finding your surroundings art-worthy and making excuses for adventure.
The photo on the left was taken by my sister-in-law while she was in Costa Rica. The composition of this piece is really great.
First on the list was to hang art. The photograph on the left was taken in front of a store front with a sort of comic message on the door. As I snapped this photo, I just about got beat up by whomever owned this "shop". From the looks of things at that time, I wouldn't have been surprised if illegal things were going on. I like the photo because it reminds me of the joys of finding your surroundings art-worthy and making excuses for adventure.
The photo on the left was taken by my sister-in-law while she was in Costa Rica. The composition of this piece is really great.
 Here's a better view of what I did to the cubbies: a spot for brushes, a bud vase that hides the soap (she's only allowed bar soap for now), a vintage jar of q-tips and an extra roll of toilet paper. Above the cubbies I feature the second of my pair of Dachshund lamps. He's like Penelope's little watch dog to make sure she washes her hands.
I made the white box next to the watch dog out of a vinyl banner my cousin gave to me. I used
Here's a better view of what I did to the cubbies: a spot for brushes, a bud vase that hides the soap (she's only allowed bar soap for now), a vintage jar of q-tips and an extra roll of toilet paper. Above the cubbies I feature the second of my pair of Dachshund lamps. He's like Penelope's little watch dog to make sure she washes her hands.
I made the white box next to the watch dog out of a vinyl banner my cousin gave to me. I used  I spray painted Penelope's stool a bright orange I had on hand. I thought I had the same green that's featured in the shower curtain, but nope. That would've been perfect, but the orange still looks nice. Much nicer than the dirty pink caused by Penelope and her bathroom adventures.
 You can see the dots on the far wall, right? They don't photograph as well as I would like, but they look really lovely in person. I opted to do the dots here and forgo any artwork on this wall because the door is typically open and covers up a good portion of the wall.

 The shower curtain and towel hooks were already there when we moved in (Thanks Nikki!!!), so no real work needed here. And it just so happened that I had charcoal towels to match the flooring and curtain. Score.
 I found it really hard to photograph the entire bathroom. What are your tips on photographing small spaces? Maybe next time I do a bathroom, I'll do video instead.
 I ended up moving the Love artwork from Merrilee from the studio to the bathroom. I think it fits here better, and ties in Felix's red towel.
The print on the right is a litho I made in college of Chris and I super imposed onto the poem, "
I ended up moving the Love artwork from Merrilee from the studio to the bathroom. I think it fits here better, and ties in Felix's red towel.
The print on the right is a litho I made in college of Chris and I super imposed onto the poem, " She already has a sweater dress I that I thrifted some time ago, so I used that as a template.
 Just by taking in the sides and the neck at the V, I had a new dress for Penelope.
 I think the jury is still out on if the dress is liked or not. She says it's scratchy, but I don't think so. It's a cotton wool blend, so it shouldn't be. But she does have extra sensitive skin, though.
 This post is sponsored by


 Open your jars and trace around your jar with a pencil. Trace as many as you want out on a page.
 Make your mini watercolors, but don't worry about staying perfectly inside the lines. It's nice to have a bit of a bleed with these kinds of projects.
 In the
  Stack them and take pretty pictures with your watercolors. Enjoy!
 This would be a fun way to hang to do lists or children's artwork. Heck, if this is a great way to immortalize your child(ren)'s artwork! Just cut out small vignettes of their paintings and mount! Even using larger jars and mounting to the wall would look absolutely lovely.

 I've had these shoes in my closet for some time, and they don't get as much attention as they should. They're so comfy.


 With the white walls, I thought this would be the perfect chance to include my bright artwork that doesn't usually match any anything else in the house. I even busted out some old artwork I forgot I had!
 Here's a quick reminder of what it looked like just days after we moved in. It's nearly impossible to get inspired in such a haphazard and messy place.
 The bright artwork is a homage to the yellow on the walls previously. It brings in a nice pop of color.
I bought the print on the left ages ago for Father's day for Chris. It was from the Beehive Bazaar, but I can't remember the seller. I love the neon square background pattern. If you know who sells these, leave a comment. I'd love to give credit!
The bright artwork is a homage to the yellow on the walls previously. It brings in a nice pop of color.
I bought the print on the left ages ago for Father's day for Chris. It was from the Beehive Bazaar, but I can't remember the seller. I love the neon square background pattern. If you know who sells these, leave a comment. I'd love to give credit!
 The middle piece I did my sophomore year, using latex house paints. It will probably deteriorate in about 15 years, unfortunately.
The two smaller pieces on the right were made at Design Camp of Alt Summit last year with Eva from
The middle piece I did my sophomore year, using latex house paints. It will probably deteriorate in about 15 years, unfortunately.
The two smaller pieces on the right were made at Design Camp of Alt Summit last year with Eva from  For the desk, I wanted to add a bunch of storage, but I still needed to take the photo corner into consideration. I tilted the Expedit on its side and slid it underneath the desk. It makes the desk a bit on the tall side, but I like the functionality of it. We have all of our hard drives and cables neatly tucked into cubbies underneath the desk. This is definitely the cleanest set up we've had thus far. We have two tethered screens (which I love), two keyboards (his and hers - Chris's is the blank black one) and two mouse pads. Chris has switched completely to mousing with his left hand, but I'm too impatient give it a try, hence the two mouse pads. And the blank keyboard? Well, it's set to PC functions, so I can't use my keyboard commands, so I use the regular mac keyboard.
I mounted the shelf above the computers to house my Silhouette cutter, camera remotes, headphones and other compy gear. I should put some artwork above there. It looks really lonely up there.
For the desk, I wanted to add a bunch of storage, but I still needed to take the photo corner into consideration. I tilted the Expedit on its side and slid it underneath the desk. It makes the desk a bit on the tall side, but I like the functionality of it. We have all of our hard drives and cables neatly tucked into cubbies underneath the desk. This is definitely the cleanest set up we've had thus far. We have two tethered screens (which I love), two keyboards (his and hers - Chris's is the blank black one) and two mouse pads. Chris has switched completely to mousing with his left hand, but I'm too impatient give it a try, hence the two mouse pads. And the blank keyboard? Well, it's set to PC functions, so I can't use my keyboard commands, so I use the regular mac keyboard.
I mounted the shelf above the computers to house my Silhouette cutter, camera remotes, headphones and other compy gear. I should put some artwork above there. It looks really lonely up there.
 The quote is by
  Behind the door I house the tripod. Right here, it's set up for studio shots. I like having it set up in the corner of the room, so I can just butt the leg up to the corner and have the camera in the same position every time I bust it out. I'm trying to work on consistency this year.
 The above artwork is self made. The
  The closet is still a work in progress. I put my paper storage in there along with photography, watercolor and bookbinding supplies. I'd like to have it more organized with shelving, but it works well enough for now.
 And here's the corner where I shoot all of my pictures now. It's so lovely to have this space all ready to rock and roll at a moment's notice. Back when we lived in California in an insanely overpriced 1 bedroom apartment, I just dreamed and dreamed of space and light like this. It's heaven.
 Along with making matching his and hers mouse pads, I decided it was high time to recover this desk chair. I have
  The bust was too big and the skirt seemed to be a reverse high-low (high in back, low in front - which totally drives me crazy). I'm so picky with how clothes fit! After sitting in my closet for over a year, it was time to get refashioned. Since reworking this skirt late last week, I've worn it several times!
 Here's what I did:
 The refashion was super speedy with the biased tape and my rolled hem foot. I believe I got it done in under 30 minutes, which is incredibly fast! Chris couldn't even tell where I reworked the skirt, so that was also a major bonus.
 The plaid has tons of fun colors in it, so it works perfectly with my summer and fall pieces. Here are the outfit's details:
 On Saturday September 1 from 2-4pm, I will be teaching a modern calligraphy workshop out of my home in Draper, Utah. I would love to see you there!
 This week, I'm looking to organize all of our office stuff in shelves and the closet, cleaning up the debris that quickly collects in this room. Hopefully we'll be able to work out a system for keeping the paper clutter down.
 At the event, they challenged us to find something in the store to work into a DIY. I wasn't planning on participating until I found this
  The tote took about 5+ hours to complete because I took my time and did things right the first time. Leather is a bit tricky to work with, so here are a couple of tips to help if you're thinking about working with leather any time soon:
 The pillow already had a zipper set in, so I worked around that. It's super roomy, so this tote could easily work as my diaper bag, but transition effortlessly into a weekend tote.
 I added lots of pockets for compartmentalizing my stuff and the kids' stuff. I used a charcoal grey canvass for the lining instead of the typical black. It looks clean, but it's not so dark in there that you can't find your black pen (a dilemma of mine all the time).
 Doing the leather bottom and handles wasn't as hard as I thought. It helped to have a walking foot, leather needle and kick-trash sewing machine. This project is evidence of how much I love my new sewing machine.
 I can't help but check out the As-Is (Chris and I call it AZEEZ) every time we're at Ikea, and we always find great items for DIY projects: my
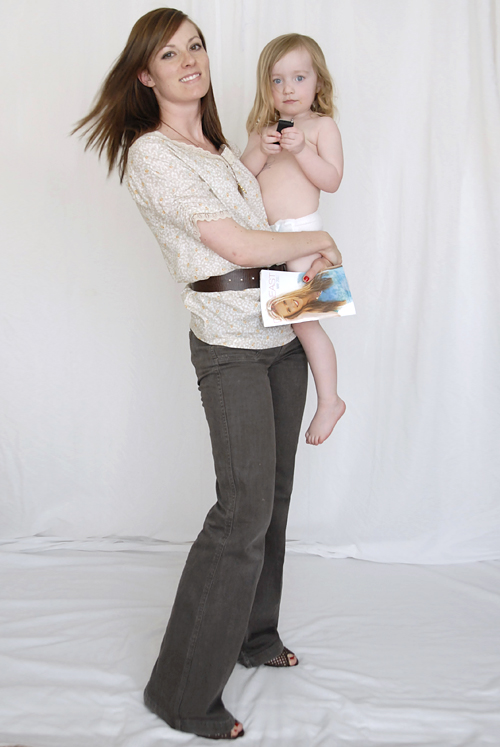
 So I made darts. I lined up the seams and laid out my favorite pair of jeans on top and marked out my darts. The refashion ended up taking 2 hours instead of 6. I'd say that was a win. They're at about a cigarette width at this point, but I may have hemmed them too short for that, so I think I'm going to go back and make them more of a skinny jean.
Yay for a new pair of pants! I've been whining to Chris about how I only have 2 pairs of jeans that fit. Now it's three.
So I made darts. I lined up the seams and laid out my favorite pair of jeans on top and marked out my darts. The refashion ended up taking 2 hours instead of 6. I'd say that was a win. They're at about a cigarette width at this point, but I may have hemmed them too short for that, so I think I'm going to go back and make them more of a skinny jean.
Yay for a new pair of pants! I've been whining to Chris about how I only have 2 pairs of jeans that fit. Now it's three.
 I think if I actually exercised I could fit into my old jeans again, but I'm just too darn lazy for that.
Outfit Details:
I think if I actually exercised I could fit into my old jeans again, but I'm just too darn lazy for that.
Outfit Details:

 I just don't feel like wearing summery clothes at the moment. The shoes don't really match, save for the little hint of yellow in the necklace. These shoes are looking very ratty, though. They need a bit of a makeover at the moment.


 Second, we bought a little toy that's been a joy to use. We've been so tired of over-sugared soda and flat club soda, we decided to buy a
  So far we love our siphon. We just mix whatever into our fizzy water and enjoy. It's been particularly wonderful with the little heat wave we've had. It gets to about 85 degrees up here in the mountains, so it's not bad, but it's definitely hot enough for a refreshing drink. See the recipe below for yesterday's tasty cocktail.

 As you can see, I have a giant pile of clothes in the corner. That's my refashion/tailor/alter pile. It grows every day. The sooner I get on it, the sooner I'll have new clothes to wear. It's a bit daunting, but I think I'll have everything ready to rock and roll in this space in no time.
The goal: create an inviting space for crafting. I need to open up as much table top space as possible by wall mounting everything that can be mounted on the wall. Put supplies and tools in bins and boxes that are easy to access and put away. This room serves many purposes: sewing, bookbinding, calligraphy, leather crafting, painting and more. I need to keep it as organized as possible so I can make those transitions as effortlessly as possible.
Follow along on instagram @melissapher #zerobudgetproject for sneak peeks on progress, and check back here on Friday for the big reveal.
As you can see, I have a giant pile of clothes in the corner. That's my refashion/tailor/alter pile. It grows every day. The sooner I get on it, the sooner I'll have new clothes to wear. It's a bit daunting, but I think I'll have everything ready to rock and roll in this space in no time.
The goal: create an inviting space for crafting. I need to open up as much table top space as possible by wall mounting everything that can be mounted on the wall. Put supplies and tools in bins and boxes that are easy to access and put away. This room serves many purposes: sewing, bookbinding, calligraphy, leather crafting, painting and more. I need to keep it as organized as possible so I can make those transitions as effortlessly as possible.
Follow along on instagram @melissapher #zerobudgetproject for sneak peeks on progress, and check back here on Friday for the big reveal.

 I sewed it similarly to my
  Remember, this below is a reminder of what it looked like before:
 Most of my work was putting guitars and artwork on the wall. Even after I put up my pretty
  Here's what Felix was up to during the shoot. He was excited to be in all the fun. This space is easy to work with. The McBride's left great window treatments, so I didn't feel the need to hang curtains (although I may later). They also left most of the upstairs painted a bright, warm grey. It doesn't translate as well into photos, but it matches pretty much everything and it's not a bandaid tan. I feel like it keeps the space light, airy and open.
 This interior wall is where I would like to place a piano, so the bench is a good place marker for that. Eventually I would like to reupholster the bench in a tangerine leather with natural wood legs, but that may be down the road. Chris doesn't mind practicing his acoustic here. The art fills the space nicely, but I do think I will be adding more artwork along each side as we get more settled. I've been brainstorming a potential series recently, so I may use this space to hang a couple of those pieces. The bench I found at a thrift store ages ago, the Poang chair in the corner was from As-Is last year, the lamp is from ikea and the art from Art.com.
 This expedit cube was originally in the living room shanking one of the sides of the entertainment center, but this space needed something to keep it from feeling barren. This is mostly knick knacks, magazines, a few favorite books and a cheap bongo drum that Felix can't leave alone (it's so cute to see him jam with Chris!). The suitcase is another place marker. Chris has been thinking about getting another guitar sometime down the line, so I hesitate to fill the space with a big gallery.
 The elephant was from
  The trumpet is Chris's. He played for several years, but hasn't picked it up in ages. It's far too beautiful to keep in a box, so I thought I would put it on display. It's likely that Chris will actually pick it up and play if it's out. Heck, I picked it up and played it the other day. I actually got a decent sound out of it, and it was HARD to do! The succulents are an assortment from Ikea and home depot.
  The panton S chairs (scored at an antique shop last year) were at each end of our dining table, but they scratch up the flooring in our new kitchen, so they've been relegated to the music room. They add a nice modern feel to the room, but I would love to have a modern bench that spanned the room here. It would be great for small gatherings and jam sessions.
 The chairs work well for now. The pillows I made (
 I did the far left painting back in college, the center intaglio print is by friend Emily Dennis and the right photo is one of Chris and my engagement photos. My mother-in-law took the photo, I cross-processed them and framed it in my great-great-grandmother's frame. I love this frame - it's a circle inside the square (which I have engraved on my wedding ring).
 The globe is a hand-me-down from my parents. It's super old - when the U.S.S.R. was a thing and colonies still existed. The side table is on loan to us until Shelley (my sister-in-law) settles down. She made it at her grandpa's house last summer. He's an architect and makes the most amazing stuff. I would love to find something similar that I could permanently use in the room.

 We didn't do a single thing to the entryway besides decorate it. I found the basket at DI a few years ago, and the
  From left:
  The fantastic and really real and awesome