Happy Halloween, everyone! I'm so excited for trick or treating tonight! It's the first year we'll be able to take Penelope out and she's so excited! I finally convinced her that she's not going to be spiderman; although if you ask her what she's going to be for Halloween she quickly replies, "Spiderman!"
It's not that I don't want her to dress up as spiderman, I just already bought the stuff for her costume by the time she changed her mind! Typical, right? I keep telling myself that if she absolutely hates her costume I'll gladly go to Target & pick up a spiderman outfit for her. So far she hasn't been hesitant to put on her witch costume in the least. She looks super adorable, I might add!
Here's the breakdown for her outfit:
tights & turtleneck - I found them at Walmart; since it's practically impossible to find green things for girls, I dyed them. I added the stripes with black paint.
tutu - I made this from 6 yards of tulle, elastic & some felt. I've considered cutting it down but that's not likely to happen. It's one of those things that she can grow into.
broom - I spray painted a dowel black, cut about 14 inches of leather fringe & wrapped the dowel with the leather, securing it with an upholstery tack.
hat - I bought this as-is at Walmart, which just so happened to be the fourth store I went to for a hat! How come plain kid's witches hats are nearly impossible to find? I don't want pink sparkles or nasty faux hair sticking out of it.
Overall this costume took WAAAY too many hours to make. The broom was fast, the dyeing was relatively fast, as were the stripes, but the tutu took forever. A lot of it had to be hand-sewn. Not sure I'll put in this amount of time on a costume ever again.
So it turns out she just wanted to fly for Halloween - this is when we discovered that we could convince her to be the Wicked Witch as opposed to Spiderman. She got so excited about the idea of flying around on a broom! After she got back from school on Friday I showed her the broom & she lit up, "For me!?! Thank you, mommy, thank you!!"
Immediately she put the broom between her legs & the biggest look of disappointment flooded over her face! She looked at me & with a sad little voice said, "Mommy, the broom doesn't work. I'm not flying!" Oooohh, my sweet Penelope. You are too much.
I'm going as Dorothy for Halloween this year. Turns out I've had the perfect Dorothy costume in my closet for some time. I bought the perfect blue dress eons ago & what girl doesn't have red heels? What are you going as?
I'm working on the finishing touches for Penelope's costume. It's by far the most work I've put into a costume. EVER. Originally I was going to make her a dino costume, then in the middle of doing that, she decided that she had to be spiderman. OH GEEZ. I tried to convince her that Dino Squad was cooler, then I tried to convince her that there was a green spiderman, THEN Chris had a stroke of genius: the wicked witch of the west. I'm already dressing up as dorothy for a party tomorrow, I also have a lot of green, I just need to encorporate black.
It wasn't too hard to convince her that she wanted to be an evil witch. Witches have brooms & can fly. Turns out she just wants to fly somehow for Halloween.
I dyed some white cotton stockings green & once we figured out that she's going to go as the Wicked Witch, I needed stripes. I used Liz's idea for painting stripes with masking tape, but I stretched the stockings over a round mailer in order to get the lines to go all the way around. They're even enough. I'm really excited to reveal the rest of her costume! It's going to be awesome. Or an awesome failure.
Happy Halloween Weekend!
The plan was to make a knee-length knit jersey dress with dolman sleeves, the bodice on the bias, an elastic waistline (using method from P's most recent refashion) with mid-length sleeves. My plan was hugely thwarted when Penelope found access (who knows how) to my scissors & massacred a good portion of my fabric. I knew the bias was completely out, but hopeful that I had enough room for a regular top. BARELY! I had to adjust the neckline & couldn't get as long a sleeve all due to some poorly placed gashes. Now I know I need to store my scissors on a stand-alone shelf at least 7 feet off the ground. Currently they're only 5 feet off the ground.
Also, I need to order more than one yard of fabric if I'm planning on making a dress. I'm sure I would have had I had the above vision when I bought the fabric.
With the restrictions I already had, I decided that I needed to be meticulous in my planning. Using my refashioned dolman top as a starting point, I traced the outline onto the Swedish Tracing Paper that Pamela gave me* at Sewing Summit. She told me that this stuff was awesome. It really is. I've used Glassine in the past, but this stuff is WAY better.
Once I got a pattern that I was pretty happy with, I was tempted to just get going on my dress, but I was smart & held back. I got out a similar jersey from my stash - I found this at JoAnn's in their scraps pile for like $2 - and whipped up a top. Thank goodness I did! I found the sleeves were too tight for the look I wanted & the body was much too loose, too. I made the adjustments on the top (besides the arms) and then translated it onto a new pattern piece. Click here to see more of the above outfit.From there I cut out my skirt & bodice pieces & sewed them together. I used the same technique for gathering & attaching the gathered skirt as I did with Penelope's granny polo dress. It was perfect. Again! The waist is a bit loose for wearing without a belt, but I'm really happy with how it turned out. If you look closely you can tell that I hadn't hemmed the sleeves or the bottom of the dress when I took this picture. Daylight was running out yesterday, so I thought I'd grab a quick pic. I spent last night vegging & hemming. I'm wearing this outfit today, so check out the fashion blog for the rest of the outfit details.
My new dress turned out fantastic! It's definitely bright & cheery enough for Spring & Summer, but I think it's also easily styled into a fall ensemble. Just add more browns & neutrals to the dress. It's light & airy so I know this will become a staple in my wardrobe during those hot summer months!
*Swedish Tracing Paper was given to me as a gift from NearSea Naturals at Sewing Summit. I just so happened to love it!
I made this top last night while trying to figure out a pattern for a dress I'm working on. I'd say it turned out pretty well. I still need to hem the sleeves, neckline & bottom.
The last time I visited my in-laws I helped my sister completely overhaul her room. We threw out about 6 heaping laundry baskets worth of old clothes and garbage! It was epic to say the least. I scored some clothes from Brooke in the process & this top was one of them. Free clothes? Twist my arm, why don't you?
I liked the color, but not necessarily the style. I liked the dolman sleeve, but it was SO wide that you could practically see my belly button if I lifted up my arms. I really don't want to wear extra layers to cover up if I don't have to, so that HAD to change. Also, what's up with the muffin-top hider waist band thing? It looked a little late '90s & not in a good way. The band was wide & low enough that it just hugged my bum. Not my style.
I chopped off the ribbing, took in the sides, took in the arms & added a vintage floral cuff to the sleeves. I had a fabric swatch from my mom (literally from the '80s) that matched the top perfectly, but I like the dimension that this not-so-matchy floral fabric adds to the top. I did a blind stitch for the hem & part of the sleeve. Can you tell I'm falling in love with the hand-stitched blind hem? It really adds a lot of polish to the finishing of the garment that my sewing machine can't. It looks a lot less like a Home Ec project. This top is asymmetrical with the front & back & just long enough for me to wear without an undershirt, but short enough that it gives the appearance of a crop. I like.
What do you think? I think it looks great for being a hand-me-down. CLICK HERE for the full outfit & details.
As promised, but a week late, I give you the boy version of Penelope's dino party suite.
I changed a few minor details, the color, the script font is now my handwriting & the heart in the middle is now a star. This is definitely more suitable for a boy than my pink invitation suite, but It could still totally work for a girl. Hope someone out there gets some use out of this freebie! Send me pics if you ever end up using any of my downloads! I'd love to see how you use them!
This tutorial/freebie is free for personal use and should not be distributed/republished without my consent. Altering the file NOT ALLOWED. If you would like to use this tutorial for commercial purposes, please email me. Thanks!
I found this awesome rose-bud women's polo at the Sewing Summit thrift excursion for $2. The fabric is soft & the print is so dainty, I just fell in love. Originally, I was planning on doing some transformation for me, but I never quite got the vision for it. As I checked out at DI & showed off my sweet find to my Sewing Summit friends, a few of them didn't get the vision either.
This was meant to be a little girl's dress. A few nights ago I was a bit bored & craving a little sewing project so I got it out & started looking at it. Originally I thought about doing a little scoop neck sheath for Penelope, but thought the finishing might look a bit shoddy if I try to take off the polo collar. Penelope was in the room, so I had her try on the untailored shirt & discovered that the neck was perfect as-is. If I buttoned it all the way to the top, it looked like a normal, meant-to-be-worn-by-a-toddler neckline. I used the same process as Penelope's little black dress from two years ago, but made a few minor changes that ended up making a huge difference.
Here's how I did it:
cut off the arms
cut off the skirt (the trunk, just below the arm pits)
laid one of Penelope's shirts (that still fits) and cut out the silhouette of the arms & bodice, leaving about an inch of seam allowance all the way around
turned the bodice inside out & sewed up the sides
fitted the bodice to Penelope & made markings for the sleeves (you want them at a slight angle)
sewed a baste stitch with elastic thread in the bobbin at the loosest tension all the way around the skirt for the skirt to gather. *
turned skirt inside-out & bodice right-side-in
pinned the skirt to the bodice, lining up the side seams then finding centers all the way around
sewed a zig-zag stitch (3mm wide 3mm long) with the elastic bobbin with the original skirt baste stitch in the middle of either side of the zag
turned right side out
hemmed the sleeves using a slip stitch (or blind hem)
*I can't remember where I saw this little tip for gathering, so if you know it, please send the link to me! This tip was SO incredibly helpful! I'll never gather without an elastic thread ever again.
It was sort of a happy accident that I sewed the two pieces together with the elastic bobbin. I usually just do zig zag stitch (my machine doesn't have a stretch stitch), but it's never as stretchy as I want it & often times looks pretty wonky. Using the elastic thread in the bobbin not only gave me more stretch, but it also pulled the stitches straighter, so when I turned the garment right side out, it looked nicely finished. I'm DEFINITELY going to use this technique in the future. Maybe for a project for me?
I'm so proud of this project. It's such a sweet little girl's dress! Penelope has refused to take it off since I finished it = job well done!
It's getting harder & harder to get her to sit still these days. I wish I could steal all of her energy & use it as my own.
I'm loving this season of Project Runway. We don't have cable so I anxiously await Saturdays when the new episodes go live online. My two season favorites are Viktor & Anya. They both have great taste & have been incredibly consistent through each challenge. In addition to the challenges I look forward to seeing Anya's earrings each episode! She has the most fantastic earrings. I need to build up the courage to make some giant disc earrings. My absolute favorite, though, is her winged pair of earrings. They're so cool. I can't seem to find any pictures online, but if you watch last week's episode (where she pairs up with Burt). You'll see them. They're gorgeous.
I haven't been on an actual search to find those specific earrings, but when I saw Nikki post about Yozo Craft & their adorable charms, I thought I'd see what they had. Sure enough, they had a really cool fern charm & thought it'd be adorable paired with a little rose. I don't typically wear dangle earrings, so I glued a regular post back to the rose & joined the rose & fern leaf together with a jump ring. Altogether costing about $3.50 for the pair of earrings. Now that I'm looking around, these wing charms would've worked nicely, too.
Here's how I wore the earrings on Wednesday. Reader Tamara found some earrings similar to Anya's at Forever 21, They're probably the closest I've seen to what she wears.
We're moving. Chris took a job in Provo last week!
I was so looking forward to a quiet winter without the stress of a newborn or a new place, but apparently that wasn't in the cards for us. I'm both excited & stressed about our relocation, but I'm convinced it'll be for the best.
Before the madness of boxing & packing happens, I thought I'd clean up & take some pictures (and video) of my studio. I'm mostly doing this so that when I'm packing & going crazy with the stress of moving, I can look at these pictures & remember how clean things once were. I'll do my best to cite sources, but if there's something I've left out, let me know. I'll do my best to respond in the comments.
We'll start with the studio-side of the room. This is my craft desk where I take my table top shots.
I attached paper to the wall with bulldog clips for my photography backdrop & added plexiglass atop the lower paper. It's the perfect permanent backdrop. I can always wipe up my spills & messes off the plexi & snap away. Also I like the Apple-esque reflective effect it gives to my photos.
Lunch box stores my calligraphy supplies.
I love that this globe has markers indicating how old it is. The USSR & other colonies are on here. I believe this globe is circa 1979-ish.
Here's my sewing space. I just bought the thread rack right before we found out we were moving, so that's just hanging out there. I plan on wall-mounting it at our new place (wherever that new place may be!).
I love having my fabric stash organized by color palette. Each basket is as follows: warms, cools, greyscale, browns. The other side is separated out by large cuts & projects needing to get done.
Here's my desk. I've got the 27" solid state iMac (SO FAST!), Wacom tablet stacking robots & a stash basket on the actual desk. I mounted two shelves with a break between them right behind the computer. This allows us to store & have easy access to all of our hard drives & for me to easily move the Silhouette cutter onto the desk when it's in use.
I've got a few treasures on the shelves themselves.
vintage clock, $10 etsy
book: It Must Be Hard To Be A Mother, gift from a friend
This might be my favorite corner of the whole room. It's my Christopher shrine. On the left is a painting done of him when he was a baby. The middle two paintings are mine and the right is a stenciled self-portrait on a suitcase. He used this suitcase in college & made it long before we ever met. I love this stencil of him.
ironing board cover, Cath Kidston from Sewing summit
Like the goiter on the side of the ironing board? Yeah, turns out our ironing board is not a full-sized ironing board. Maybe one day I'll upgrade to a full-sized ironing board.
I love baby Chris's striped shirt & chubby cheeks. The yellow border is adorable, too.
This explains Chris perfectly when we met. This is a stencil of him rocking out to music. I love everything about what this suitcase says. Perhaps we could collect more suitcases & stencil the entire family!
Here's a little video tour of the room. Please excuse my awkward pauses. I can't seem to operate a video camera & talk at the same time.
I was asked if I was going to be paying with food stamps at the cash register today at the grocery store. I've never been asked that before, so it makes me wonder. . . is this what it looks like to be on welfare? Granted, I had a grandpa cardigan & an oversized pashmina on, but everything else was the same. Was it the heels that tipped her off or was it the two kids in tow? Scratch all that. I bet she could tell that I spent less than $25 on my entire outfit.
earrings: made by me, $2
blazer: thrifted, $4
necklace: RiteAid, in high school?
top: Shade, $10
cords: Gap, gift from mom
shoes: Payless, $5
TOTAL: $21
Anyone following Project runway? These earrings are an ode to Anya's cool wing earrings. I want to steal those earrings right off her ears. Also, I might have a little girl crush on Anya. She's got serious style.
I found this top at a clothing swap months ago & wore it for the first time today. I like how it looks, but not how it sounds. It makes a plasticky rustling noise as I move.
I found this striped granny shirt & refashioned it ages ago; I'm just getting around to sharing it with you now. It definitely screams summer, so it's going into hibernation until fall & winter are over. This probably means I won't wear it for another 9 months seeing as winter has practically hit here in Salt Lake & will be here to stay until mid July of next year. What's up with these long winters we've been having?
This top was a $4 thrift store find. I fell in love with the stripes & the gold button details on the shoulder. I took in the sides & shortened the sleeves. I didn't feel the need to hem the sleeves as the fabric just rolled anyway.
This refashion took very little time to do. 30 minutes tops.
I'm already getting excited for Spring 2012. You?
It was Chris's Birthday on Saturday! Sadly enough, we spent the whole day car shopping. It's probably the worst thing ever, besides getting all of your teeth pulled all at once. We had already planned on having family over on Sunday so we treated Sunday night as his real birthday. We had his brothers & sisters over for dinner, cake & a rousing game of Bridge. Chris's request was to have chocolate instead of cake. I found this to be the perfect mixture of both.
I'm over on This Week For Dinner sharing A flourless chocolate cake recipe. Believe me, you don't want to miss it. It's called Chocolate idiot cake & it only has 5 ingredients. It's definitely my kind of cake.
Back to Chris. I just want to say how happy I am that he's here and in my life. He's hilarious, smart, goofy, an awesome dad & is really, really strong. Here are a couple of things that I love about him:
He's a fast learner & his enthusiasm for learning is contagious
He's a fantastic guitar player, even only a year after starting (and teaching himself!)
He writes the best songs that make me smile
He's a fantastic dad & doesn't shy away at a chance to play/cuddle with the kiddos
As promised, here are two video tutorials to hopefully help your hand sewing get better. I don't hand sew too incredibly often, but when I do, I always use these methods. After attending Gertie's tailoring class at Sewing Summit, I'm convinced I need to do more hand sewing in my garment construction. Also, I'm convinced that Gretchen should take up bookbinding.
This first method is for keeping your tails in place when you're hand sewing with one thread. I'm not entirely sure what to call it, so for lack of a better phrase, it's the stay-put tail. It keeps the thread from slipping out the eye of the needle! I don't bother to do this if I'm doubling up the thread.
This second technique is about adding thread if you run out. I like it because it's low profile (doesn't create giant bumps or lumps), incredibly fast and sturdy. It also allows me to sew with smaller lengths of thread to avoid tangles. Do you hear Felix's cooing?
Hope these video tutorials are helpful! I hope to make more video tutorials in the future. Is there anything you'd like to see specifically? Feel free to leave it in the comments or email me.
Penelope's little gold slippers have been looking pretty ratty for some time. I don't have any gold shoe polish & I really have no clue how to get rid of the scuffs on the toe. I had gold shoes like this once & ended up buying gold spray paint & clear shoe polish to get them looking new again. That never seemed to last long enough, though.
So, of course the natural remedy is to cover it up in glitter. I like this remedy. It's messy, it involves lots & lots of glitter & it reminds me of wizard of oz or something like that.
Susan has a tutorial on how to do it. I used PVA glue instead. I don't have modge podge (gasp!), but PVA is pretty much the same, if not better. PVA is what I use for bookbinding & pretty much everything else. It's my favorite kind of glue. Possibly ever.
Susan recommends doing multiple layers, which I think I might do. It would be good to make sure that glitter stays on. Ashlee also glitterfies some old shoes of hers, I love how she kept the bow the same. Hope you have a great weekend! I'll be colorizing Penelope's Dino brunch suite in a more masculine color palette! Check back on Monday for the download.
Two years ago when my parents relocated to Charlotte, NC; my mom gave to me a book that still means the world to me. It's my great-great grandfather's resource book for sign making. Well, two weeks ago my grandma added to this dear gift. She gave me my great-great grandfather's oblique calligraphy pen.
I'm in the proces of finalizing my online calligraphy course material and a lot of other stressful things, so it's just perfect that my grandma would give it to me at this time.
Truly, I feel loved by those beyond this world and I never thought I'd get so emotional over a pen.
This is essentially what I wore in my refashioning class at Sewing Summit. I wore different shoes, though. I just couldn't find the other pair when I got around to taking this photo. I really need to unpack from last weekend.
I used every spare minute before Sewing Summit to refashion pieces I've been meaning to get to for ages. Gosh, I think I've had this number for at least 8 months. If I remember correctly, I got this at Savers in Phoenix for something like $6.
I didn't like the shape, red details or the fit. I did like the circle skirt & checked pattern, but that was about it. When I looked at it I knew I wanted to refashion it, but I originally thought that I needed to just update the sleeves, fit & neckline to something a little more modern. Last week it hit like a ton of bricks: it needs to be a midi skirt instead. Once I decided on that my work refashioning this little number took about 30 minutes. Lickety split, eh?
I just cut out the skirt just below the waistline and attached elastic to the waist, using leftover elastic from my leather belt project*. Just to break it down, here's what I did:
measured my waist with the elastic
cut out elastic & sewed ends together
divided elastic & skirt waist into fourths & pinned together
pinned elastic wrong side out to outside of the skirt which was right side out
evenly pinned gaps of skirt every 2-3 inches along elastic
stretched elastic to match up with skirt waist as I sewed my longest straight stitch
ironed & wore
I think it's a big improvement on the original & I love that I now own a midi-length skirt! I'm just over the moon that they're super hot this fall. The above outfit is what I wore during my Refashioning class at Sewing Summit. The class went really well, too! We had a great time making fun of the gross things you can find at thrift stores. See outfit details here.
*Elastic provided by rufflefabric.com
It's not often I work on masculine design projects, but when I do, they're usually for Chris. It's always great to work on these things, because it forces me to go outside of my norm. I end up doing more design research & I usually find some great design sites in the process.
Chris needed a portfolio site to showcase his recent work in programming. In the last year, he's transitioned away from finance & moved towards programming web apps that manipulate data. It's really cool to see his excitement about what he's learned or accomplished each day when he gets home from work. He's really awesome at learning new things.
Chris naturally did all of the programming from scratch and I did the design work. I used a more neutral pallette with pops of muted color, inspired by fashion's fall brights paired with neutrals. I manipulated LostType's Ranger font for Chris's logo & remixed a gorgeous Bokeh photo from Teleyinex to fit Chris's color scheme. I can't emphasize enough how awesome the fonts are on LostType are. I've talked about it before & I want everyone to know about the insane talent behind that site. Chris programmed some really tricky little details into his site that I'm just in awe over. I love how his site turned out. Click here to check out Chris's Portfolio.
This last weekend was insane. I don't believe I went to bed before 2 a.m. from Thursday through Sunday. There was just way too much to do & too little time to do it. Friday, as part of the Sewing Summit festivities, I led a group of ladies around downtown Salt Lake on a little thrift/vintage shopping excursion. Hands down I was the one that scored the most loot. I left a lot of fabulous stuff for everyone, but I found so many great things I just couldn't help myself. It's been a while since I've done a Thrifty & Chic feature, so I thought I'd do that today since I'm still trying to get on top of laundry, dishes, sleep, projects, etc.
I found these never-been-worn moccasin hush puppies for $23 at my favorite vintage shop: MisC. MisC isn't like Goodwill or Salvation Army. The owner carefully curates her little shop keeping trends & seasons in mind.
I don't shop there all the time, but when I'm looking for something different, specific & in near-perfect condition; I go there. Part of me was hesitant to buy these shoes because I'm used to finding deals for under $6, but come on! Where would I ever find a pair of shoes quite like these for even $23?
Have you found any good deals lately? Just recently my sister in thrifting, Laura, emailed me how she found an amazing modern wooden kitchen for $17. I won't lie, I'm so incredibly jealous. Feel free to share links in the comments! I'd love to see what you've scored lately.
Just finished my business cards! It's been a good 5 months since I've had up-to-date business cards and now I do. I'm excited to finally have some business cards I'm proud of giving away.
It took me a long time to figure out what I wanted to do. I wanted something nice & thick, but didn't have the budget to have them letterpressed. I have had my heart set on a 300 GSM paper, but unfortunately no digital printer (aka the cheapest form of printing) will print anything thicker than standard card stock. Most printers won't even print on uncoated paper, which is also what I've been looking for.
Instead of getting them printed, I decided to get stamps made & stamp on the paper of my choice. I found a Stratton Bristol 4-ply paper (SO THICK!) at my local art store & cut that up. I'm SO happy with how these cards feel. They're soft, smooth, thick & ultimately delicious. Paper can be delicious. This stuff is.
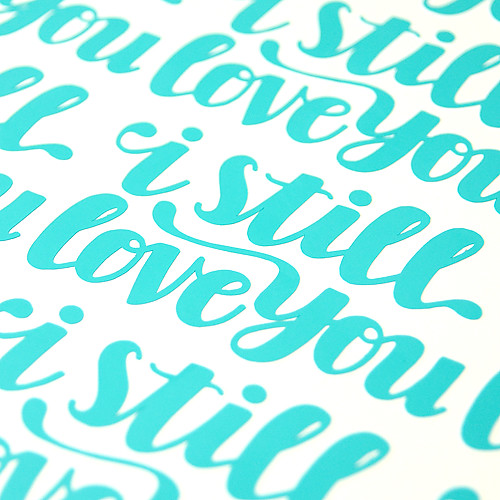
I kept my information as simple as possible to keep the stamp up to date as long as possible. I think this will last me a while. Nice thing is, I can stamp my info on ANY surface (hello wood biz cards!) in ANY color. I did my standard & cut out I Still Love You stickers, but instead of putting it all inside an envelope, I totally copied Nikki's idea (pretty sure the thought of stamping my design was also inspired by Nikki) & used washi tape (can be found here) to attach them to the back of the business card.
I'm excited to pass these out this weekend!
I'm over on Rhodes Bread Blog today sharing a little experiment I did the other day - Salted Caramel Apple Cups. They're TASTY. I'm having a hard time not eating them all! The salted caramel frosting is to die for. It's perfect for brunch, or dessert.
This week is in full-swing with preparations for this weekend's Sewing Summit. I've been hard at work on my business cards (I'll share once they're done) & have come across a few road blocks. Chris & I recently upgraded to a Solid State 27" iMac (HOT!!) and while Penelope was at preschool this morning I discovered that Mac OS X's Lion does NOT play well with the CutMaster for CraftRobo Illustrator plugin. Once I figured this out, I was in a panic. What the heck am I going to do?!? How on earth am I going to use my Silhouette now!? How am I going finish my business cards in time for Sewing Summit?
I spent a frantic two & a half hours searching online for CraftRobo patches or new downloads, trying to export & tracing in Silhouette Studio & emailing friends to see if they could convert the files for me. I found out: CraftRobo won't be coming out with an update until November 2011 (Serious?), tracing in Silhouette was not promising and I wasn't getting responses from friends soon enough. Just as I was about to give up, @Drew_Noland piped up on twitter & suggested I read an article by Maggie Muggins Designs about the subject. The first part of the blog talks about the plug-ins (which don't work for Mac at the moment), but at the end was the saving grace. You can import graphics into Silhouette Studio if you export your Illustrator files as an AutoCad Interchange File or .DXF. A couple other things: make sure your graphics are outlined, not filled & not compounded or grouped before exporting.
Hallelujah. My sanity has been saved. I just thought I'd post this little tidbit up here in case anyone else finds themselves in the same predicament as I. Hopefully this can help someone else!
 It's not that I don't want her to dress up as spiderman, I just already bought the stuff for her costume by the time she changed her mind! Typical, right? I keep telling myself that if she absolutely hates her costume I'll gladly go to Target & pick up a spiderman outfit for her. So far she hasn't been hesitant to put on her witch costume in the least. She looks super adorable, I might add!
Here's the breakdown for her outfit:
It's not that I don't want her to dress up as spiderman, I just already bought the stuff for her costume by the time she changed her mind! Typical, right? I keep telling myself that if she absolutely hates her costume I'll gladly go to Target & pick up a spiderman outfit for her. So far she hasn't been hesitant to put on her witch costume in the least. She looks super adorable, I might add!
Here's the breakdown for her outfit:

 Immediately she put the broom between her legs & the biggest look of disappointment flooded over her face! She looked at me & with a sad little voice said, "Mommy, the broom doesn't work. I'm not flying!" Oooohh, my sweet Penelope. You are too much.
I'm going as Dorothy for Halloween this year. Turns out I've had the perfect Dorothy costume in my closet for some time. I bought the perfect blue dress eons ago & what girl doesn't have red heels? What are you going as?
Immediately she put the broom between her legs & the biggest look of disappointment flooded over her face! She looked at me & with a sad little voice said, "Mommy, the broom doesn't work. I'm not flying!" Oooohh, my sweet Penelope. You are too much.
I'm going as Dorothy for Halloween this year. Turns out I've had the perfect Dorothy costume in my closet for some time. I bought the perfect blue dress eons ago & what girl doesn't have red heels? What are you going as?
 I dyed some white cotton stockings green & once we figured out that she's going to go as the Wicked Witch, I needed stripes. I used
  I really think this dress is perfect for any season. I could easily pair it with bright summer colors or mute it down with some warm fall browns.


 With the restrictions I already had, I decided that I needed to be meticulous in my planning. Using my refashioned dolman top as a starting point, I traced the outline onto the Swedish Tracing Paper that
  I made this top last night while trying to figure out a pattern for a dress I'm working on. I'd say it turned out pretty well. I still need to hem the sleeves, neckline & bottom.


 Just updated this hand-me-down top to the 21st century.


 I liked the color, but not necessarily the style. I liked the dolman sleeve, but it was SO wide that you could practically see my belly button if I lifted up my arms. I really don't want to wear extra layers to cover up if I don't have to, so that HAD to change. Also, what's up with the muffin-top hider waist band thing? It looked a little late '90s & not in a good way. The band was wide & low enough that it just hugged my bum. Not my style.
 I chopped off the ribbing, took in the sides, took in the arms & added a vintage floral cuff to the sleeves. I had a fabric swatch from my mom (literally from the '80s) that matched the top perfectly, but I like the dimension that this not-so-matchy floral fabric adds to the top. I did a blind stitch for the hem & part of the sleeve. Can you tell I'm falling in love with the hand-stitched blind hem? It really adds a lot of polish to the finishing of the garment that my sewing machine can't. It looks a lot less like a Home Ec project. This top is asymmetrical with the front & back & just long enough for me to wear without an undershirt, but short enough that it gives the appearance of a crop. I like.
What do you think? I think it looks great for being a hand-me-down.
I chopped off the ribbing, took in the sides, took in the arms & added a vintage floral cuff to the sleeves. I had a fabric swatch from my mom (literally from the '80s) that matched the top perfectly, but I like the dimension that this not-so-matchy floral fabric adds to the top. I did a blind stitch for the hem & part of the sleeve. Can you tell I'm falling in love with the hand-stitched blind hem? It really adds a lot of polish to the finishing of the garment that my sewing machine can't. It looks a lot less like a Home Ec project. This top is asymmetrical with the front & back & just long enough for me to wear without an undershirt, but short enough that it gives the appearance of a crop. I like.
What do you think? I think it looks great for being a hand-me-down.  I changed a few minor details, the color, the script font is now my handwriting & the heart in the middle is now a star. This is definitely more suitable for a boy than my pink invitation suite, but It could still totally work for a girl. Hope someone out there gets some use out of this freebie!
 This was meant to be a little girl's dress. A few nights ago I was a bit bored & craving a little sewing project so I got it out & started looking at it. Originally I thought about doing a little scoop neck sheath for Penelope, but thought the finishing might look a bit shoddy if I try to take off the polo collar. Penelope was in the room, so I had her try on the untailored shirt & discovered that the neck was perfect as-is. If I buttoned it all the way to the top, it looked like a normal, meant-to-be-worn-by-a-toddler neckline. I used the same process as
  Here's how I did it:
 *I can't remember where I saw this little tip for gathering, so if you know it, please send the link to me! This tip was SO incredibly helpful! I'll never gather without an elastic thread ever again.
 It was sort of a happy accident that I sewed the two pieces together with the elastic bobbin. I usually just do zig zag stitch (my machine doesn't have a stretch stitch), but it's never as stretchy as I want it & often times looks pretty wonky. Using the elastic thread in the bobbin not only gave me more stretch, but it also pulled the stitches straighter, so when I turned the garment right side out, it looked nicely finished. I'm DEFINITELY going to use this technique in the future. Maybe for a project for me?
 I'm so proud of this project. It's such a sweet little girl's dress! Penelope has refused to take it off since I finished it = job well done!
 It's getting harder & harder to get her to sit still these days. I wish I could steal all of her energy & use it as my own.
 I haven't been on an actual search to find those specific earrings, but when I saw
 We'll start with the studio-side of the room. This is my craft desk where I take my table top shots.
 I attached paper to the wall with bulldog clips for my photography backdrop & added plexiglass atop the lower paper. It's the perfect permanent backdrop. I can always wipe up my spills & messes off the plexi & snap away. Also I like the Apple-esque reflective effect it gives to my photos.
 Lunch box stores my calligraphy supplies.


 I love that this globe has markers indicating how old it is. The USSR & other colonies are on here. I believe this globe is circa 1979-ish.
 Here's my sewing space. I just bought the thread rack right before we found out we were moving, so that's just hanging out there. I plan on wall-mounting it at our new place (wherever that new place may be!).


 I love having my fabric stash organized by color palette. Each basket is as follows: warms, cools, greyscale, browns. The other side is separated out by large cuts & projects needing to get done.
 Here's my desk. I've got the 27" solid state iMac (SO FAST!), Wacom tablet
  I've got a few treasures on the shelves themselves.
 This might be my favorite corner of the whole room. It's my Christopher shrine. On the left is a painting done of him when he was a baby. The middle two paintings are mine and the right is a stenciled self-portrait on a suitcase. He used this suitcase in college & made it long before we ever met. I love this stencil of him.
 I love baby Chris's striped shirt & chubby cheeks. The yellow border is adorable, too.
 This explains Chris perfectly when we met. This is a stencil of him rocking out to music. I love everything about what this suitcase says. Perhaps we could collect more suitcases & stencil the entire family!
Here's a little video tour of the room. Please excuse my awkward pauses. I can't seem to operate a video camera & talk at the same time.
This explains Chris perfectly when we met. This is a stencil of him rocking out to music. I love everything about what this suitcase says. Perhaps we could collect more suitcases & stencil the entire family!
Here's a little video tour of the room. Please excuse my awkward pauses. I can't seem to operate a video camera & talk at the same time. I was asked if I was going to be paying with food stamps at the cash register today at the grocery store. I've never been asked that before, so it makes me wonder. . . is this what it looks like to be on welfare? Granted, I had a grandpa cardigan & an oversized pashmina on, but everything else was the same. Was it the heels that tipped her off or was it the two kids in tow? Scratch all that. I bet she could tell that I spent less than $25 on my entire outfit.

 Anyone following Project runway? These earrings are an ode to Anya's cool wing earrings. I want to steal those earrings right off her ears. Also, I might have a little girl crush on Anya. She's got serious style.

 I found this top at a clothing swap months ago & wore it for the first time today. I like how it looks, but not how it sounds. It makes a plasticky rustling noise as I move.


 This top was a $4 thrift store find. I fell in love with the stripes & the gold button details on the shoulder. I
  This refashion took very little time to do. 30 minutes tops.
 I'm already getting excited for Spring 2012. You?
 I'm over on
  This first method is for keeping your tails in place when you're hand sewing with one thread. I'm not entirely sure what to call it, so for lack of a better phrase, it's the stay-put tail. It keeps the thread from slipping out the eye of the needle! I don't bother to do this if I'm doubling up the thread.
This second technique is about adding thread if you run out. I like it because it's low profile (doesn't create giant bumps or lumps), incredibly fast and sturdy. It also allows me to sew with smaller lengths of thread to avoid tangles. Do you hear Felix's cooing?
Hope these video tutorials are helpful! I hope to make more video tutorials in the future. Is there anything you'd like to see specifically? Feel free to leave it in the comments or email me.
This first method is for keeping your tails in place when you're hand sewing with one thread. I'm not entirely sure what to call it, so for lack of a better phrase, it's the stay-put tail. It keeps the thread from slipping out the eye of the needle! I don't bother to do this if I'm doubling up the thread.
This second technique is about adding thread if you run out. I like it because it's low profile (doesn't create giant bumps or lumps), incredibly fast and sturdy. It also allows me to sew with smaller lengths of thread to avoid tangles. Do you hear Felix's cooing?
Hope these video tutorials are helpful! I hope to make more video tutorials in the future. Is there anything you'd like to see specifically? Feel free to leave it in the comments or email me. So, of course the natural remedy is to cover it up in glitter. I like this remedy. It's messy, it involves lots & lots of glitter & it reminds me of wizard of oz or something like that.

 Susan recommends doing multiple layers, which I think I might do. It would be good to make sure that glitter stays on.
  I wore this ensemble the last day of Sewing Summit. It was super comfortable with a dash of dressy.


 I'm in the proces of finalizing my online calligraphy course material and a lot of other stressful things, so it's just perfect that my grandma would give it to me at this time.
  Truly, I feel loved by those beyond this world and I never thought I'd get so emotional over a pen.
 This is essentially what I wore in my refashioning class at Sewing Summit. I wore different shoes, though. I just couldn't find the other pair when I got around to taking this photo. I really need to unpack from last weekend.
 I didn't like the shape, red details or the fit. I did like the circle skirt & checked pattern, but that was about it. When I looked at it I knew I wanted to refashion it, but I originally thought that I needed to just update the sleeves, fit & neckline to something a little more modern. Last week it hit like a ton of bricks: it needs to be a midi skirt instead. Once I decided on that my work refashioning this little number took about 30 minutes. Lickety split, eh?
 I just cut out the skirt just below the waistline and attached elastic to the waist, using leftover elastic from
  I think it's a big improvement on the original & I love that I now own a midi-length skirt! I'm just over the moon that they're super hot this fall. The above outfit is what I wore during my Refashioning class at Sewing Summit. The class went really well, too! We had a great time making fun of the gross things you can find at thrift stores.
  Went to Kilby Court last night to see my cousin's band,
  This is totally a spring/summer top, but I can't help myself.


 I found these never-been-worn moccasin hush puppies for $23 at my favorite vintage shop:
  I don't shop there all the time, but when I'm looking for something different, specific & in near-perfect condition; I go there. Part of me was hesitant to buy these shoes because I'm used to finding deals for under $6, but come on! Where would I ever find a pair of shoes quite like these for even $23?
Have you found any good deals lately? Just recently my sister in thrifting, Laura, emailed me how she found an
I don't shop there all the time, but when I'm looking for something different, specific & in near-perfect condition; I go there. Part of me was hesitant to buy these shoes because I'm used to finding deals for under $6, but come on! Where would I ever find a pair of shoes quite like these for even $23?
Have you found any good deals lately? Just recently my sister in thrifting, Laura, emailed me how she found an  It took me a long time to figure out what I wanted to do. I wanted something nice & thick, but didn't have the budget to have them letterpressed. I have had my heart set on a 300 GSM paper, but unfortunately no digital printer (aka the cheapest form of printing) will print anything thicker than standard card stock. Most printers won't even print on uncoated paper, which is also what I've been looking for.