
- top: thrifted, $3
- belt: thrifted, $1
- denim: TJ Maxx, $15
- shoes: thrifted, $4
 I'm feeling great about my body right now. Every day I think of it as an adventure to see what fits(or doesn't). I've got a little muffin top, but I'm just thrilled to be able to shimmy into a few pairs of my old jeans and tops already!! You know what three things have made me feel good about my body? Pooch-hiders, high-waisted pants & heels. I call tops like the one above, pooch hiders. They have a blousy fit, then have a low waist band and conceal any muffin-top. The high-waisted pants also reduce muffin top considerably. It's like wearing pants with built-in spanx. The heels? Well, I think heels look good always.
In my effort to stay positive about my body & the changes that have happened, I'm documenting my postpartum outfits over in my fashion section as often as I can. Click over for details on today's outfit.
I'm feeling great about my body right now. Every day I think of it as an adventure to see what fits(or doesn't). I've got a little muffin top, but I'm just thrilled to be able to shimmy into a few pairs of my old jeans and tops already!! You know what three things have made me feel good about my body? Pooch-hiders, high-waisted pants & heels. I call tops like the one above, pooch hiders. They have a blousy fit, then have a low waist band and conceal any muffin-top. The high-waisted pants also reduce muffin top considerably. It's like wearing pants with built-in spanx. The heels? Well, I think heels look good always.
In my effort to stay positive about my body & the changes that have happened, I'm documenting my postpartum outfits over in my fashion section as often as I can. Click over for details on today's outfit.
 I was just ecstatic to score these serpent bookends! The serpents are a tad on the grotesque side, but there's something about them I find so interesting & awesome. Right now they're on our coffee table and they keep a few of Penelope's books, but I thought I'd put some of our grown-up books in for the photos.
I had such a blast at the swap party, I'm thinking it'd be so fun to do one for clothes or accessories or baby clothes! Have any of you been to one? Have you found any great deals recently? Please share in the comments!
I was just ecstatic to score these serpent bookends! The serpents are a tad on the grotesque side, but there's something about them I find so interesting & awesome. Right now they're on our coffee table and they keep a few of Penelope's books, but I thought I'd put some of our grown-up books in for the photos.
I had such a blast at the swap party, I'm thinking it'd be so fun to do one for clothes or accessories or baby clothes! Have any of you been to one? Have you found any great deals recently? Please share in the comments! I was so ready to have Felix, and so grateful that my doc pushed up the date for induction to last Wednesday night! Would you like to hear (read) all about it? If not, read no further & just scroll through the awesome pictures courtesy of the lovely Rachel Call. By the way, It was awesome having her take pictures of Felix's arrival. Rachel was absolutely fabulous to work with. Her photos obviously speak for themselves. Check out her facebook page to see more pics of the birth. If I ever have another kid, we will have her take the birth photos again.
About a week before Felix arrived, I got an email from Rachel offering to take Felix's birth photos. She's just starting out a birth photography business, but her portfolio so far is incredible. I was so excited that she'd offer to take photos for us! With Penelope, Chris was so busy worrying about getting the right angles, that he was sort of separated from the experience.
I was so ready to have Felix, and so grateful that my doc pushed up the date for induction to last Wednesday night! Would you like to hear (read) all about it? If not, read no further & just scroll through the awesome pictures courtesy of the lovely Rachel Call. By the way, It was awesome having her take pictures of Felix's arrival. Rachel was absolutely fabulous to work with. Her photos obviously speak for themselves. Check out her facebook page to see more pics of the birth. If I ever have another kid, we will have her take the birth photos again.
About a week before Felix arrived, I got an email from Rachel offering to take Felix's birth photos. She's just starting out a birth photography business, but her portfolio so far is incredible. I was so excited that she'd offer to take photos for us! With Penelope, Chris was so busy worrying about getting the right angles, that he was sort of separated from the experience.

 Last Wednesday night, I was admitted into the hospital for a scheduled induction. As the nurse hooked me up to the monitors, she asked me if I could feel the contractions. NOPE. Sure enough, I was having little contractions about 10 or so minutes apart. She hooked me up to the antibiotics & we waited. After four hours she was able to get me hooked up to pitocin & start the labor process. I didn't want to get the epidural right away because that would render me bed-ridden until Felix's arrival, so I held off.
 Every hour after 2am, the nurse would come in to check on my progress & ask me how I felt. She seemed to disbelieve that I truly didn't feel any contractions for about 4 hours. I didn't feel any of them! I only had some back pain. Finally, I was so annoyed with my back pain I asked for the epidural. Turns out that constant back pain I've been having for the last few weeks were contractions!
 Once the doc broke my water, it was only a couple of hours until I started pushing. It didn't take much to get Felix out, perhaps 30-45 minutes of pushing. I can't describe to you the fear I had when Felix was passed to me without so much as a scream. He was entirely blue. I held him for maybe 15 seconds before the nurses took him away. It was a good 5 hours before I'd get to hold him again.
 Turns out he inhaled meconium. The fact that the umbilical cord was wrapped around his neck probably didn't help his breathing situation, either. He had to be on assisted breathing for about 5 hours before his lungs were cleared out & he stopped wheasing. It was sort of heart-breaking to not have him in my arms right away. I missed him. I was grateful, though, that he was getting the help he needed. Thank you, modern medicine!
 We're just thrilled to have him in our family. It's sort of surreal to be a mother of two, but I can't imagine anything else.
I'm really excited to get back into the swing of things. I've got a lot of projects in the works that I'm hoping to complete & share soon. What projects are you working on? Anything fun? Share in the comments!
We're just thrilled to have him in our family. It's sort of surreal to be a mother of two, but I can't imagine anything else.
I'm really excited to get back into the swing of things. I've got a lot of projects in the works that I'm hoping to complete & share soon. What projects are you working on? Anything fun? Share in the comments!• • •
Since Melissa introduced me to blogging, I began to explore the "blog world" a little deeper and I found that it is a wonderful thing to share beautiful, personal art online. So, once my artsy sister, Becka, started her own blog, I jumped aboard with both feet. Now, after almost a year of craft-blogging, I can say that I find the free-sharing of creative ideas and projects more satisfying than ever!
My sister and I run a blog that fits well into the "creative living" category, posting about family recipes or DIY projects. However, our personal specialties are found in bedtime toys and tales (hence our blog title, Made by Bedtime tales). Becka likes to create cuddly, homemade stuffed animals and dolls. I love to capitalize on original stories and illustrations for my kids.

Our dream is to one day sell handmade, ornate, small wooden puppet stages that you can share with your children at bedtime. Until Becka and I get that dream up and running, however, we'd like to share with you a small, printable puppet stage pattern!
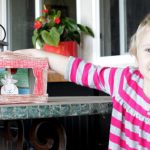
I've seen a number of online patterns for "green" doll houses made out of recycled cardboard boxes. Well, this is a similar idea here, only we've designed a way to make a puppet stage out of an old, empty kleenex box and some cardstock. This pattern comes with some printable puppets that attach to popsicle sticks and a funky ad-libs script for your own fun, family-night puppet show.
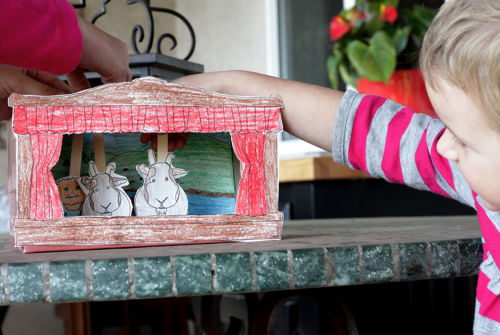
So, please enjoy the FREE printable pattern ;)
And thank you, Melissa, for all the years of free printables, tutorials and fun DIY projects!
-CK

This printable is free for personal use & should NOT be distributed or republished without consent. Altering files is NOT ALLOWED. If you'd like to use this for commercial purposes, please email Carrie.


 necklace: Charlotte Russe, $4
cardigan: hand-me-down
top: DownEast Basics, $10
ribbon: hand-me-down
leggings: Target, $3
boots: thrifted, $6
necklace: Charlotte Russe, $4
cardigan: hand-me-down
top: DownEast Basics, $10
ribbon: hand-me-down
leggings: Target, $3
boots: thrifted, $6 Two weeks ago my sister gave me a box of formula samples that came to her door. Inside the box were little cardboard filler boxes to keep the two canisters in place. I just about discarded them, when I thought how lovely they'd be for holding a small set of cards. Completely inspired by Mer Mag's color theory valentine's, I thought I'd make a little bit of stationery to fit in those boxes.
 I used my mini heart stamp & stamped like a crazy lady yesterday. It took me about an hour to cut, score, fold & stamp 12 cards and then another half hour to design & cut out matching envelopes (on my Silhouette). I made three little boxes full of stationery in relatively no time & I'm quite pleased with how they turned out.
I plan on keeping one of the sets for myself, but the other two? I'd like to give them away. To two of you. See. . . I love blogging. It's been one of the most rewarding things I've ever done, and you? Thanks to all of you who have commented on this blog. Your encouragement & kind words don't go unnoticed. Ever.
So, just leave a comment (perhaps telling me what your plans are - or aren't - for Valentine's day) and I'll announce two winners tomorrow. Here are the official details:
I used my mini heart stamp & stamped like a crazy lady yesterday. It took me about an hour to cut, score, fold & stamp 12 cards and then another half hour to design & cut out matching envelopes (on my Silhouette). I made three little boxes full of stationery in relatively no time & I'm quite pleased with how they turned out.
I plan on keeping one of the sets for myself, but the other two? I'd like to give them away. To two of you. See. . . I love blogging. It's been one of the most rewarding things I've ever done, and you? Thanks to all of you who have commented on this blog. Your encouragement & kind words don't go unnoticed. Ever.
So, just leave a comment (perhaps telling me what your plans are - or aren't - for Valentine's day) and I'll announce two winners tomorrow. Here are the official details:


 I've also been keeping busy this week while waiting for labor to come by hand-calligraphing a few things for another client. It's going to be a while before I can really show it off, but here's a little preview:
 Besides fun design stuff, I'll be speaking about my thrifting/refashioning experiences at the Sewing Summit this fall! I can't wait. From the looks of it, there's a pretty rad line up of ladies that will be teaching. I'm honored to be teaching along side them!
Since I'm sure you're sick of hearing pregnancy updates, the doc bumped up the induction date from next Friday to Wednesday. We'll see if I'll make it to Wednesday. In the mean time, I'm going to make a little paper chain to remind me that the end is near! Have a great weekend!
Besides fun design stuff, I'll be speaking about my thrifting/refashioning experiences at the Sewing Summit this fall! I can't wait. From the looks of it, there's a pretty rad line up of ladies that will be teaching. I'm honored to be teaching along side them!
Since I'm sure you're sick of hearing pregnancy updates, the doc bumped up the induction date from next Friday to Wednesday. We'll see if I'll make it to Wednesday. In the mean time, I'm going to make a little paper chain to remind me that the end is near! Have a great weekend!

 Penelope loves sleeping & cuddling with her pillows, so I thought I'd make her a little heart pillow for her collection! Happy Valentine's my dove! Thankfully she doesn't read this blog so I can share this with you before I give it to her. I'm pretty pleased with how the pillow turned out, although the printing of the heart turned out a little messier than I had hoped. I ended up having to paint in where the ink was too light, but I still like the effect of it all.
 To allow for easy cleaning of her new pillow, I made a muslin pillow form and then I made the cover. I added a visible zipper to the cover for easy removal & just because I thought it'd look cool. Do you see the velvet scalloped ribbon? OH MY GOODNESS. When I taught calligraphy to the lovely folks at American Crafts a few months ago, they gave me that ribbon (along with some other goodies). I LOVE this ribbon. Even though their ribbon is packaged & sold at craft/scrapbooking stores, it makes for wonderful embellishments with sewing projects. And really, I'm just sharing this with you because I love their ribbon. Not because they asked me to. Again, did I mention how much I love their ribbon?!?
Are you making anything fun for Valentine's? ALSO, do you have multiple kiddies? I'm trying to think of something special to do/give to Penelope when Felix comes as a "big sister" prize. Any ideas?
To allow for easy cleaning of her new pillow, I made a muslin pillow form and then I made the cover. I added a visible zipper to the cover for easy removal & just because I thought it'd look cool. Do you see the velvet scalloped ribbon? OH MY GOODNESS. When I taught calligraphy to the lovely folks at American Crafts a few months ago, they gave me that ribbon (along with some other goodies). I LOVE this ribbon. Even though their ribbon is packaged & sold at craft/scrapbooking stores, it makes for wonderful embellishments with sewing projects. And really, I'm just sharing this with you because I love their ribbon. Not because they asked me to. Again, did I mention how much I love their ribbon?!?
Are you making anything fun for Valentine's? ALSO, do you have multiple kiddies? I'm trying to think of something special to do/give to Penelope when Felix comes as a "big sister" prize. Any ideas?

 The other night I was looking through pictures of Chris & me in the final days before Penelope's arrival (I can't believe it was almost 3 years ago!!). Man, I really started to look frumpy. I totally know why: I wasn't getting any sleep & I was uncomfortable all the time therefor showering & dressing didn't really happen. I'm in that stage as we speak. I just want to sleep all day, in fact, that's pretty much what I did yesterday.
So, in an effort to document a not-so-haggard pregnant Melissa, I'm going to take outfit pics every day from now until Felix's arrival (which will hopefully only be a couple more days). It'll motivate me to wear something more than just my pajamas all day. Because, let's be honest, Chris & Penelope aren't motivation enough to get showered & dressed. Sorry Chris.
The other night I was looking through pictures of Chris & me in the final days before Penelope's arrival (I can't believe it was almost 3 years ago!!). Man, I really started to look frumpy. I totally know why: I wasn't getting any sleep & I was uncomfortable all the time therefor showering & dressing didn't really happen. I'm in that stage as we speak. I just want to sleep all day, in fact, that's pretty much what I did yesterday.
So, in an effort to document a not-so-haggard pregnant Melissa, I'm going to take outfit pics every day from now until Felix's arrival (which will hopefully only be a couple more days). It'll motivate me to wear something more than just my pajamas all day. Because, let's be honest, Chris & Penelope aren't motivation enough to get showered & dressed. Sorry Chris.

 The photos aren't that pretty, but you get the idea. The lighting was just horrible in our kitchen today because of a crazy snow storm that just blew in from nowhere.
 I was really surprised to see how nicely the heart impression turned out on the fabric, I'm thinking of doing a heart stamp on a shirt. Maybe Penelope & I can be twinners with heart-stamped shirts for V-day.
I'm thinking of being a little more festive with Valentine's this year. My mom used to decorate the house to the nines, make a special breakfast & give us Valentine's gifts for V-day. I might copy her with some heart-shaped pancakes. That is, if I'm not in the hospital giving birth. What are your Valentine's day traditions? Do you have any good, low-stress ideas for celebrating the blessed/dreaded holiday?
I was really surprised to see how nicely the heart impression turned out on the fabric, I'm thinking of doing a heart stamp on a shirt. Maybe Penelope & I can be twinners with heart-stamped shirts for V-day.
I'm thinking of being a little more festive with Valentine's this year. My mom used to decorate the house to the nines, make a special breakfast & give us Valentine's gifts for V-day. I might copy her with some heart-shaped pancakes. That is, if I'm not in the hospital giving birth. What are your Valentine's day traditions? Do you have any good, low-stress ideas for celebrating the blessed/dreaded holiday?
 I've found a few great sources for jeggings & I wanted to share them with you. My absolute favorite jeggings are from H&M. I found them in the little girl's department for somewhere around $15. They're like wearing pajamas, they're so comfortable. Last time I went, they still had plenty of styles of jeggings in the women's department, too. All under $20.
 My other favorite pair of jeggings are from. . . wait for it. . . Walmart! Walmart, to me at least, doesn't necessarily scream fashion, but I found the best pair of jeggings there for $12. They're a lot thicker than the jeggings you'd find at most stores and they have back pockets, which look more like regular jeans & not tights. I've turned some of my friends (who've been hesitant to try skinny jeans) to these pants & all of them have cheered for joy. They're LEI brand. Go get a pair now if they're still in stock.
So, do you think jeggings should die a slow & painful death or are you on the bandwagon?
My other favorite pair of jeggings are from. . . wait for it. . . Walmart! Walmart, to me at least, doesn't necessarily scream fashion, but I found the best pair of jeggings there for $12. They're a lot thicker than the jeggings you'd find at most stores and they have back pockets, which look more like regular jeans & not tights. I've turned some of my friends (who've been hesitant to try skinny jeans) to these pants & all of them have cheered for joy. They're LEI brand. Go get a pair now if they're still in stock.
So, do you think jeggings should die a slow & painful death or are you on the bandwagon?
 Those are tennis balls on the legs of the chair. AND yes, they're awesome.
Yellow Pages Booster Seat Tutorial
Supplies:
 Measure your yellow pages. Mine were 20 inches x 24 3/4 inches. Make sure to measure accurately, but not too tight, otherwise you might be cursing me later.
 Cut your fabric. From the measurements I took I used a simple formula to calculate my measurements:
X ÷ 2 + 1 = WIDTH Y ÷ 2 + 1 = HEIGHT
Cut two squares using the above formula & cut a third rectangle at: HEIGHT x 4 inches. Snag one of your large rectangular pieces & the small one & fold the long edge over twice (for a clean edge on both sides) iron and hem. Set aside.
 Cut ribbon in half & fold each half in half. Grab the remaining large rectangle (the one without the hem) & pin the ribbon 3 inches from each corner along the long side of the fabric with the ribbon fold flush to the edge of the rectangle. Pin ribbon in place.
 Place large, hemmed rectangle right-side down on top of your ribbon. Match the long unhemmed side to the side where ribbons are secured. You want to have the ribbons opposite of the envelope opening.
 Place the smaller rectangle right-side down on top of the two fabric pieces. Line up the unhemmed side to the bottom of the first rectangle. Pin all pieces in place. Sew along all four sides with a 1/2 inch seam allowance.
 While the casing is still inside out, slip your yellow pages into the cover (binding side first) & pinch off corners (the two corners that are opposite of the envelope opening. Pinch the excess fabric & mark a line where the edge of the yellow pages are.
Remove yellow pages from casing & sew along those two perpendicular lines. This will create two boxed corners.
Flip casing right side out & insert yellow pages binding side first. When enclosing the envelope, bend the pages of your book in order to get the envelope over the book. Push pages back into place.
Tie the book to a chair & use as a booster seat! Enjoy!
While the casing is still inside out, slip your yellow pages into the cover (binding side first) & pinch off corners (the two corners that are opposite of the envelope opening. Pinch the excess fabric & mark a line where the edge of the yellow pages are.
Remove yellow pages from casing & sew along those two perpendicular lines. This will create two boxed corners.
Flip casing right side out & insert yellow pages binding side first. When enclosing the envelope, bend the pages of your book in order to get the envelope over the book. Push pages back into place.
Tie the book to a chair & use as a booster seat! Enjoy!
 For your convenience, click the button above to download the printable version of the tutorial. Cheers!
This tutorial is free for personal use and should not be distributed/republished without my consent. Altering the file NOT ALLOWED. If you would like to use this tutorial for commercial purposes, please email me. Thanks!
Oh, and by the way. . . I just finally updated the tutorials page!! Check it out to see if you've missed anything.
For your convenience, click the button above to download the printable version of the tutorial. Cheers!
This tutorial is free for personal use and should not be distributed/republished without my consent. Altering the file NOT ALLOWED. If you would like to use this tutorial for commercial purposes, please email me. Thanks!
Oh, and by the way. . . I just finally updated the tutorials page!! Check it out to see if you've missed anything.  Congratulations, Emily on both the baby & the win! I've sent you an email with all the details. Cheers!
A big thanks to Ruche for sponsoring the giveaway & to all that participated! Maybe we'll have to do this again sometime?
Congratulations, Emily on both the baby & the win! I've sent you an email with all the details. Cheers!
A big thanks to Ruche for sponsoring the giveaway & to all that participated! Maybe we'll have to do this again sometime? The writing looks much prettier in person. For some reason the lighting on the paper looks really stark. I mixed orange and burgundy inks together to create more of a rose red.
I'm really getting in the mood to do something fun for Valentine's day. Especially since I've got that 6 inch heart stamp. I really need to put it to use . . . and SOON!
The writing looks much prettier in person. For some reason the lighting on the paper looks really stark. I mixed orange and burgundy inks together to create more of a rose red.
I'm really getting in the mood to do something fun for Valentine's day. Especially since I've got that 6 inch heart stamp. I really need to put it to use . . . and SOON!