While looking for rentals last year, our place was listed as a two bedroom. Well, it wasn't really. It has one bedroom upstairs & one downstairs in the unfinished basement. The second bedroom wasn't really habitable before we moved in. We liked the finished part of the house, so we signed a rental agreement under the condition that the owner would make the second room liveable, i.e. remove the mysterious puddle of water in the middle of the floor, install carpet, paint the walls, install a ceiling and add a rod in the closet to make it functional. You know what they did? They installed the cheapest, ugliest carpet they could find and
stapled (YES) faux wood paneling to the ceiling. See. . .
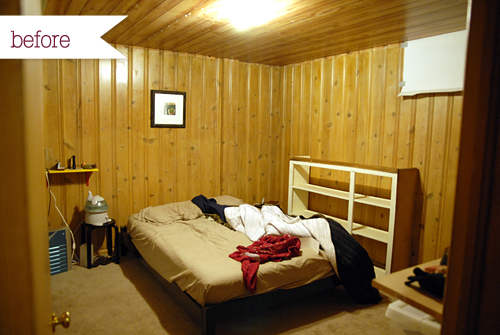
We didn't have a closet
OR a dresser for nearly two months. IT. WAS. AWFUL. Our landlord wasn't going to do anything about it, either. So, Chris (the awesome husband that he is) installed a metal rod to the ceiling studs of the closet using a bunch of industrial chains. See, we couldn't just put any rod in because the closet wasn't/isn't framed. Yup. The landlord's grandson was in the process of ripping apart the studs of the closet to refinish the basement when he got accepted to dental school. Our basement was never finished.
We lived in this dump for about 5 months. I was so sick of sleeping in a dungeon, I made Chris fix it up with me. Now it looks like this. . .
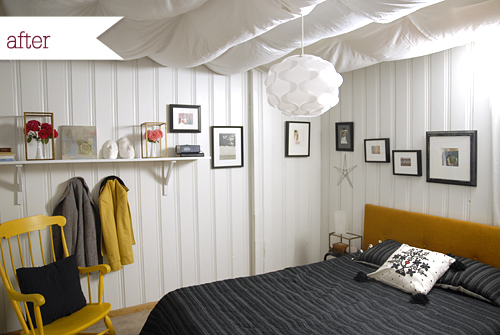
Sigh. This was a
much needed improvement. If we actually owned the place I think we would have spent more time & money fixing the carpet, trim, door & closet but considering we may move out of this place any time it was just the right amount of investment. Here's what we did:
- painted the walls white
- added a new light fixture
- stapled white bedsheets to the ceiling
- installed old kitchen cabinet to the wall for storage
- made a shelf (from scratch! Chris is awesome), installed it & painted it white
- added a headboard
- hung artwork
- added curtains to hide the closet
- added curtain to the window
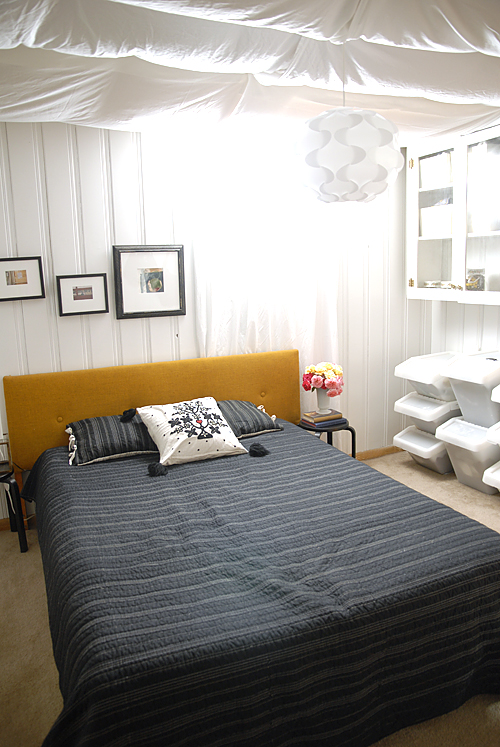
Here's what we spent:
- Paint: $28
- Ikea light fixture: $30
- White bedsheets: $18
- Lumber for shelf: $7
- Headboard: $8
- Milk glass vases: $3
- Brass cages: $1.50
Awesome, right? We managed to give this room a complete face-lift for under $100!
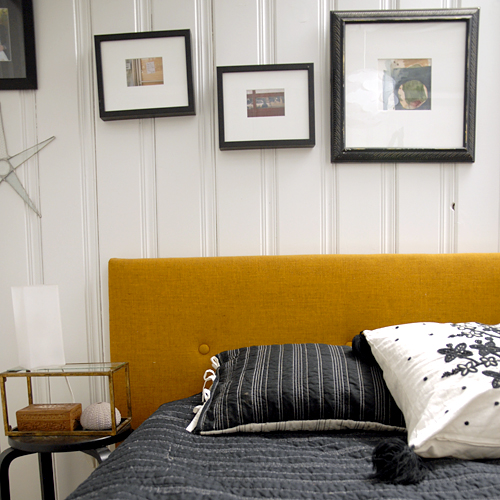
I love my new headboard.
Susan pointed it out for me while we were thrift shopping together. I love the simple design & the rich color. Some day I think I'll recover it with a hounds tooth or chevron pattern. Wouldn't that look sharp? It works well in this room for now.
Our room is also rather A-symmetrical. Because of the off-kilter window & random raised-wall thingy, we went for an A-symmetrical look with decorating. Certainly not my typical style for decorating, but it works. I'm still not sure how I feel about how the frames are hung. I'll probably rehang those at some point.

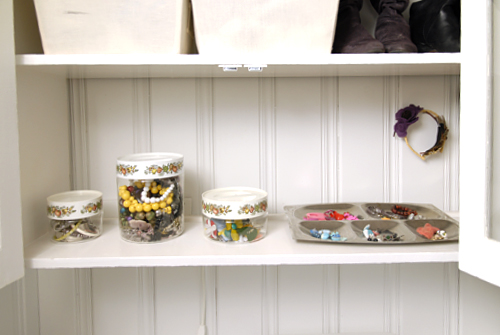
The cabinet (above) was from the previous kitchen & just taking up space in our basement. We painted it white & installed it on the wall. It's the perfect place for my accessories & shoes. We had an awfully hard time finding a dresser when we moved in, we just opted to buy stackable Ikea bins instead. They're not as gorgeous as the dresser I have in mind, but they're cheap & functional. We figured it was better to buy these bins than a dresser we didn't like. This way, if we find the perfect dresser we'll just repurpose the bins as storage for my growing mounds of fabric or something.

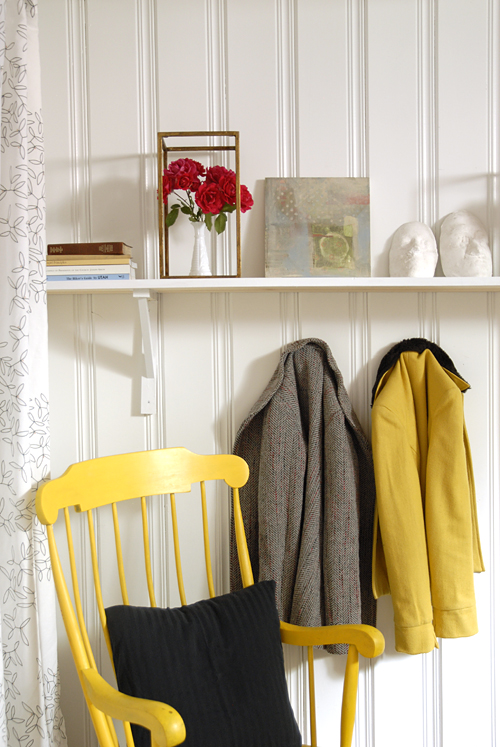
This shelf was in the kitchen of our last apartment, but works perfectly in this little nook by the bedroom door. We stash our pocket contents here when we come in for the night.
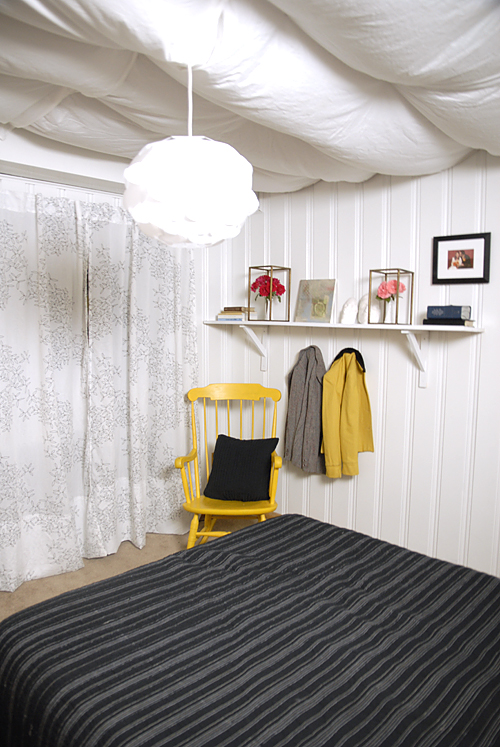
For the longest time we didn't have anything covering our closet. It's so nice to finally have something hiding all that chaos.
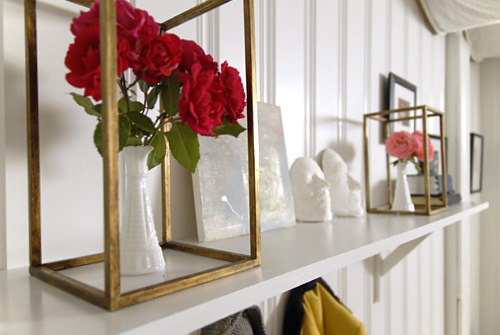
I found these brass cages at the thrift store just last week. Aren't they fun? I wonder what the original owner used them for.
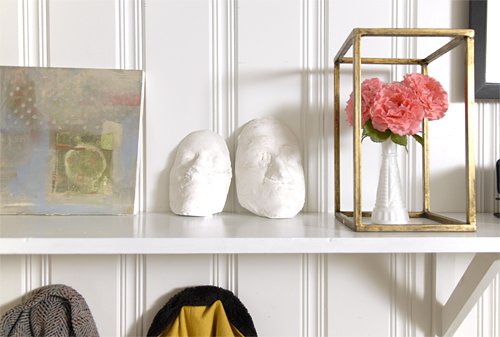
Here's my favorite decoration: our death masks. We made those when we were dating. Such a great reminder of our courtship!
There you go. We no longer live in a dungeon. Hip, Hip HOORAY!
Additional Info:
- We got our bedding & shams from Target 4 years ago as a wedding gift.
- We did not paint the ceiling (the reason why I covered it with bedsheets) before attaching the bedsheets.
- We were really lazy & just painted right over the wood paneling. No priming. Next time we'll prime before we paint, but it doesn't really matter since we'll likely move the end of next month.
- Since the house has an unusually tall basement for a home built in the 1930s, stapling the bedsheets to the ceiling makes the room feel cozier, but not smaller.
•I M P O R T A N T•
I've received a few emails from concerned readers regarding the code of this bedroom. The
shelterpop article was actually a little misleading. There is a window in the room (as evidence by the light in the after photos), it's just covered by a curtain. The window measures about 2'x3', which is pretty incredible for a basement window of a house built in the early 1900s. The window is also above ground (nice!). Bottom line, it does count as a room as far as Utah rental laws are concerned. It was just a poor excuse for a room before I got my hands on it. Additionally, we don't live there anymore. Our current bedroom windows are GIGANTIC! Hooray for loads of natural light!
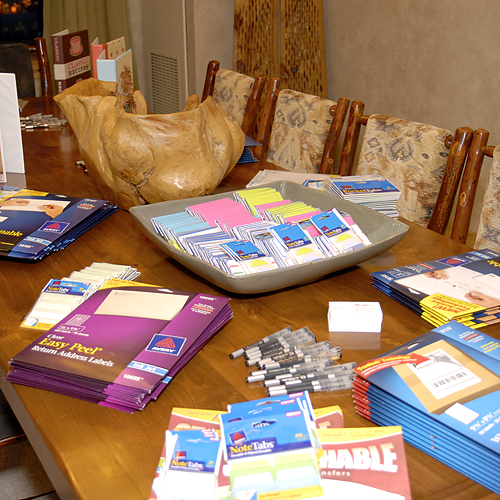
 My experience would not have happened if it hadn't been for Avery office products, who generously sponsored me & 7 other lovely ladies. They graciously provided us with our conference passes, meals and excellent lodging. We were in heaven hanging out in our 4 bedroom, 5 bathroom, 3 livingroom, 1 sauna penthouse. Seriously, Avery hooked us up! I love it when large companies make personal connections in social media and put a face & personality to their brand. They also had some neat products to share with us & other conference goers as well. I'm really looking forward to making my very own custom binder.
 Les Madeleines of Salt Lake City made these delectable treats.
 The suite party Avery sponsored was just hoppin'. We had delicious food, great music & awesome company. You know you've got a successful party on your hands when the party goes 'til 2am, and it was only scheduled until 11pm! Madeline and I ended up kicking a few party-goers out so that we could clean up & go to sleep. Sleep was definitely not one of those things that really happened last weekend. I still haven't caught up on my ZZZs.

 (this post is not in chronological order, btw)
Friday afternoon, I rode a gondola up to the top of the Canyons and attended the photography workshop where we listened to four panelists talk about different ways to make photos more interesting and pretty. I felt a little advanced for the session, but I still learned a few great tips & tricks. For example, If you shoot in f22 or higher and point your camera at the sun, you'll get a pretty sunburst effect that you wouldn't otherwise get in a lower aperture. I tried that on Saturday night at the closing party & it worked! Sort of. I'm blaming the un-interesting photo on my rush to head back to the hotel to pack.
 The closing party was a lot of fun, but I was so exhausted from the weekend, I stupidly didn't take advantage of the venue. I did take some fun pictures of everyone having a good time, though! To see more pictures of the EVO conference craziness, check out their flickr group!
Three cheers for Jyl, Rachael and their minions!! They put on such an inspiring and educational conference! Can't wait until next year!