MelissaEsplin.com

European Techno Rockstar Refashion

April 30, 2010
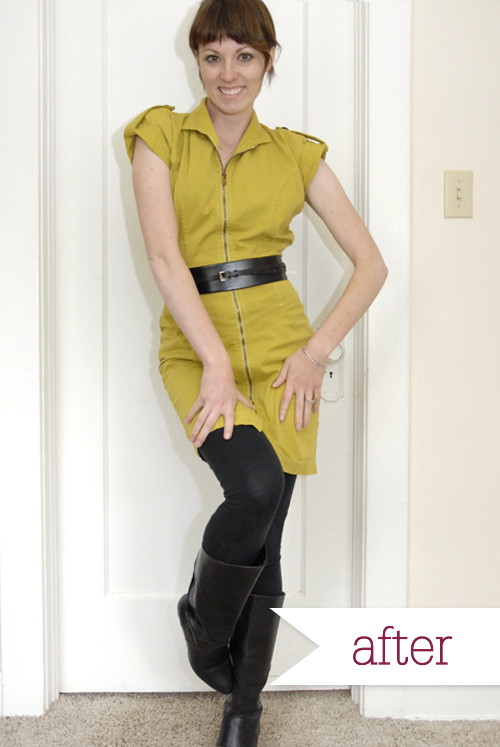
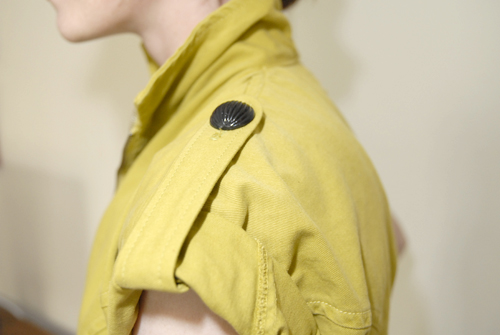
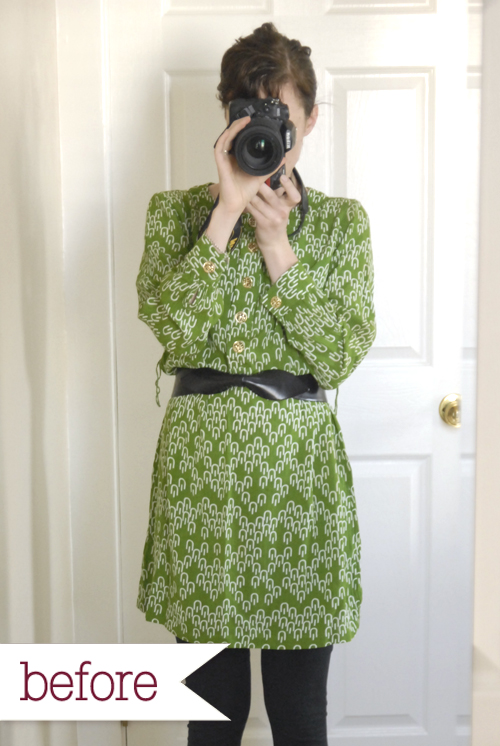
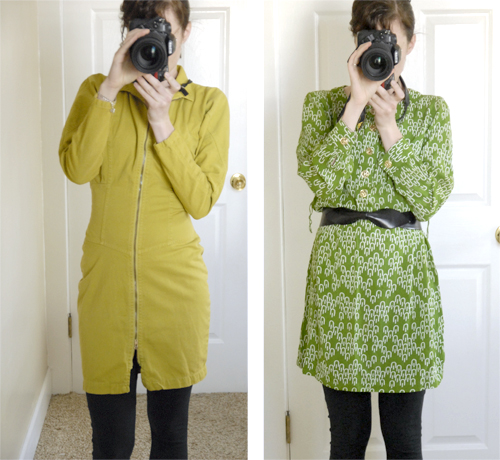
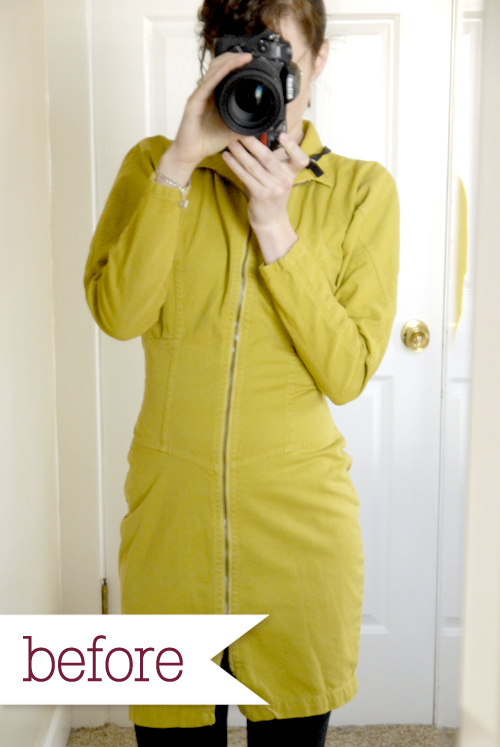
The refashion/sewing bug has hit me HARD! I've been aggressively attacking my mending pile this week and I completed FOUR projects in 24 hours! See, I've been stressed lately. When I get stressed out, I work. I work really hard on the small stuff because I like to procrastinate the big stuff. Example: my Senior year of college I had a lot of pressure to finish and execute my final show. I was so busy procrastinating my show that I hand-bound over 50 books in the two semesters. Crazy. This week is no exception to the craziness. I've been so busy planning Penelope's birthday party, working on freelance design, working on DHD design and blogging that I had to just do something that didn't need to be done: refashion a mini-dress. Also, I've done more dishes and laundry in the last week than I've done in the last month. I bought this old-school Paris Blues mini dress ages ago while in college. I think I got it for $5. It reminds me of something my sister and I would've seen at Contempo Casuals (a.k.a. Contrampo) when we would go window shopping in the mid '90s.  I imagine a really classy lady would've worn this to a techno dance club with a pair of 10" platforms heels. Don't you? When I bought it, the sleeves were really huge (I wasn't very confident in my sewing skills back then), so I took it into a tailor to get the sleeves taken in. Even after I had the sleeves tailored, I didn't really wear the dress because the sleeves were really HOT. Hot as in sweating bullets, not sexy. There's also something about slightly bulky long sleeves that makes me feel like the clothes are wearing me, rather than the reverse. I decided it was high time to shorten the sleeves and make the mini dress a little more appropriate for spring/summer. I didn't want to do a regular short sleeve, although that would've been a cinch. I needed to accentuate the shoulders and add a hint of military to this rather hard-core piece of attire. Here's what I did in list form:
  • Chopped the sleeves
  • Rolled sleeves twice to hide raw edge
  • Ironed sleeves
  • Cut & sewed two strips of fabric for epelets
  • Sewed button holes
  • Raided Susan's button stash
  • Attached buttons raided from Susan's stash
  • Anchored the epaulets on the under side of the sleeve
The changes took an hour or so to make. It was pretty simple. I really like how the cuffed sleeves & epaulets add more of a rock-and-roll feel to the dress. I think the dress will get more use now that I've taken off the sleeves. Ironically, I'm wearing the mini dress right now and I'm sort of wishing I had the warmth from those long sleeves because it's a chilly 40º outside. Brrr! Next week I'll be reporting on Penelope's Birthday party (the invitations were freaking rad) and sharing with you the rest of my refashions! Happy weekend, folks!

Featured! Penelope Pearl's Wardrobe

April 30, 2010
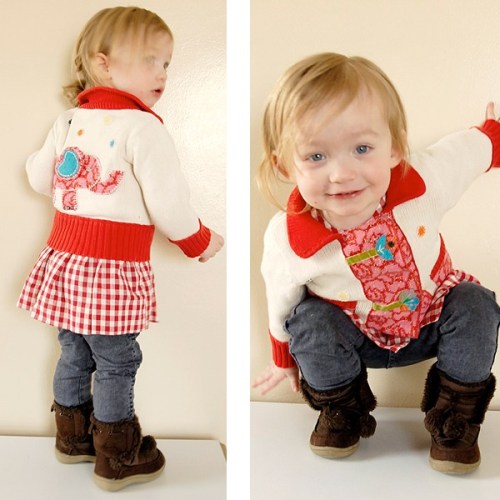
Penelope's wardrobe was featured on little. lovely. today! I had a lot of fun dressing up Penelope & trying to get her to pose for the camera. The above photos are probably my favorite. Check out the rest of Penelope's outfits here.

Springtime Refashion

April 29, 2010
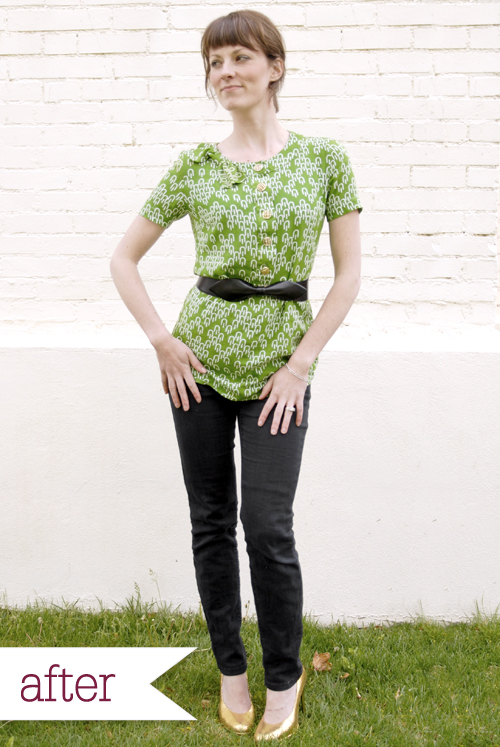
I found this fabulous vintage Jaclyn Smith dress while thrifting a month ago. I fell in love with the color and pattern more than anything. The fit wasn't so great, though. The sleeves were loose at the upper arm & tight at the wrist. The fabric on the sleeves wobbled like the flabby skin on an old lady's arm. So annoying. The length of the dress was too long to be a shirt, and too short to be a dress (too short for me, at least). The fit in the bust and waist was shapeless and too large, too. All these things are really easy to fix, so I did it! Here's what I did:
  • Shortened the sleeves
  • Took in the bust, waist and sleeves by 3 inches on each side
  • Chopped 6 inches off the bottom & created a curved hem
  • Added a bow to the neckline
All of this was really, really easy. The hemline was the most time consuming (I HATE hemming), but so worth it. I made the curved hem using a fabulous curved hem tutorial on Burdastyle. I really like how accurate and consistent the hem is all the way around the shirt. You should try it out. I love my new shirt. I love how the black belt really makes the green pattern sing. What do you think? Should I have left it as it was?

Thrifty & Chic: Moccasins

April 26, 2010
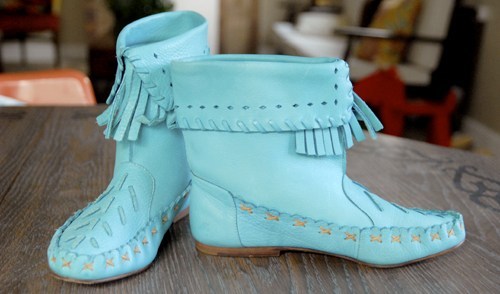
How was your weekend? Penelope and I went on a little thrifting run on Thursday and found a few goodies. Penelope found some neon green rain boots (which she refuses to take off) for $3 and I found some amazing moccasins for $4. They're gorgeous! I fell in love instantly. Our affair didn't last long because I quickly discovered they're half a size too small on me. GRRR! Half a size! Luckily for my sister, she's half a size smaller than me, so I bought them for her. I was glad to see that she shared the same excitement for them as I did when she came to pick them up.

• • •

I have some rather exciting news! I'm going to be on T.V. today. TEEE VEEEE! Thanks to DownEast I'll be on the local channel two afternoon news modeling their lovely clothes with my lovely friends Allison, Susan and Jyl. If I don't embarass myself too much, I might post a link to the video. Don't forget! Today is the last day to enter the DownEast Basics giveaway. They just got a bunch of new arrivals in their shop, so you should check those out, and then enter the giveaway. Good luck!

Weekend Plans

April 23, 2010
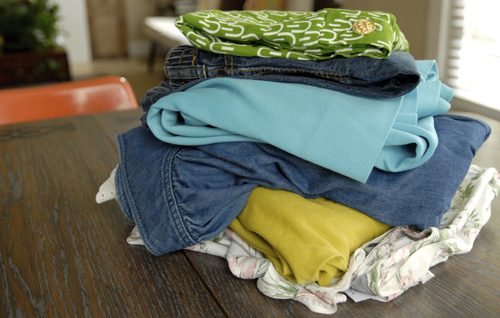
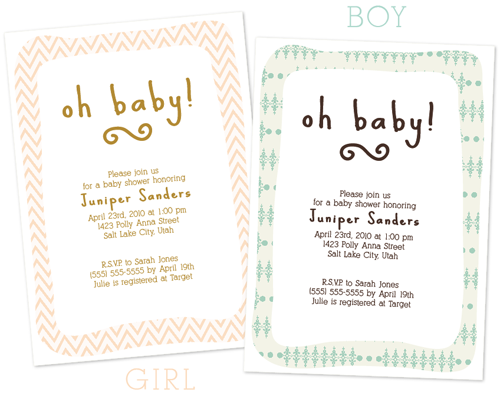
My 'to do' pile, just like my 'to mend' pile keeps getting bigger and bigger. This weekend I plan on tackling both of those piles. Hopefully I'll be more focused and productive than I've been in the last few days. What are your plans for the weekend? Just to show you a sneak peak at what's to come, the above photos are a couple of before photos of some items I'm refashioning. They're not bad as is, but I have a few style updates I have in mind for them. I really like the pattern on the dress on the right. Super cool, hu? Hope you have a happy weekend! Enter in my giveaway if you haven't already. It ends Monday night! Also, I posted my first DIY design recipe over at Good Look Cook Book. Head over there and make a baby shower invitation with me!

Thrifty & Chic: Striped Skirt

April 21, 2010

This post is brought to you by DownEast Basics.

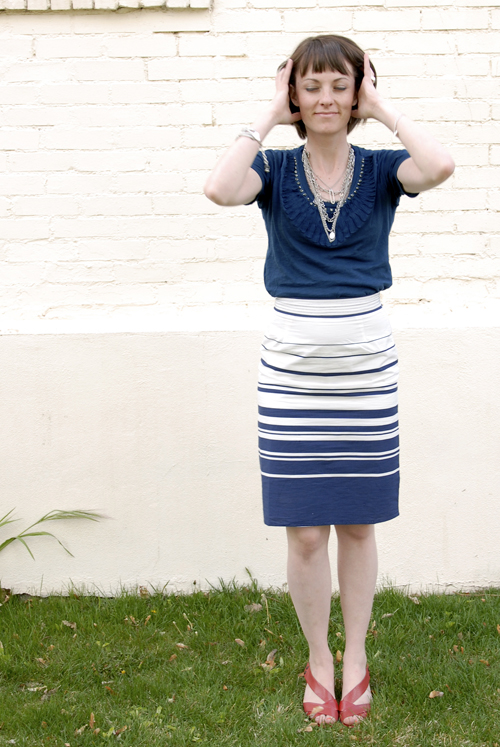
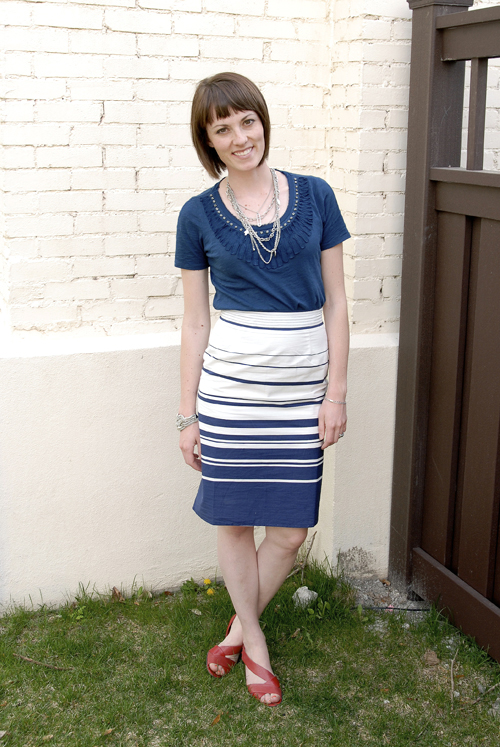
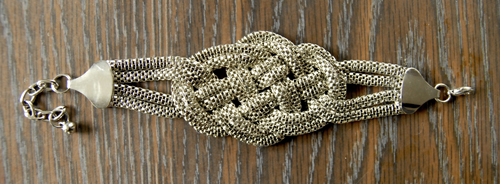
DownEast Basics sent me some cute new clothes to review this week. I didn't think they would show up as fast as they did, but sure enough, I was able to sport my new skirt and fancy bracelet at church last Sunday. I think I looked pretty snazzy.

Outfit details:

Top: Ann Taylor Loft Necklace: Forever 21 Bracelet: DownEast Basics Skirt: DownEast Basics Shoes: Sesto Meucci, thrifted I've got two words for this outfit: nautical & patriotic. I'm not sure it's possible to wear true blue and white without pairing it with another primary color. Are you the same way? I have a pair of gold heels that I think would go marvelously with this skirt. I may just have to wear this skirt two Sundays in a row. Gasp!

Here's what I love about this skirt: it's form-fitting in all the right places, the waist is high, the skirt is straight, it's fully lined, and it shows just a little leg. I'm not sure it'll be a summer staple because I'm notoriously terrible with anything white, but this will be in pretty quick rotation guaranteed.

DHD Blog Hop + ANOTHER PRINTABLE

April 20, 2010

Are you getting sick of my printables, yet? If you're not, good. If you are, suck it up; I've got one coming your way today.

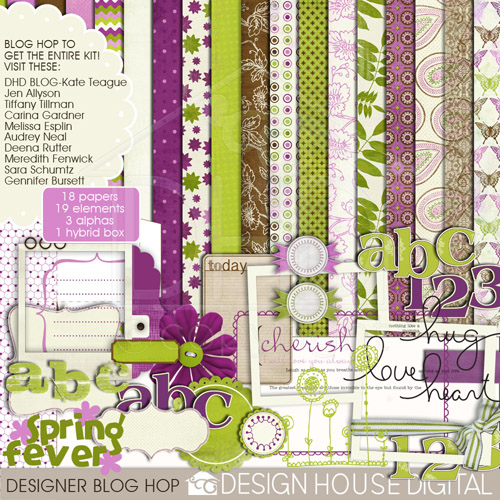
Today I'm participating in a DHD blog hop. YUP. SO FUN! The idea is that you start at the DHD blog and make the rounds to each designer's blogs and pick up freebies along the way. By the time you're done, you've got an entire kit of awesomeness on your hands. Pretty rad, right?

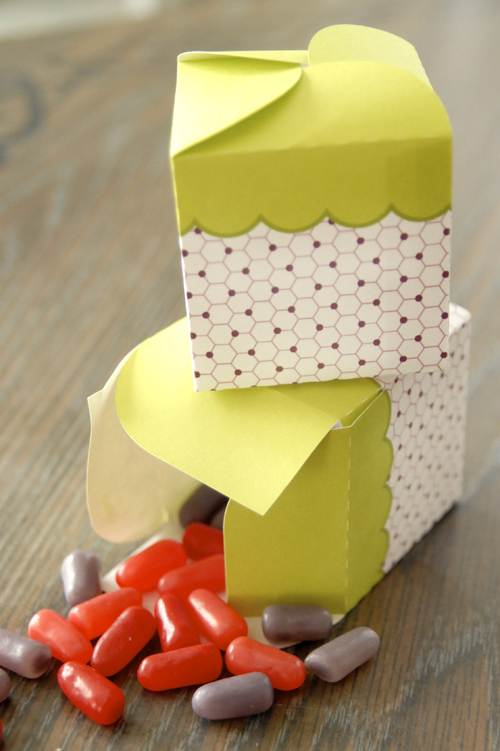
I know there are a lot of non-digital folk out there, so I thought I'd do something that everyone can use. A printable box. I hope you like it. The final dimensions come out to 2.25 x 2.25 x 2.25 inches. Click the button above to download.
Hop forward by clicking on the left, hop backward by clicking on the right.

Here's a little preview of the artwork you can expect to get if you participate in the blog hop. Man, that's a load of artwork! Isn't the color scheme so fun? I love purple & green.

This printable is free for personal use. If you would like to use this printable commercially, please email me. Thanks!

Paper Wings Blog Redesign

April 19, 2010
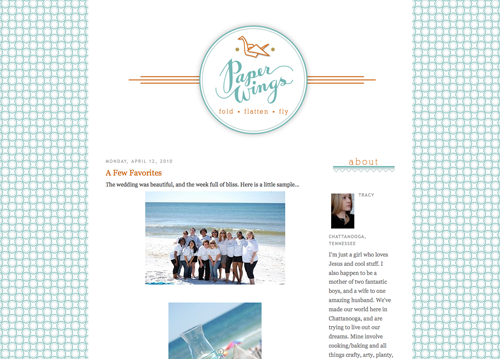
I did a blog redesign for a lovely lady this last week. I'm really happy with how the whole thing turned out, and I wanted to share the outcome with you. Tracy of Paper Wings was just so lovely to work with. She was so good at explaining to me what she wanted, and just a 100% awesome client to work with. I was really, really happy when she said, "OHHHHHHHHH MYYYYYYYY GOOOOOOOOODNESS! I absolutely L-O-V-E it!" after I sent her the final proofs. Squeal! I love positive feedback. Don't you? Thrifty & Chic will be postponed until Wednesday, but it's going to be really rad. Stay tuned for a sweet giveaway!

My New Favorite Tool + Freebie

April 16, 2010

This post is brought to you by Silhouette.

If you follow this blog at all you know that I love paper crafts. My friend Heather recently introduced me to a new paper-crafting tool that has blown my mind and opened up a whole range of craft and design possibilities.  It's called a Silhouette SD.  I've seen cutting machines floating around the craft stores for years.  They use expensive cartridges pre-programmed with stock word art.  The Silhouette is entirely different.  It's a computer peripheral that takes your true type fonts and digital designs and cuts them with PERFECT PRECISION.  Glorious. Silhouette sent me a machine to test out about two weeks ago. I was in Arizona when it came, so I was more than a little jealous that Chris was home all alone with my new Silhouette SD.  He kept teasing me about all of the fun he was having with "his Silhouette".  My husband senses gadget lust on my voice and moves quickly to exploit it for his own entertainment. At least he didn't unbox it while I was gone. That's not a line that he wants to cross. ;)
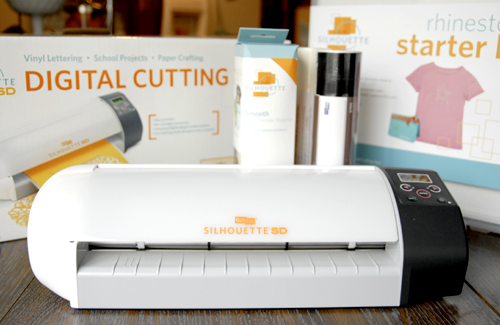
Silhouette machine with heat transfer material, vinyl, and rhinestone starter kit
My first impression was that the packaging is surprisingly clean.  The only other gadgets that I've purchased that had this level of attention to detail in the packaging was my Apple iMac and my Wacom tablet. The cutter itself is very light and attractive. The first words out of Chris's mouth as he lifted it out of the box were, "Wow! It's so light!"  The only two machines on our office table are the iMac and the Silhouette, and they make excellent desktop friends. Installation was a tad tricky for a few reasons. First, we don't have a PC. The silhouette is optimized for Windows, but can be used with Macs. Second, I was connecting the Silhouette through the USB hub on our backup hard drive. You'll want to connect it directly to your computer to clear up any potential communication issues. Third, I was trying to install the illustrator plug-in for the Silhouette, not the Silhouette SD. There's a difference. I was in business once I installed the correct software (Cutmaster 2 for CraftRobo 1.61 I have this for CS3, btw) and read this tutorial. Mac users need Adobe Illustrator to use the Silhouette SD, because Silhouette America has yet to publish a standalone cutting application for the Mac. My contact with Silhouette says that they'll have a dedicated Macintosh application in the near future.  This is good news for Mac users who don't already own a copy of Illustrator. I can't quite describe how much fun I have watching the Silhouette cut a project. I'm like a little kid waiting for Santa Claus. I hover over the cutter, craning my head all over the place to catch a peek of the cutting blade in action.  It makes this awesome robot noise as the paper jerks in and out and the blade zooms back and forth along its tracks. I needed a worthy project fast, and I quickly realized that I needed to cut out everyone's names for Easter Sunday dinner. I used Bodoni font, squished each letter together and used the pathfinder tool to make each word one shape. The names didn't take very long, so I whipped out an extra one for my mom and sent it along with a gift box I was prepping for her. I submitted the above word art to Silhouette, and they've decided to offer it for free on the Silhouette online store. Click the "Purchase Online" button within the Silhouette software to view & download these graphics for free! YUP. Free. There are even two 10ss rhinestone graphics, perfect to add a little bling to some baby onesies. Mac users cannot access the Silhouette online store, but don't feel left out. Just email me and I'll send you the artwork. ;) EDIT: Download my baby graphics for free by clicking the download button below! ENJOY!! And, as always, these graphics are free for personal use only. If you would like to use these graphics commercially, please email me. Thanks!
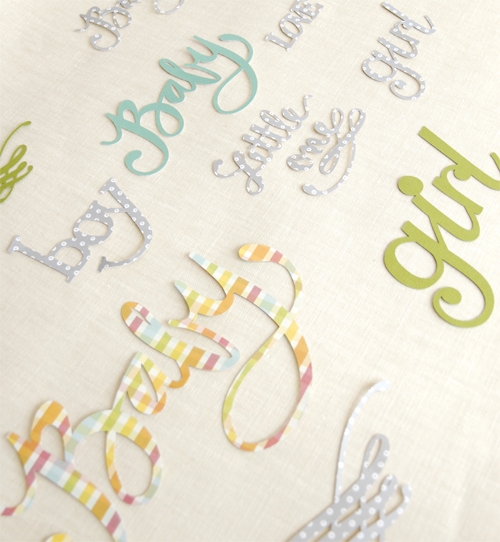
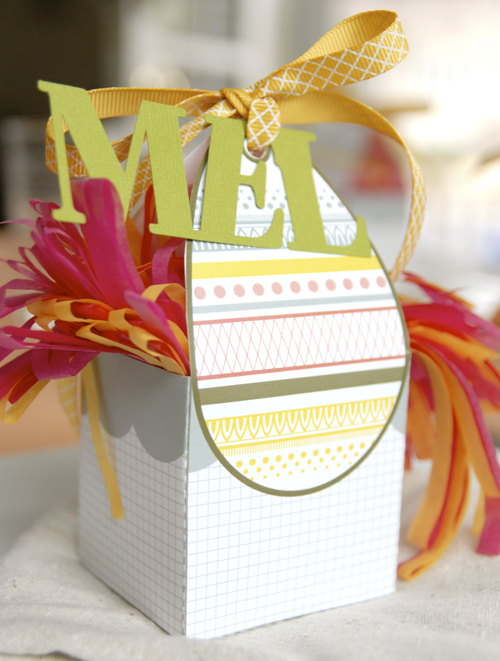
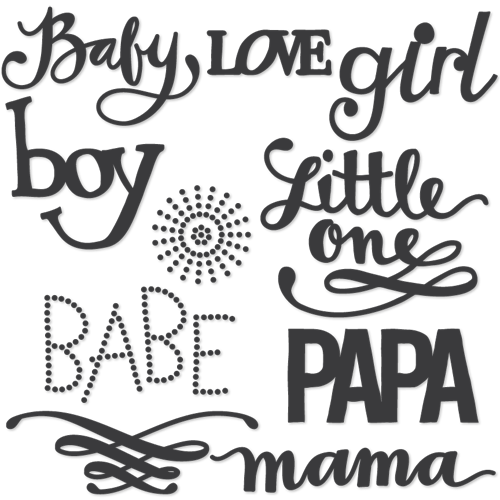
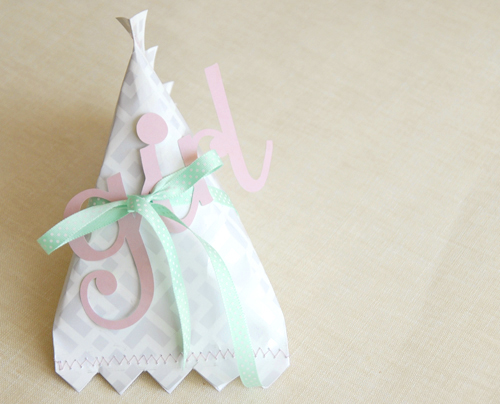
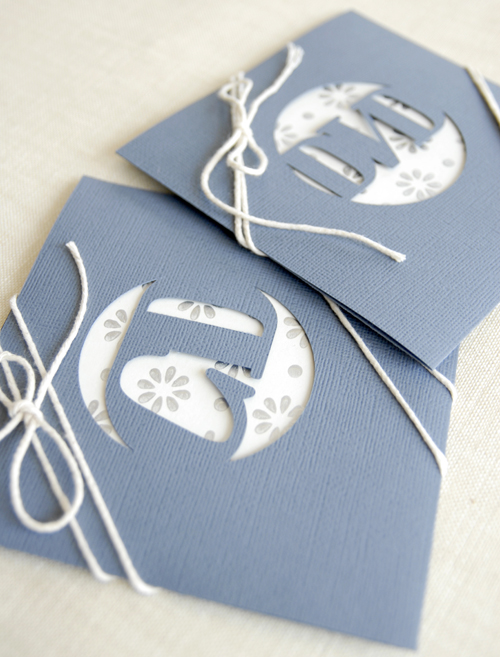
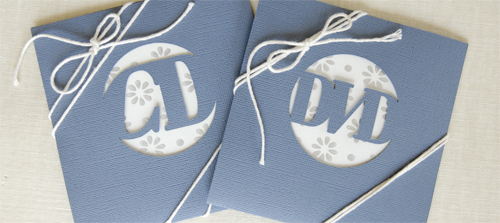
Currently I'm a little obsessed with the "baby" and "girl" graphics. Do I sound a little baby hungry? I just wrapped up a little gift for my friend who's having a girl soon. Doesn't the girl word art look so cute when tied to the package? Ugh. I'm a woman obsessed. The silhouette isn't limited to word art. Check out their "What Can It Make?" section for more ideas. Penelope's grandparents live far away, so we can't forget to share her photos and videos with them. It's been a while since I've burned them a CD or DVD, so I cut these cases to provide myself with a little motivation. I've always printed and cut out my own CD sleeves, but it's a time-consuming, hand-ache-inducing process.  The digital cutter speeds things up considerably.  I cut the card stock down to size, run it through the Silhouette, fold and glue.  If I'm going to make one, I might as well make ten.  Or twenty! My contact at Silhouette hooked me up with a huge discount to share with ISLY readers, so this is your chance.  If you find yourself with a healthy combination of papercraft desire and spare change, check out the Silhouette store and make sure to place your order before MAY 8, 2010 to get $50 off a Silhouette machine and 10% off everything else in the Silhouette store. They'll throw in 10 feet of vinyl, 10 feet of transfer tape, and a hook and scraper to sweeten the deal. Full Disclosure:  Silhouette sent me a Silhouette SD in exchange for my honest review.  I suspect they knew that I'd love their product. Silhouette Resources:
Motivation & Good Intentions

April 14, 2010
I've talked about this before, I'm not a self motivator. I need deadlines in order to complete anything. I found this out when I graduated from college, moved off to the SF bay area and didn't do anything all day for about 6 months because I didn't have to. I was SO LAZY. I still am when I'm not crazy busy. If it weren't for Penelope, I'd wake up at 2pm every day. Seriously. Ask Chris. I just recently missed a friend's baby shower while in Arizona, and I've actually made her a gift before the baby was born! You should give me a huge pat on the back. If I don't have the baby shower as a deadline, I hardly ever get around to making baby gifts for friends. I'm a little lame like that. I made this sweet little halter dress using the machine smocked dress tutorial from Brooklyn Bean and the French seam tutorial from Freshly Picked. Great tutorials, ladies! The French seam tutorial has forever changed how I approach finishing seams. This little dress is getting me a little baby hungry. LBH.

Thrifty & Chic: Sunday Best
April 12, 2010
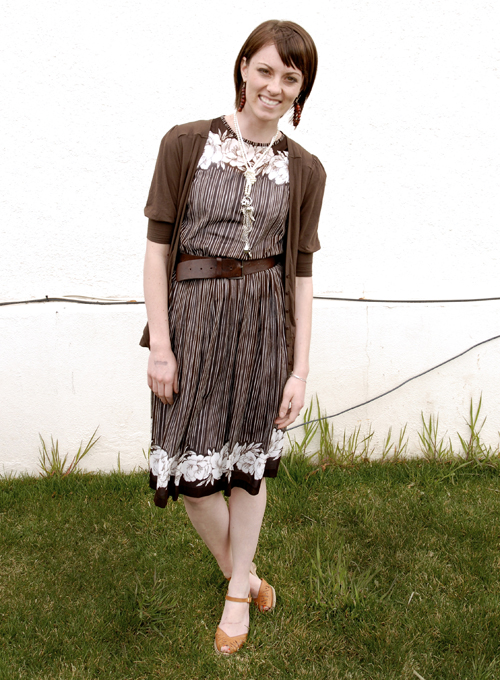
Chris rolls his eyes every time I buy a new dress, but I just can't help myself. I love dresses! earrings: Payless (won from a Chronicle Books giveaway) necklace: DownEast $6 cardigan: the ModBod (free) belt: dunno dress: thrifted $6 shoes: thrifted $3 total: $15 Not bad, right? I found this pretty dress at a thrift store in Phoenix a couple weeks ago. I. LOVE. IT. It's completely see-through so I have to wear a mega slip and an undershirt underneath it, but it's totally worth it. I love the slightly irregular vertical stripes and the gorgeous (and possibly slightly kitschy) roses on the top & bottom. You can't tell from the picture, but the super short cap sleeves give the shoulders a more boxy look when worn plain. Shoulders are so hot right now. How was your weekend? Chris and I went to see Miike Snow in concert this weekend. It was awesome! They really know how to put on a good show. Everyone was singing and grooving along to their super hip dancy beats. We were incredibly lucky and ended up in the very front, less than 5 feet away from the lead singer. It wasn't so cool when a bunch of drunk girls were trying to push us out of the way to take our spots, but Chris dominated with all of his 212 lbs of muscle. It was so funny to see how hard they tried. One of them probably played powder puff in high school because she was trying all sorts of football tackling moves. Silly drunk girls. My husband is bigger than you. So there. We also bought tickets to go see Yeasayer on the 23rd. I'm SO excited for that one, too! I'm practicing my uber cool dance moves already. If you're not familiar with Yeasayer, you NEED to go watch this video RIGHT NOW. Just try not to dance. You'll find it completely impossible. What did you do this weekend? Find any cool deals? Dance like a maniac? Craft like a crazy person? Do tell.

iPhone Case Pattern 2.0

April 9, 2010
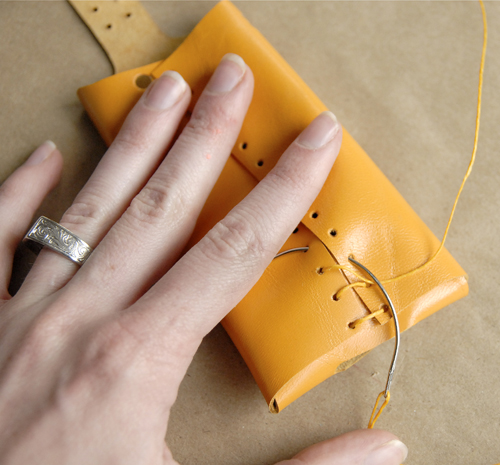
I threatened that I would post iPhone case tutorial nearly a month ago and here I am finally getting around to actually doing it. I really liked the old case that I had, it was just slightly impractical to had an unprotected phone to Penelope when she wanted to play her games. I decided that I needed to have a case that could stay on and actually protect my phone from grubby little hands. When I decided to embark on my noble quest, our computer was out of commission, so any designing I did was the old school way with a ruler and a pencil. That method took forever. Also, I kept running into wall after wall of design flaws. BLERG. After I got my computer back and I had a great brainstorm session with the hubs, I completed the pattern. It's pretty awesome, if I do say so myself. Doesn't the corsetted back look hott? The pros to this case:
  • Penelope can't press the home button, because she can't see it. So, she's stuck watching her little videos or playing her games and can't post random tweets from my phone.
  • The leather makes for a better grip. It's not going to slip out of mine or Penelope's hands.
  • The phone is protected from minor bangs and drops.
The cons to this case:
  • It's sewn in. So if you have to take it to the Apple store (which I do), you might need to un-pick the sewing. No big deal, but slightly annoying.
  • the sides of the case don't lay flat. Although, time and scoring the inside of the leather remedies this problem.
It's been about 3 weeks since I've had the case on my phone, and I really like it a lot. I feel like it's protected all the time and it just looks funky fun. I get comments on the stitching ALL the time. If you're looking to cover your iPhone, I hope you give this little tutorial a try. Click on the Download button below to download. Enjoy!

This printable is free for personal use. If you would like to use this printable commercially, please email me. Thanks!

I'm Ready for Summer

April 8, 2010
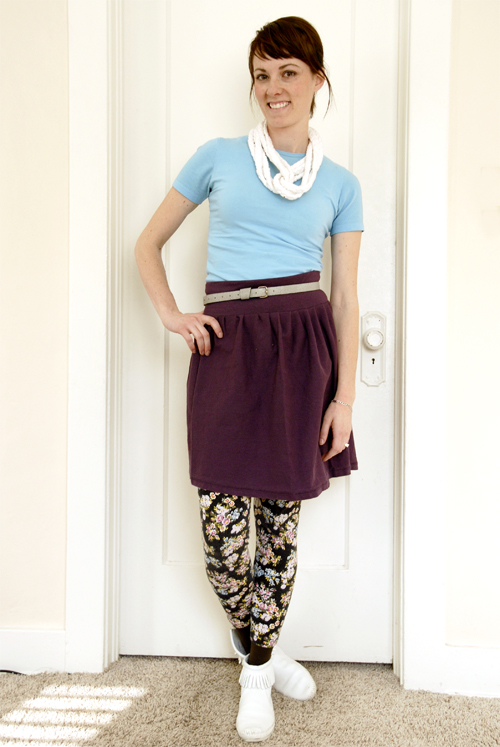
I'm almost wishing for 110º weather. Almost. Instead of dancing around hoping that it will please mother nature enough to let the sun come out and play, I made a skirt. You know. . . just in case the sun comes out for more than 15 minutes in the next 6 months. Now the sun is out! I must have done something right. ;) I made a sweet little mid-waisted jersey skirt from an XXL men's shirt. It was so easy. I spent 30 minutes sewing (15 of which were pinning the skirt to the waist) and $2 total. Not bad for a summer staple. I did a muu muu refashion back in September that was very similar, but after seeing Susan's method on her skirt tutorial, I thought I'd take her approach with this refashion. I like it much better. For the muu muu skirt I sewed the gathered material under the elastic, which created bulk in the wrong spot. So now I'm thinking I'm going to get my picker and re-do that one. I've had XXL t-shirts on the brain recently. Can you tell?

Thrifty & Chic: I love H&M

April 5, 2010
Utah does NOT have an H&M. It totally bugs. If Salt Lake were to ever get a Trader Joe's and an H&M, I think I'd be in big trouble, but super happy. Does anyone want to help me petition to H&M to open a Salt Lake store? I'm serious about this. While in Arizona, I made it a point to go to H&M at least once. I probably could've gone two or three times, but I'm not sure Chris or my bank account would've really appreciated that. I was a good girl, though. I managed to get a bunch of awesome clothes for Penelope and a few must-haves for me & Chris without spending over $100. H&M has the best kid's clothes. In fact, their kids clothes are so awesome, my 18 year old sis-in-law and I both found some pretty sweet items for us in the tween department. I found so many sweet little things for Penelope, but this dress (above) was a must-have Easter dress. My jaw just dropped when I saw it in the store, it's so precious! It was only $17, too! Score. I had planned on making matching outfits for Easter (like last year), but I don't think I would've thrown together anything nearly this cute at the last minute. So, I had to have it. I also found two awesome dress shirts for Chris for $12.50 each! The yellow shirt (above) is one of them. You can't tell from the pic, but it's a yellow and white pin stripe pattern. It looks really sharp in person. Chris likes his new shirts, but I think I might like them more. H&M makes fitted dress shirts. I can see Chris's muscles better. I like. Don't they look so cute together!? So, who's with me on petitioning for a H&M in the Salt Lake area?  Shall we get started?! Contact H&M and let them know you want one. I did. Hope you had a great Easter weekend!

Happy Easter Weekend, Folks!

April 2, 2010
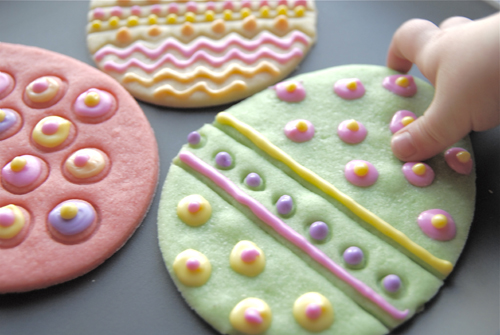
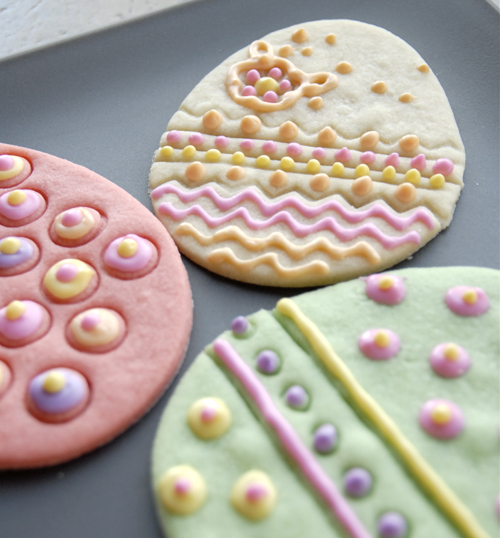
Here are a few pictures of the Spring/Easter-themed cookies I made with my in-laws while visiting in Arizona last week. We had so much fun stamping out the cookie dough and frosting them. We used Williams Sonoma cookie cutters and decorative pens to make these cookies. Aren't they just beautiful? They sat around the house for about two days before we ate them. That's pretty impressive considering my sweet tooth! I hope you all have a weekend full of candy, delicious food (maybe a vegetable or two), friends and most importantly, family. Aren't those greedy little fingers adorable?

Easter Egg Basket Printable

April 1, 2010
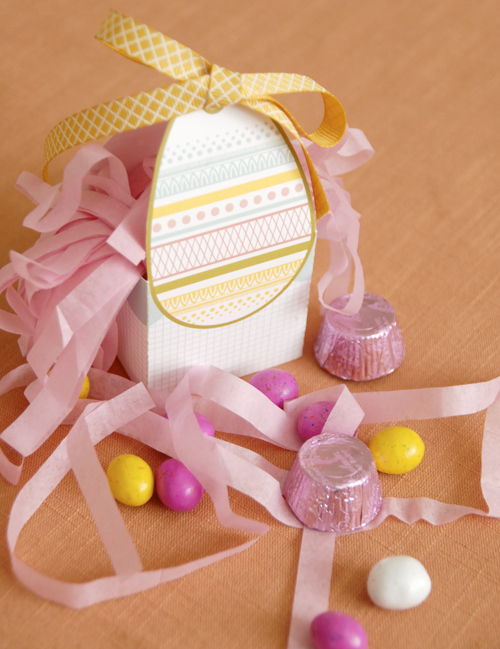
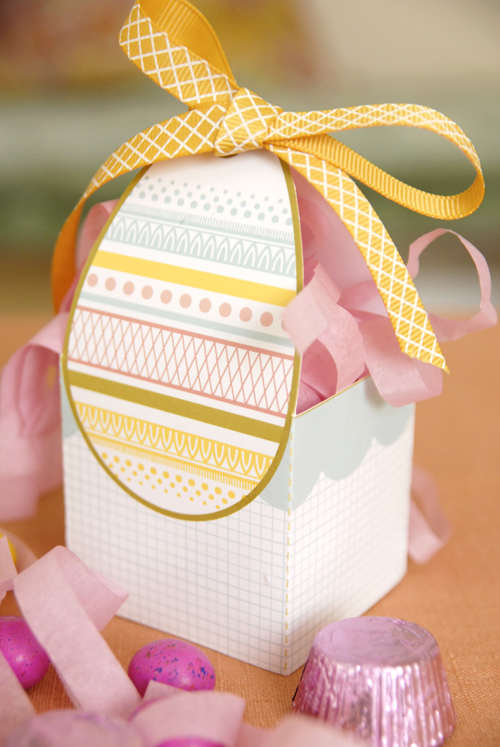
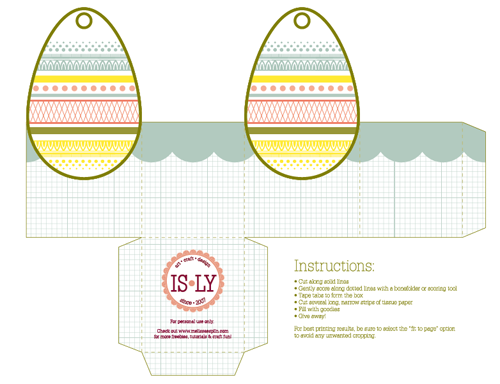
I just can't believe that Easter is this weekend! Does anyone else feel completely unprepared for the weekend festivities? My lovely neighbor, Susan, kindly reminded me that it was Easter this weekend and that an Easter printable would be a good idea. I agree! I think y'all need something festive to adorn your Easter spread this weekend. So, with much excitement, I present to you a new freebie!! Isn't it so cute?!? It's the perfect size for chocolate goodies, a hard boiled egg or (my favorite) a generous handful of Starburst Jelly Beans. The finished dimensions measure about 4.5" x 2.25" x 2". All you have to do is print out on cardstock, cut, score, tape and fill! You'll want some decorative ribbon to tie the tops together and maybe some Easter grass to use as filling. I didn't have any grass, so I just cut thin strips of tissue paper. I really like how the tissue paper looks. Give it a try sometime!

I really hope you enjoy this printable and USE IT! I plan on using these for place settings for dinner this Sunday. Oh, and if you don’t celebrate Easter, it’s sort of holiday neutral, so feel free to use it for anything. Ever! Click on the button below to download for free. Hope you enjoy!!

This printable is free for personal use. If you would like to use this printable commercially, please email me. Thanks!