 |
Babylegs
October 27, 2008Leggings are fabulous, and even more 80s fabulous when on chubby baby legs. I found an excellent, fast tutorial on how to make your own baby legs from adult socks. I was a little hesitant to make them, mostly because I didn't think they would look that good without a surger seam. Fortunately I was wrong. They're fast, easy and look great even with regular sewing machine seams. I've made 6 pairs thus far, and from start to finish, they take fewer than 5 minutes to make. Check out the tutorial HERE.
If you're looking for more tutorials, check out my delicious.
Halfsies
October 24, 2008Happy Half Birthday, Penelope. I'm very proud to say you've survived your first 6 months of life with little incident. You haven't had a runny nose yet and you've only blown out one diaper which somehow got me out of some work responsibilities. I can't complain. You truly are a fabulous baby and we love you more and more every day.
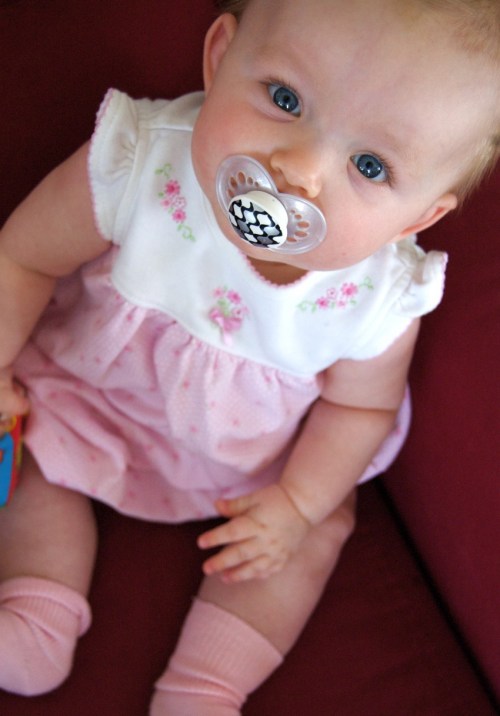 I have to admit, it's been nice to find you in the same place we left you. No longer! You rolled over yesterday. Three times. I guess you've finally decided to move your chubby baby body. You're also getting better at sitting up on your own. I think you managed to sit up for about 3 minutes yesterday! Solid foods have been the easiest thing for you so far. You're a champ at eating peas (although not alone, yet), carrots and pears. You're even trying to feed yourself. I can't believe how grown up you are.
By far this stage is my favorite. I feel like I know you now. We're friends even. Your mom and dad love you. A LOT.
I have to admit, it's been nice to find you in the same place we left you. No longer! You rolled over yesterday. Three times. I guess you've finally decided to move your chubby baby body. You're also getting better at sitting up on your own. I think you managed to sit up for about 3 minutes yesterday! Solid foods have been the easiest thing for you so far. You're a champ at eating peas (although not alone, yet), carrots and pears. You're even trying to feed yourself. I can't believe how grown up you are.
By far this stage is my favorite. I feel like I know you now. We're friends even. Your mom and dad love you. A LOT.Spooky Prints + Tutorial
October 22, 2008Carol, a woman in my watercolor class, mentioned in class last week about making prints from styrofoam. GENIUS. It's not nearly as painstaking (or dangerous) as linoleum block prints. It stuck with me, and a woman in my church asked me if I had any ideas for a school class activity for a Halloween party, well here you go, Wendy. Hope this works out!!
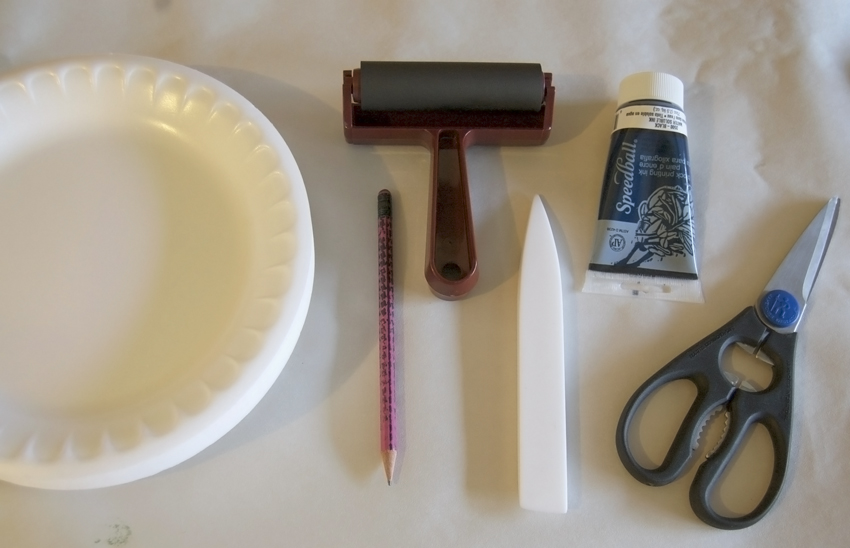 In a nutshell, here's what you need:
 Cut the bottom of the plate out. I chose a circle, it's easy. You can cut any shape you want.
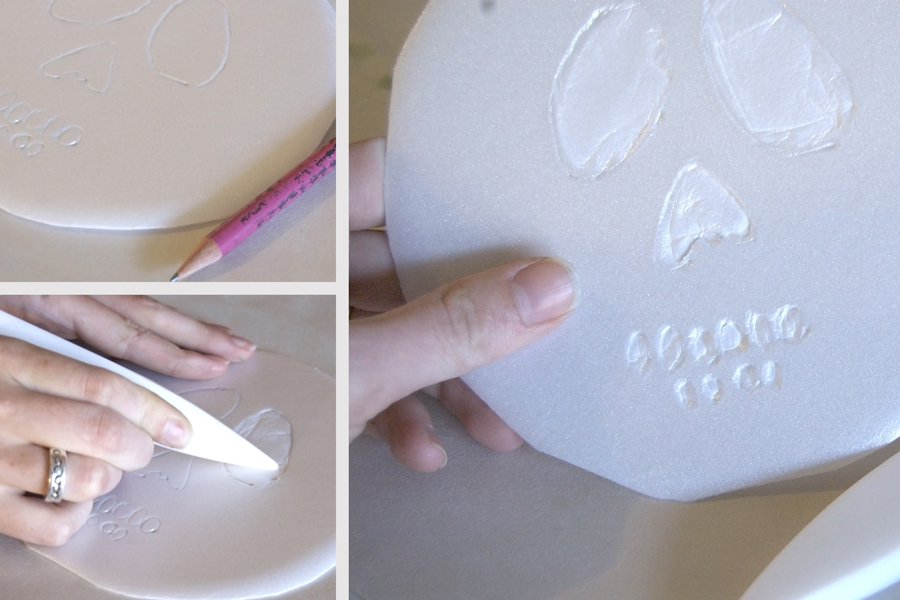 Draw on the surface of the Styrofoam with a pencil. After you're done with outlines you can depress large spaces (these spaces will end up white) with a bonefolder or tongue depressor.
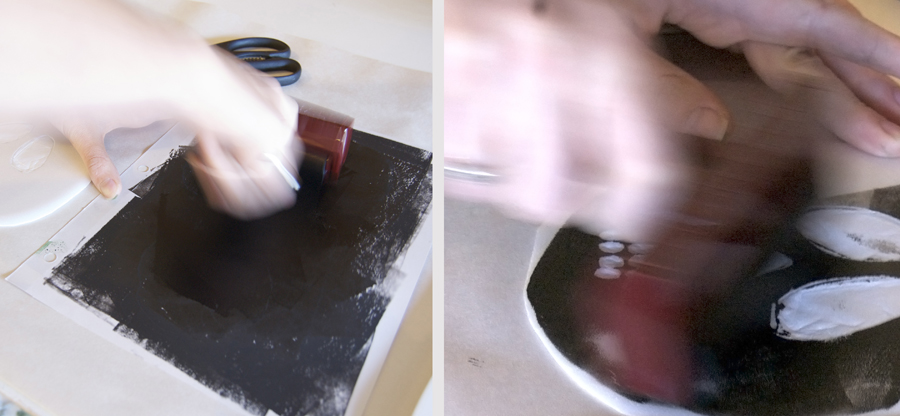 Squirt ink on a "throw away" sheet of paper to get your brayer evenly coated with ink. Roll ink over the surface of your print. Be sure not to press too hard or you'll ink up your white spaces.
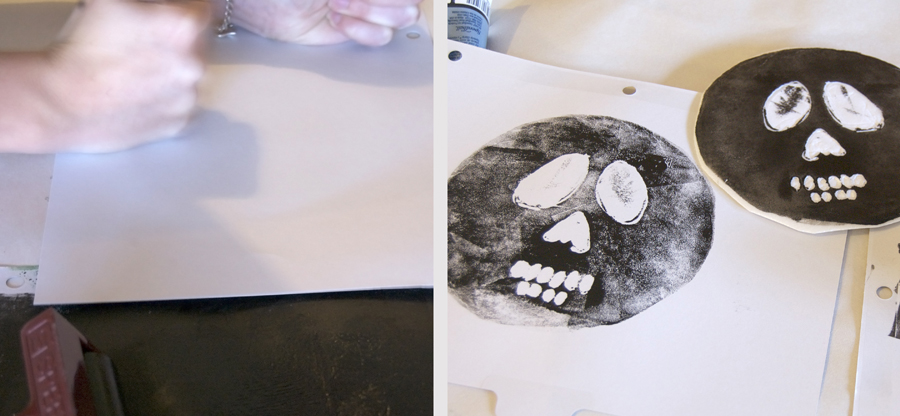 Apply the paper face down onto your "plate". With the palm of your hand or side of your fist, rub the back side of the paper to transfer the ink. Remove the paper.
 All done!
Styrofoam Printing
 In a nutshell, here's what you need:
- Pencil
- Styrofoam plates
- Scissors
- Bone folder or tongue depressor
- Brayer
- Printing ink (any color)
- Paper (not pictured)
- Newsprint (to manage the mess)
 Cut the bottom of the plate out. I chose a circle, it's easy. You can cut any shape you want.
 Draw on the surface of the Styrofoam with a pencil. After you're done with outlines you can depress large spaces (these spaces will end up white) with a bonefolder or tongue depressor.
 Squirt ink on a "throw away" sheet of paper to get your brayer evenly coated with ink. Roll ink over the surface of your print. Be sure not to press too hard or you'll ink up your white spaces.
 Apply the paper face down onto your "plate". With the palm of your hand or side of your fist, rub the back side of the paper to transfer the ink. Remove the paper.
 All done!
Delicious Pumpkin Minicakes (or Pumperdoodles)
October 19, 2008I'm not sure what I want to call these, but whatever their name may be, they are delicious. These minicakes were one of those happy little accidents that (for me) rarely ever happens in the kitchen. I had far too much pumpkin pie filling left over after baking 2 pies, and decided to make a little concoction of pumpkin filling and snickerdoodles. The results, well, too bad you weren't there to eat them with me. I think I ate half the batch in two days. Thanks to the park days ladies who helped me polish them off.
Download the printable recipe card HERE.
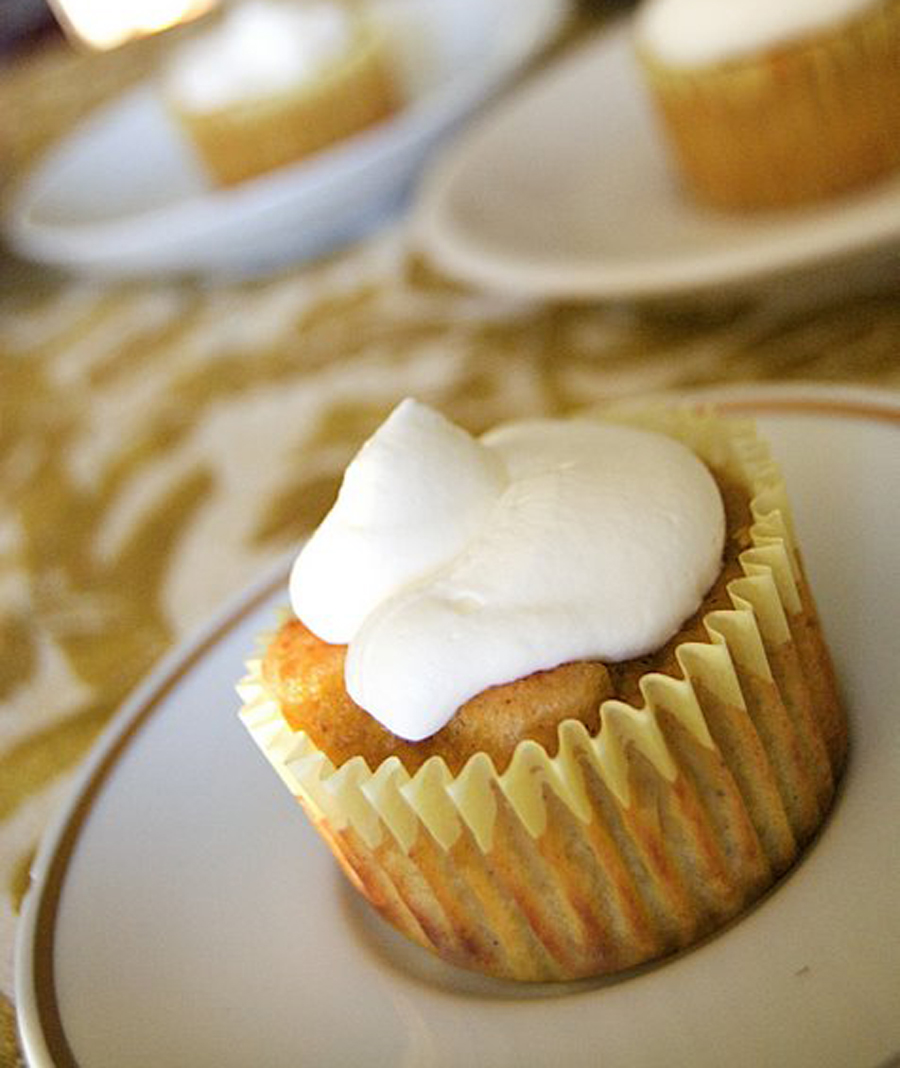 Without any further ado, I give you The Pumperdoodle (or Pumpkin Minicake)
 Without any further ado, I give you The Pumperdoodle (or Pumpkin Minicake)
Pumpkin Minicakes
Makes about 18Dough:
- 6 tablespoons butter, softened
- 3/4 cup sugar
- 1 egg
- 1 1/4 cup flour
- pinch of salt
- 1/2 teaspoon soda
- 1 teaspoon cream of tartar
Filling:
- 1 cup pumpkin puree*
- 1/3 cup firmly packed brown sugar
- 3 tablespoons all purpose flour
- 1/2 teaspoon ground cinnamon
- 1/4 teaspoon freshly grated nutmeg
- Pinch salt
- 2/3 cup heavy cream
- 1/4 cup maple syrup
- 2 eggs, slightly beaten
- 1/2 tsp vanilla extract
Recycled Wedding Announcements
October 18, 2008My mom had a bunch of extra wedding announcements from Jake's wedding, and put them to excellent use. What a crafty woman. If you're lucky enough to get a card made from my mom, you know what I'm talking about.
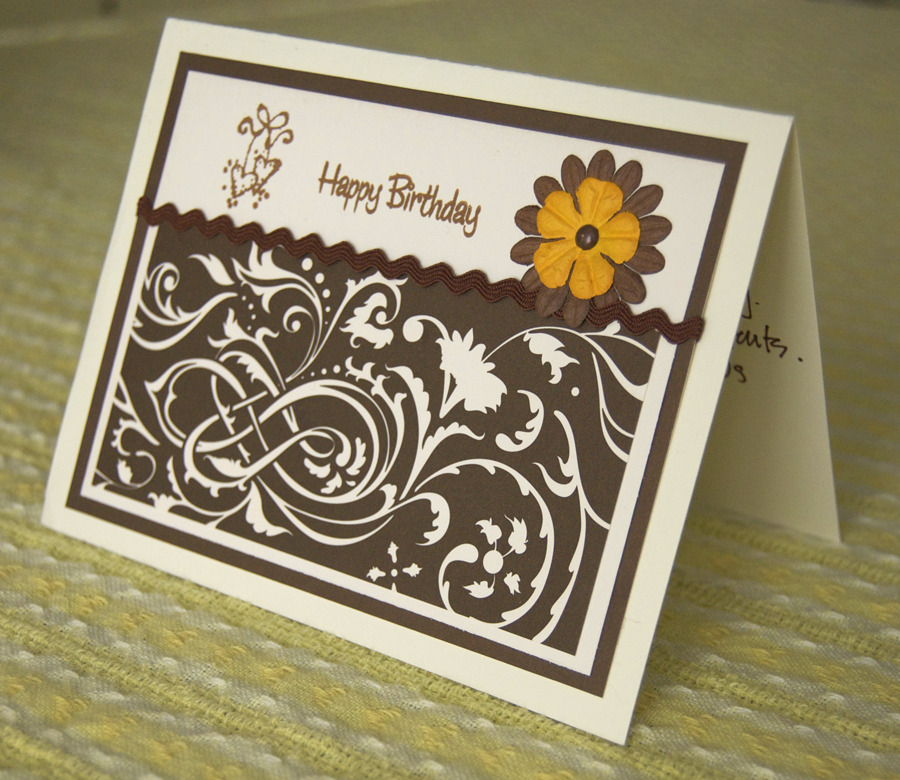 Mom, thanks for the card & giftcards. Chris feels loved. We both do.
 Mom, thanks for the card & giftcards. Chris feels loved. We both do.
Apartment Therapy & Goody Blog
October 16, 2008As you know I've been a little bored with my apartment recently. I've made a few changes, progress is coming slowly. Anyway, I've been featured in Apartment Therapy as one of the contestants for the Fall Color Contest!!! I couldn't be more pleased, since yesterday (the last day to enter) I kept getting error messages when I was trying to upload and submit my entry.
 My entry is in the regional best 40 bracket. Contest voting will be on the 20th and if I get enough votes, I can move on to the final 20. I probably won't make it into the top 20, because I'm up against some serious competition, but I'm excited to be blurbed about in ATSF.
 **Update! I also just found out that Penelope was featured in the Goody Blog's "Cute Kid Thursday". I submitted info and picture last week, didn't think it would happen so soon, but hey, Penelope is just adorable.
 My entry is in the regional best 40 bracket. Contest voting will be on the 20th and if I get enough votes, I can move on to the final 20. I probably won't make it into the top 20, because I'm up against some serious competition, but I'm excited to be blurbed about in ATSF.
 **Update! I also just found out that Penelope was featured in the Goody Blog's "Cute Kid Thursday". I submitted info and picture last week, didn't think it would happen so soon, but hey, Penelope is just adorable.
To: My Christopher Dear
October 16, 2008Happy birthday!! Even after all of these years. Since you're turning 26, I thought it might be fun to show you the reasons (not all of course) of why you're just awesome. . .
[gallery=22]
I hope you've had a great day, inspite of having to work late. I still love you.
Whoop Dee DO! Hooray!
October 13, 2008My totally awesome (one and only) brother Jake took the bar recently. He may have been a little nervous because while he was studying he was working, engaged and travelling between SLC and Spokane. There were only a few things to distract him from studing. Just a couple. Little things.
He passed!! I'm so excited for him! Now that he passed he can focus on his awesome wife and house projects instead of studying his brains out. Great Job, Mr. Smarty pants.


Eventful Weekend
October 13, 2008Besides being glued to the computer because of this and that, and despite Chris having to go into work, we had a great weekend. Chris has been searching high and low for an Oxy-acetylene torch, and we found one last week! Seriously, I love Craigslist. We've both been anxiously waiting for Saturday so we can finally bust the thing out.
At first I was really jumpy, it's been a while since I've fired one up (like 3 years), so I didn't want to do anything wrong and I have no desire to blow up. Our practice braising session was a little rocky at first, I was thinking you set the flame as high as you would for welding, NOT SO! Your flame doesn't need to be nearly as hot in order to braise effectively. It's very similar to soldering.
 We tested our braising skills on copper (pretty cheap), and got some really colorful results. We have to get a lot better before Chris starts braising on his steel frame, but I'm glad that no longer feel we're in way over our heads.
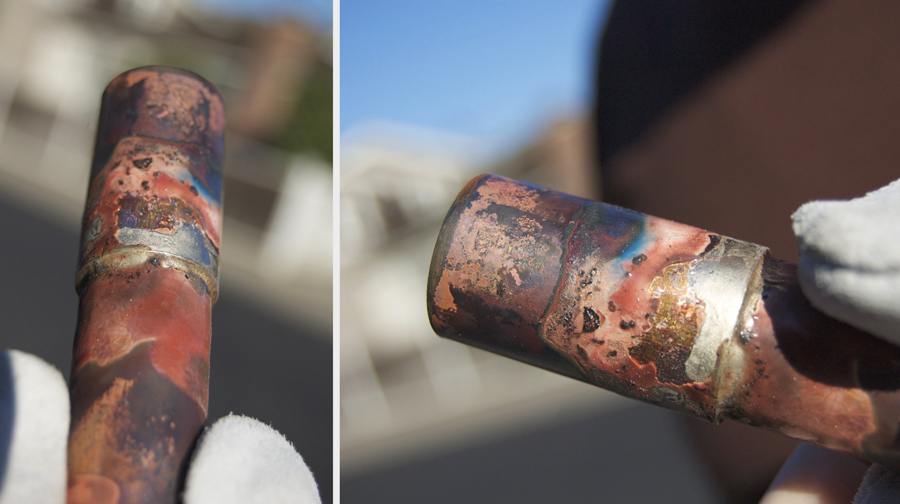
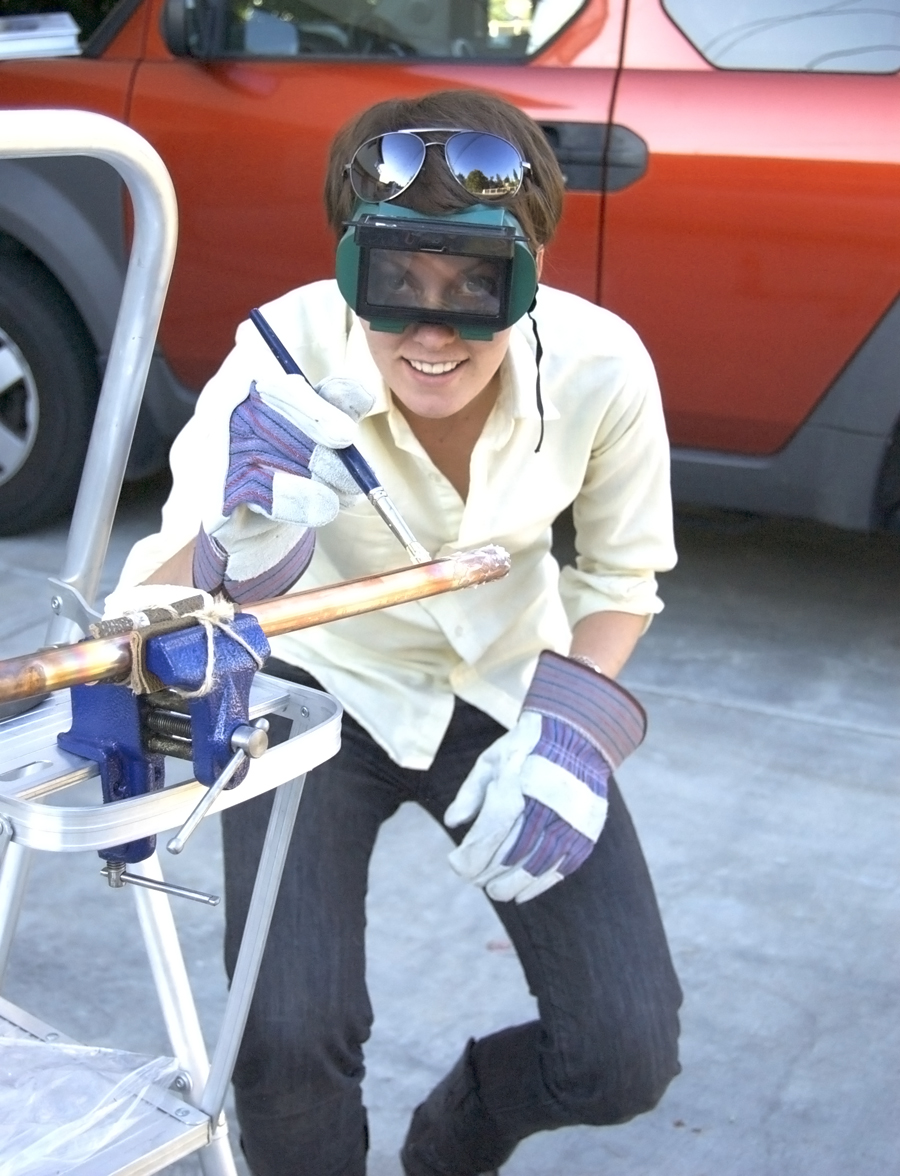 Chris was nice enough to let me give it a try.
 We tested our braising skills on copper (pretty cheap), and got some really colorful results. We have to get a lot better before Chris starts braising on his steel frame, but I'm glad that no longer feel we're in way over our heads.

 Chris was nice enough to let me give it a try.
Penelope Update: She Gets Sweeter Every Day
October 13, 2008I know she was cute and sweet from the very beginning, but it really has taken me this long to get attached. A couple of weeks ago, I was telling her, "I love you!", I thought (pretty sure for the first time). . . I really mean this in that I-will-do-anything-for-this-child way. She truly is an amazing baby. Chris and I look at each other and wonder what it was we did to deserve this child. Probably nothing, and we're infinitely in God's debt for this one.
 She's nearing her 6 month mark, and isn't showing any interest in rolling over or becoming mobile. [Thank you, Penelope!] She is interested in standing and sitting up. I really need to get a baby swing. We're working on that. She's loving solid food, but hating peas. Why?? I got clever the other day and mixed a spoonful of peas in with the carrots. I could tell she knew something was wrong with the carrots, but she ate anyway. What a trooper. I'll be posting more on the food later.
I've updated the PENELOPE PEARL page with the most recent batch of photos. One of these days I'll get organized enough to post some videos. Enjoy.
She's nearing her 6 month mark, and isn't showing any interest in rolling over or becoming mobile. [Thank you, Penelope!] She is interested in standing and sitting up. I really need to get a baby swing. We're working on that. She's loving solid food, but hating peas. Why?? I got clever the other day and mixed a spoonful of peas in with the carrots. I could tell she knew something was wrong with the carrots, but she ate anyway. What a trooper. I'll be posting more on the food later.
I've updated the PENELOPE PEARL page with the most recent batch of photos. One of these days I'll get organized enough to post some videos. Enjoy.Something New
October 10, 2008Last week was the fabmo distribution I found little hangers, which were probably used to hang fabric samples in design centers. They are much too small to hang a pair of pants, but perfect for un-framed artwork!

- First, buy a couple of D-rings (don't ask the guy at home depot for d-rings, he won't know what you're talking about, ask for "Ooks") and some framing wire
- Get a stud finder, screw the d-rings into the studs
- Wrap the wire around the d-ring and pull tight
- Hang your work
<b>Cheerio</b>, Trash!
October 6, 2008I'm all about quick and easy crafts these days. This one took me mmm. . . five minutes? maybe three. It's so fast.
How to make a trash can out of a cereal box & wallpaper (or wrapping paper)
Step 1: Staple down the flaps (adds strength)
 Step 2: Cut paper to size and tape down ( I used double sided tape for this part, so that the tape wouldn't show. Everywhere else I used very strong packaging tape)
 Step 3: For the opening, cut the paper at each corner. Fold to the inside and tape.
 Step 4: Fold extra paper like you would wrap a gift. Tape down.
 Step 5: Insert plastic bag (I use old grocery bags) and start throwing your trash away!
 I made this trash can for my car about a month ago and it is such a lifesaver. I can just throw Penelope's diapers in there, and not worry about them soiling the car (or worse, my purse). We use this all the time. I suspect you could also modify this to hold toys, games, etc for long car rides.
 Step 2: Cut paper to size and tape down ( I used double sided tape for this part, so that the tape wouldn't show. Everywhere else I used very strong packaging tape)
 Step 3: For the opening, cut the paper at each corner. Fold to the inside and tape.
 Step 4: Fold extra paper like you would wrap a gift. Tape down.
 Step 5: Insert plastic bag (I use old grocery bags) and start throwing your trash away!
 I made this trash can for my car about a month ago and it is such a lifesaver. I can just throw Penelope's diapers in there, and not worry about them soiling the car (or worse, my purse). We use this all the time. I suspect you could also modify this to hold toys, games, etc for long car rides.
Use the Stairs
October 1, 2008Since I decided I'm not in any hurry to move (unless #2 comes along, which hopefully won't happen for a few years), I am slowly re-decorating and organizing our apartment. I love where we live. We have so much natural light, fabulous storage (aka an attached garage), great layout and awesome location. I figure I could work on organizing our space a little better.
We have so much wall space going up the stairs from our entrance, I decided it needed to be used (especially since losing a closet to Penelope). I was inspired by How About Orange's faux boix project and thought how well it would translate to decorating wall hooks.
 Here's how I did it: I bought decorative contact paper from Target ($5) and drew a bunch of circles and cut them out. I located the wall studs, made marks and arranged my cloud forms accordingly. Then, I located the stud (again) and screwed the hooks in. I think from start to finish the whole thing took me less than an hour. Pretty sweet hu? I'm mostly excited to do something to our embarassingly plain walls. Now that it's finished, I think I'm going to buy more hooks and do it to the entire wall.
 Here's how I did it: I bought decorative contact paper from Target ($5) and drew a bunch of circles and cut them out. I located the wall studs, made marks and arranged my cloud forms accordingly. Then, I located the stud (again) and screwed the hooks in. I think from start to finish the whole thing took me less than an hour. Pretty sweet hu? I'm mostly excited to do something to our embarassingly plain walls. Now that it's finished, I think I'm going to buy more hooks and do it to the entire wall.