Posts Tagged ‘zero budget project’

Zero Budget Project: Penelope’s Studio

12 Comments

For Penelope’s birthday, Chris and I wanted to give her something that would make her squeal. She is obsessed with her art supplies and crafting. Most days it’s all over the kitchen table, pantry, floor, counter tops and couch. She just spreads her artistic love all through the house.

zero-budget-project

It’s great, but I want to channel it somewhere that I can close the doors and ignore it. I also wanted the space (and flooring) to be utterly indestructible to her glues and glitters. She thinks my studio is so cool, I wanted to give her one of her own.

istillloveyou-penelopestudio-before-1

The downstairs toy room was out (too much soft carpet down there). My studio was definitely out!

We have this utility closet that we don’t really use that efficiently upstairs just next to my studio. It has washer and dryer hookups, but we have a laundry room downstairs instead. We had a few random boxes and things (above) that could be easily organized elsewhere, so I made this space Penelope’s.

istillloveyou-penelopestudio-utilitycloset-1

It’s the perfect size for her and the tile floors allow for easy clean up. As far as the cost and logistics of making this space hers, here was the breakdown:

  • tables: $50, Ikea
  • chairs: already on hand
  • shelving and brackets: $16, Ikea
  • containers: already on hand (Pink: $5, Michael’s | black: $3.99, Ikea)
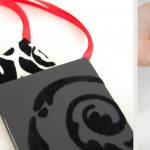
  • frame for her sign: $5, Ikea
  • flat art storage: already on hand
  • filing cabinet: already on hand
  • magnets: gift from LivyLove

Total:$80

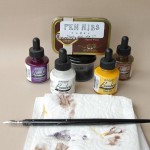
Of course, while I was at Ikea, I wandered through their art supplies and picked up about $40 worth of supplies for her as well. Who knew Ikea had such awesome art supplies for kids?

istillloveyou-penelopestudio-utilitycloset-2

The top shelf is still a dedicated space for the drill, light bulbs batteries and misc cleaning supplies. I’m thinking the above space needs an overhaul as well.

istillloveyou-penelopestudio-utilitycloset-3

With the open containers, Penelope can move them and clean up easily. And she’s pretty good about keeping things clean. So far.

istillloveyou-penelopestudio-utilitycloset-4

I finally found a use for those tins I bought on impulse by way back. This one holds chalk, the other holds her glitter pens.

istillloveyou-penelopestudio-utilitycloset-5

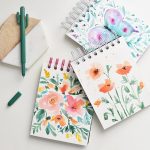
My mother-in-law sent Penelope a bunch of sweet supplies for her birthday like floral fabric tape, pebble crayons, twig pencils and loads of paper. What a nice grandma. Now she can use these in her own way and not worry about me nagging to clean up.

istillloveyou-penelopestudio-utilitycloset-6

The metal cabinet is perfect for displaying her favorite pieces before storing or framing them.

istillloveyou-penelopestudio-utilitycloset-7

It’s really a great space for her. She can do whatever she wants in that space and I can close the doors at the end of the day and ignore it all!

Did you have a creative space just for you growing up? Will you or have you done this for your own kids?

Zero Budget Project: Hand Cut Fish Plants

5 Comments

Meet Goldie Cruise in the Dooms. She’s Penelope’s goldfish – we LOVE Penelope’s creativity with that.

istillloveyou-handcut-fish-plant-1

This sort of satisfied her desire for a dog, but not really. We’ve had her for about 6 months (a record for a family goldfish?). We bought her as part of some cheap kit from the grocery store. And that kit came with some really ugly rocks and foliage. It was really disappointing that I couldn’t find anything that had more of a modern vibe to it.

istillloveyou-handcut-fish-plant-2

Remembering that my sister-in-law had given me some white plastic sheeting (used for Industrial Design projects). I cut some foliage for Goldie.

istillloveyou-handcut-fish-plant-3

I used the previous base from the kit to keep the plant upright. This way more tolerable than hot pink and muddy green fake foliage.

Inexpensive Minimal Gallery Wall

20 Comments

zero-budget-project

I’ve got another installment of the great Zero Budget Project. I don’t know why I’ve been dragging my feet on styling our bedroom. It’s not like it took that long or wasn’t fun to do. I guess I just needed to channel the right creativity.

melissaesplin-zero-budget-project-bedroom-art-1

I walked past these ribba frames while on a routine run to Ikea. They were $1.99 – and that spurred an idea. What if I did an entire wall out of these awesome cheap frames? I think the best part about these frames is that they’re an inch and a quarter deep. They don’t look as cheap as they are. So for just over $20 I was able to decorate this wall. Easy peasy.

melissaesplin-zero-budget-project-bedroom-art-2

It took a measuring tape, a level and a pencil. I measured out the width of the wall and graphed out where each piece should lie. It worked out to 10 inches apart. I went through old artwork and cropped down the pieces that would work (really only taking the pieces I liked that were just about 5×7). I had a few holes in my 11 piece series so I looked through Penelope’s stash and made a few new pieces as well.

melissaesplin-zero-budget-project-bedroom-art-3

Curating, prepping, cleaning, painting and hanging artwork took a few hours. All the while Chris was MIA, it was fun to reveal the newly cleaned and decorated space to him. Making him excited about our space really makes my efforts worth it.

melissaesplin-zero-budget-project-bedroom-art-4

The ribba frames come with these pre-cut mats, I didn’t use any of them for the artwork on display so I sandwiched an engagement photo of ours in between two of them using a flower frog (from Gather & Hunt).

melissaesplin-zero-budget-project-bedroom-art-5

I didn’t go with any specific style or color theme with this gallery, and I like it that way. I went with pieces that I liked and tried to arrange them in a way that would make them balanced.

melissaesplin-zero-budget-project-bedroom-art-6

melissaesplin-zero-budget-project-bedroom-art-7

I believe I made 5 pieces specifically for this gallery, it was a much-needed exercise to bust out the watercolors. Details on each painting after the jump.

(more…)

Organizing Spices – Enabling my OCD

11 Comments

zero-budget-project

The OCD gal in me has been wanting to do this for ages. I have this strange obsession with unifying things. Like spices. I typically buy my spices in bulk, so they’ve not been pretty. Not at all.

organize-spice-jar-1

Having these new jars around has been so nice. My house is a complete mess these days, so I can at least open up my cupboard here and see this pretty sight.

IMG_6413

This is what it looked like before. A complete mess. And it took me forever to look for the right spices when I needed them.

organize-spice-jar-3

I found these jars here, they’re not actual spice jars, but I like that they’re wider so I can actually fit my measuring spoons in and they were cheaper than the spice jars. It’s not like it was a huge price difference, but I liked these. It seems like a really lame thing to spend money on, spice jars, but it’s worth spending $20 to have a cupboard that’s always neat and tidy.

What little things to you spend money on to keep your home organized? I’d love to hear!

Zero Budget Project: Acrylic Utensil Holder

4 Comments

zero-budget-project

Either I’m a utensil hoarder, or utensil holders are made much too small for the utensils required for making yummy food. I think it’s the latter. I dreamed up this idea while my sister-in-law was still in Utah, and she helped me on it. It just took 1/2 inch acrylic an acrylic heater bender thing, glue, a drill and some string.

zero-budget-project-acrylic-utensil-holder-3

I found out that a local business sells acrylic for a reasonable price. For a 4’x8′ sheet of 1/2 inch acrylic, it was $140. I bought the whole sheet, intending to use most of it for coffee tables. Turns out 1/2 inch acrylic is a bit too thin for coffee tables. Lesson learned: research before buying. They also sell small scraps for cheap, this piece could easily be made out of one of those scraps. They also have black and white acrylic.

zero-budget-project-utensil-holder-kitchen-1

The utensil holder is base-less, there really is no need for a base, since this rarely if ever gets moved (I’ve had this for 3 months and I’ve only moved it for the sake of this picture). The holder is 9 inches tall, 18 inches wide and 3 inches deep. It’s basically a 9″x42″ sheet of plastic that’s been bent, and the seam joined in the middle back. Bending it really easy when you have an acrylic heat bender, but if you don’t have one of those and are in a DIYing spirit you can make one of these.

zero-budget-project-acrylic-utensil-holder-kitchen-2

The problem that I ran into after I begun using it was since it was too wide, the utensils would fall to the bottom and make it nearly impossible to fish out. To remedy this, I drilled a few holes and thread some string from front to back creating little utensil sections. The white strings are hardly noticeable – Chris didn’t notice anyway.

I love having my utensils out of drawers and within arm’s reach of the stove top. And I also like that it’s pretty. I like having clean, pretty things in my home.

mobile site