Posts Tagged ‘Silhouette’

2019 Easter Treat Box Free Printable

2 Comments

This post is sponsored by Canon. 

I’ve been a long-time Canon printer fan. I previously had, and LOVED, the Canon MG5620 for 5 years and loved it (here’s the newer version at $75). When I got the opportunity to try their TS9521C Craft Printer, I jumped at the chance! I set it up successfully all by myself. In an afternoon.

The craft printer boasts printing 12×12 borderless, I’ve ALSO successfully been able to print borderless 11×17 as well. So score, right? A larger printer that can handle bigger print and cut projects that doesn’t cost an arm and a leg?? I’m sold. 
See the bottom of the post for the download, but if you want the low-down for this printer, check out my pros and cons list. 
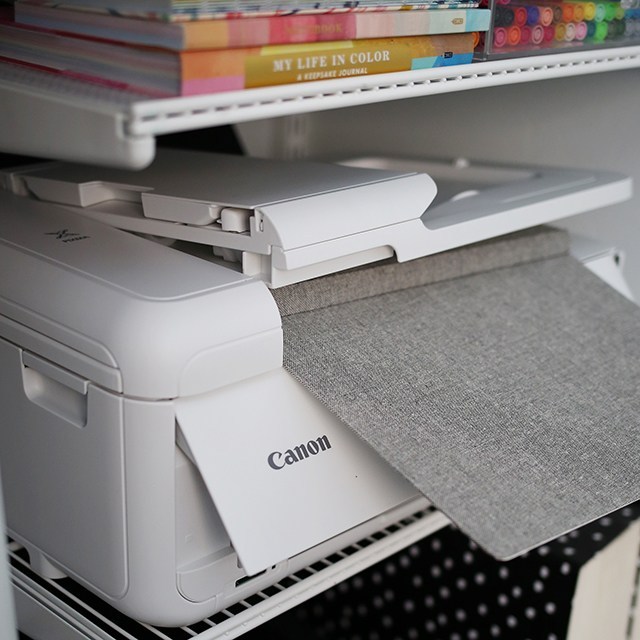
PROS: 

  • Easy set up
  • Pre-loaded templates
  • Wireless Printing
  • 12×12 borderless printing*
  • Scanner
  • Duplexing Scanner
  • Front and Rear feeds for different media types

CONS: 

  • Scans legal sized paper, not 12×12
  • It’s not compact
  • Front tray doesn’t work well with thicker paper

These cons by all means aren’t deal breakers at all. It would be amazing to have a larger-format scanner, but it does do 9×12, so that’s pretty darn great. The size of the TS9521C is a fair amount larger than my older Pixma MG5320, but that’s to be expected of a larger-format printer. Just don’t expect it to fit in to super tight spaces. ;) And the front tray doesn’t work well with all of my card stocks. It works with Neenah card stock, but not letterpress. HOWEVER, that’s what the rear tray is for! It’s great to have that option so I can work with thicker card stocks no sweat. 

The cons list aren’t really cons because I’m so excited about this printer. 

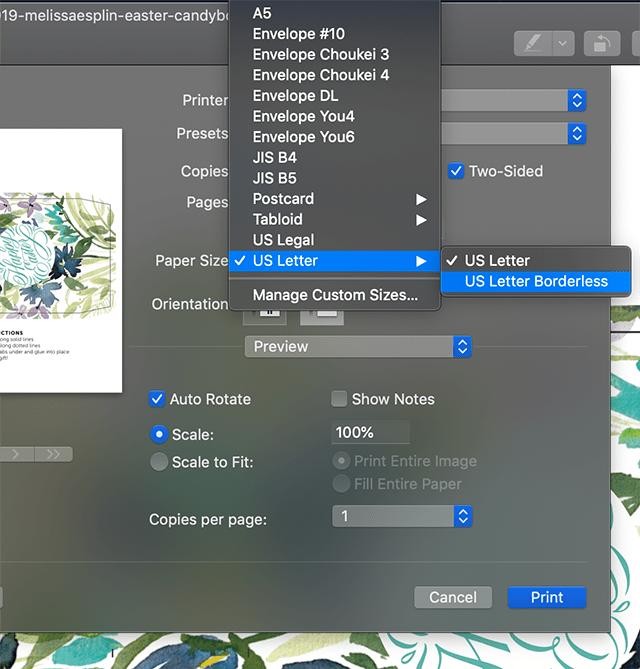
*It doesn’t print borderless as a default setting. When you select print, you’ll see the option in print settings where you can select a borderless option in the paper size selection area. See image below. 
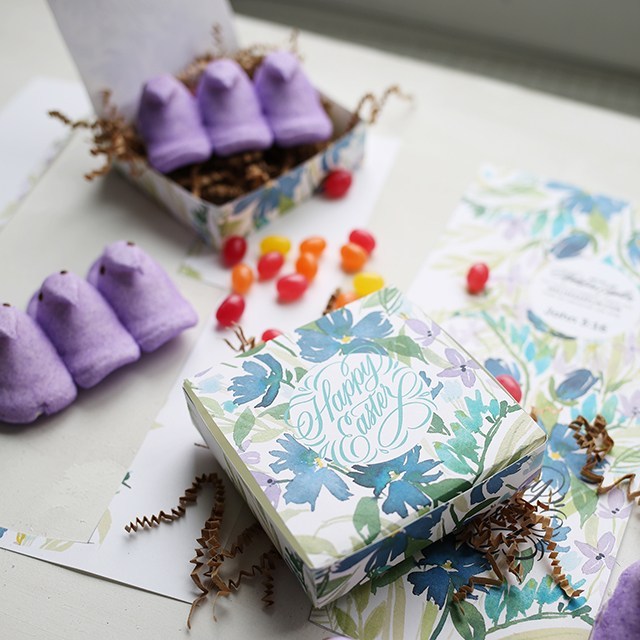
I painted up this floral and made a print and cut, and didn’t have to worry about borders. I’d call that a win. 
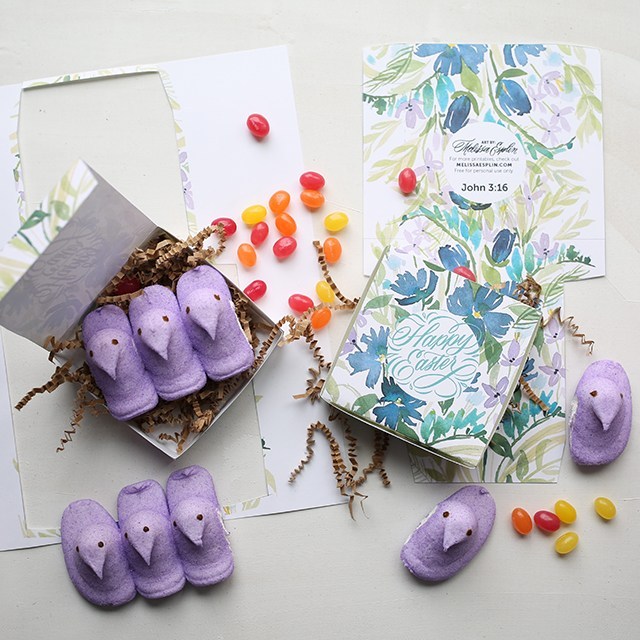
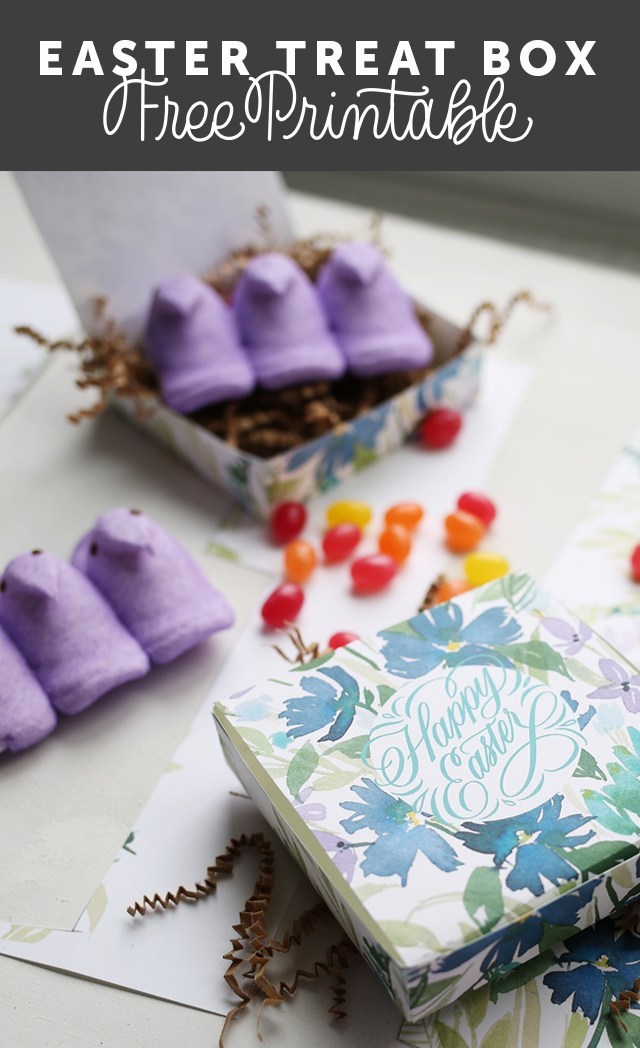
The box dimensions are 3.75 x 3.75 x 1 inches; It’s the perfect size for a few candies or a cookie. The perfect little treat to gift to someone in celebration of this Easter week. 
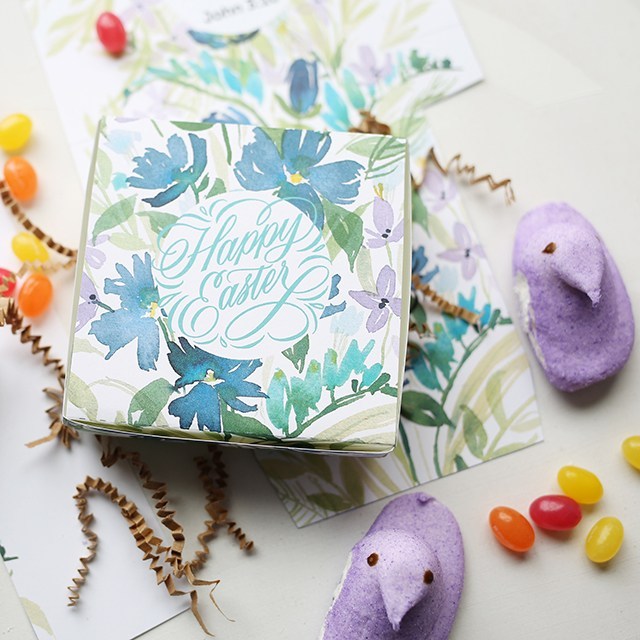
There’s something about Easter that makes me go for blues and greens. See below for different file downloads. 
PDF Easter Print & Hand Cut

Silhouette Print & Cut File

More goodies for your Easter Celebrations below: 

2017 Easter Scripture Print2016 Easter Basket Tag • 2016 Easter Box • 2016 Easter Scripture •2014 Easter Banner • 2011 Easter Box • 2010 Easter Box

This post is sponsored by Canon. This post contains affiliate links. All opinions are my own.

2017 Thank You Printable

9 Comments

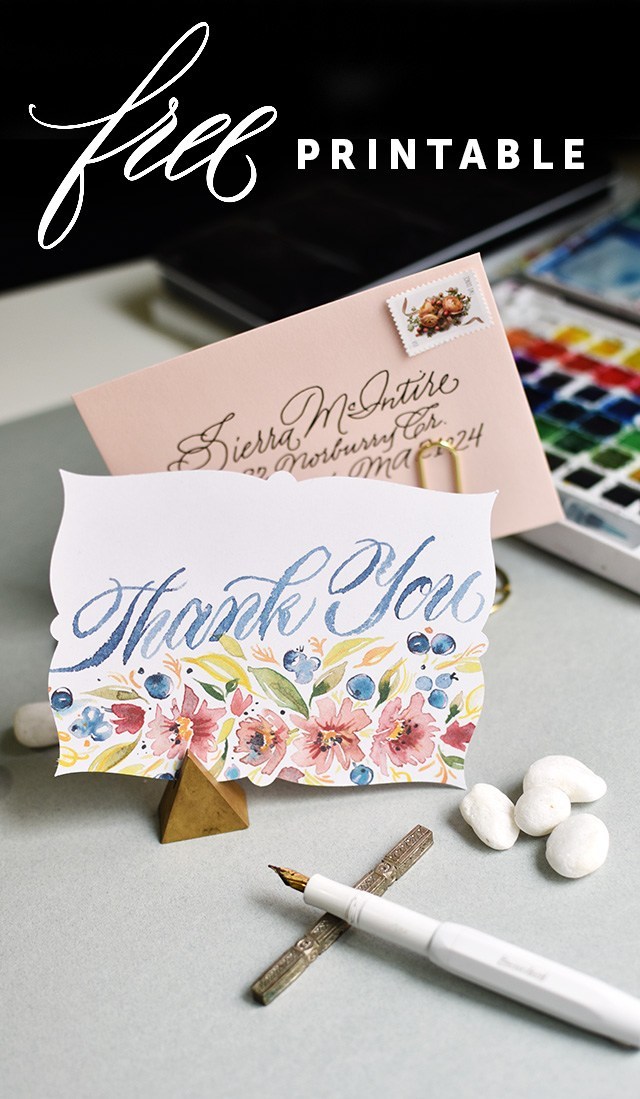
The time of year has come where it’s time for the annual Thank You freebie! I love doing this because it gives me a chance to work on styles and techniques I don’t always get to do on a regular basis. For this year, it meant I got to put the watercolor floral classes I’ve taken from Natalie Malan to use. I wanted to go for a slightly muted palette, but it only worked slightly. It’s like a bright, muted palette. ;)

Also, I feel like I must mention that this month completes the 10th year I’ve been blogging! I can’t believe it’s been that long. So much has changed: 6 moves, 3 children and a few career changes to say the least. I didn’t know I would be blogging this long. But here we are! ‘Tis the season for gratitude, so I may as well express that I’m so grateful for the opportunities that blogging and social media has given me. I’ve made dear friends, I’ve traveled, I’ve learned so much and I’ve felt the creative inspiration through the connections that I’ve made. It’s been pretty awesome. Will I still be here, writing in another 10? We shall see! 

Check out the a video of my process here:

This year’s Thank you takes on two forms. One is a plain, 5.5×4.25 rectangle with cut lines for you to follow, the above is a suggestion. You can download the JPG and use Silhouette’s print & cut feature to make a gorgeous full-bleed card with a scalloped edge. See below for the tutorial! 


You certainly don’t have to have a Silhouette in order to take advantage of this printable. Just click The download link below with the description “hand cut”. :) Just giving you some fun options.

DOWNLOAD SILHOUETTE FILES HERE


But I’ve got TONS MORE ‘Thank You’s. Check out the whole list of past years’ printables below!

Want to learn calligraphy? Like the brush lettering I use here? Check out my class on Calligraphy.org. I’ll give you one-on-one instruction to help you get there. We start from the very basics, but because of the personal nature of the instruction we offer off-script learning for the more advanced letterer. Use code BRUSHLETTERING for a 10% discount on the class. :)

Materials used for this DIY: 

This printable is free for personal use only. Any redistribution or commercial use of this printable without written consent is prohibited. © Melissa Esplin 2017. Affiliate links used, by purchasing through an affiliate link, you support MelissaEsplin.com and the free content provided here. Thank you for your support! 


All Kids Are Artists with the Silhouette Mint

3 Comments

A couple of months ago, I did a video interview for Silhouette for their Mint. It’s now up on my YouTube channel. Check it out here or the embedded video below.

melissaesplin-allkidsareartists-silhouette-mint

In the video I mention that anyone can be an artist with the Silhouette Mint. It’s so true! I volunteer as a youth leader for 8-12 year old girls in our congregation. We meet twice a month to talk about spiritual doctrine, learn new skills, socialize and do fun activities. As a learning activity, I taught them about the design process and had them come up with their own stamp designs. I was so impressed with the skill and focus of each of these girls! A few of them had me help them with their word art. I was a little reluctant to do that because I wanted them to have full ownership, so I made them trace and add their own personal touches to do that.

This was perhaps one of my favorite activities as their leader. Seeing them thoughtfully come up with a design, draft and draw it out was so satisfying. For best results when making your own stamps:

  • Use the brightest paper you can find. Premium laser paper is smooth and solid white.
  • Use a black, black marker. I love Pigma Professional markers for this.
  • Draw graphic at a larger scale.
  • Scan your work at 300 DPI or snap a photo under natural light.
  • Adjust your image to make your blacks blacker and your whites whiter. I adjust in my photos setting, or use your favorite image editor.
  • Open into Silhouette Mint software & make!

If you’d like to get your own Mint, now is definitely the time!! Right now they’re only $49.99 (down from $129.99)!!! That’s a steal. With Christmas around the corner, I think it’s a no-brainer.

FREEBIE: Silhouette Mint Designs & Valentines

0 Comment

Valentine’s Day is just around the corner! I swear it was just Thanksgiving. This time of year just flies right on by. I’m teaming up with Silhouette (my favorite, as you know) to provide you with some fun printables in time for Valentine’s Day!

melissaesplin-brush-workshop-silhouette-mint-stamp-freebie-2

The Silhouette Mint is one of my favorite new gadgets of all time. I can create a stamp in minutes. Literally. If you haven’t seen my youtube video on the process check it out here. It’s super slick, which makes card making, gift giving and label making so much more fun and customized. I wrote out a few little sayings and drew up a little banner. All these things are available to download free at the bottom of this post. If you don’t have a Mint, no problems. Feel free to use the graphics for personal use.

melissaesplin-brush-workshop-silhouette-mint-stamp-freebie-9

This Wednesday, we had an intimate gathering to learn calligraphy and make Valentines. I wanted to allow these awesome people to use their freshly gained calligraphy skills, but also give them the opportunity to put calligraphy on something if they didn’t feel comfortable writing something out. Each guest got a calligraphy kit and a card making kit with card stock (Thanks to my favorite My Mind’s Eye peeps! We used the dark grey from this line.) and piles and piles of stickers, washi tape and stamps for everyone to deck out their cards to the gills. Because a gaudy valentine is an awesome valentine. Totally channeling my inner Schin Loong.

melissaesplin-brush-workshop-silhouette-mint-stamp-freebie-1

These little stamps are so fun to use. See below for what size stamps I used for each design.

  • banner: 90×45 mm
  • Be Mine: 30×30 mm (on the diagonal)
  • You’re Hot: 30×30 mm
  • I Freaking Love You: 15×60 mm

If you’re interested in purchasing the Mint. Use code: MELISSA for $20 off a Mint machine! Wouldn’t it be so darling to have your kid design their own Valentine’s card? So adorable. Click the link to read more about the workshop and download the free artwork.

(more…)

How to Make A Stamp With Silhouette Mint

55 Comments

CHECK OUT my instagram for details on how to win your very own Mint™ machine!

I’ve had my Silhouette Mint for a little bit now and I’m crazy in love with how quickly and accurately I can make a stamp. The below stamp design took under 20 minutes from design to stamp. The bulk of the time was spent waiting for the ink to dry so I could scan it in.

melissaesplin-make-a-custom-stamp-silhouette-mint-1

This new-fangled miracle-worker should be on every calligrapher/designer’s list this year. It’s not terribly expensive and it cuts a lot of time out of the stamp-making process.

The stamp itself is a different technology than traditional rubber stamps. It creates a recessed area where the ink holds. Because of this, you can create super-fine hairlines and still get a great impression! You’re “limited” to 7 standard sheet sizes with the stamps, but they cover just about every range, it doesn’t feel like a limitation at all.

melissaesplin-make-a-custom-stamp-silhouette-mint-2

See below for a step-by-step video on how to make your custom design into a stamp.

Use code: MELISSA for an exclusive discount on the Silhouette Mint for amazing Black Friday deals. I get an affiliate fee on each purchase made with the discount at silhouette.com. It helps fuel the content over here. I honestly wouldn’t be hocking Silhouette’s products if I wasn’t absolutely obsessed. I hope you like this fancy gadget as much as I do! Deals start at 12:01am MST on Thursday, November 26!

  • Free Shipping on orders over $50.00*
  • 40% off almost everything in the Silhouette America store
  • 20% off Silhouette Design Store Subscriptions*
  • Silhouette Mint $99.99
  • Portrait & Mint $189.99
  • CAMEO $199.99
  • CAMEO & Portrait $289.99

*Deals end December 4th. Free Shipping applies to Contiguous United States. For 20% off subscriptions, use code BLACK.

melissaesplin-holly-stamp-silhouette

Right-click on the image above to download for your own Mint making!

melissaesplin-make-a-custom-stamp-silhouette-mint-3

By downloading the above material, you agree to terms of use: This tutorial/freebie is free for personal use and should not be distributed/republished without my consent. Altering any files is NOT ALLOWED. If you would like to use this freebie for commercial purposes, please email me. Thanks!
mobile site