Posts Tagged ‘photography’

We Bought A Photobooth

2 Comments

It’s like one of those things that you say that elicits a cocked head and a, “What?”. Like we bought a zoo or something. Except infinitely sillier and minus the animal poop.

SaltyBooth-Logo

saltybooth-melissaesplin-open-concept-photobooth-utah-1

In October of this year Alix and I (along with our men) bought an open-concept photobooth. Alix is heavily involved in the event planning scene in the Utah and Salt Lake valleys. Both of us have been sorely disappointed in poor branding, terrible exposures and bulky equipment. Especially when it came down to the Secret Garden event back in January.

If you want something done right, you better do it yourself! So SaltyBooth was born: A utah-based photo booth business run by event experts. 

saltybooth-melissaesplin-open-concept-photobooth-utah-3

Since getting our photobooth, we’ve had a ton of fun. Lots of late night photo sessions sorting out branding and layouts. It’s resulted in lots of family photos. An excellent perk of the new job, I might add.

saltybooth-melissaesplin-open-concept-photobooth-utah-4

We set up the booth for our Christmas cards (which are turning out to be more like New Year’s cards – EEP!). The image quality  was nice enough for us to get a 11×14 canvas of the above amazingness. I can’t tell you how thrilled that makes me!

saltybooth-utah-openconcept-photo-booth-1

For Halloween we started a new tradition: Pic or Treat. Take a pic or grab a treat. It was a huge hit! Parents could get a great photo of their kids in costume and teens. . . teens squeal over any opportunity for a good selfie!

saltybooth-melissaesplin-open-concept-photobooth-utah-2

We had our first event last month with a handful of bloggers. The reception was more than we could have hoped for. Since then we’ve had our second event and booked several more. Get in touch if you’re looking for a photo booth rental for your next event! Here’s why what we offer is better than anything you’ll see locally:

  • We understand events and the blogging industry (amazing images are everything)
  • If you hire us, you get a calligrapher/designer and an event planner to make your booth awesomesauce
  • Users won’t be able to resist sharing their images across social platforms (Integrated Twitter, Facebook and Twitter, SMS and email sharing)
  • Instant gratification with a ridiculously amazing photo printer (we only use the best)
  • Our rockin’ lighting system allows you to get fabulous photos every time, even if the lighting at your event sucks
  • Our open-concept booth takes up very little space and it’s all-in-0ne so no bulky equipment to trip over
  • We’re really fun!

saltybooth-biz-cards-by-engravejet

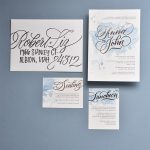
image by Alix | business cards by engrave jet

Email us at infoATsaltyboothDOTcom to book us for your next event.

DIY: Ikea Hack Photography Studio Lighting

30 Comments

Dear professional photographer friends, don’t hate me. I hope we can still be friends even with my ghetto lighting ways.

Sometimes I have to burn the midnight oil in order to get any blog posts up. We’ve been a busy family this fall! It’s nice to finally have a way to take decently lit photos without having to wait until the perfect time of day to shoot. Usually that perfect time of day lands during lunch time or mid-morning when I’m still in pajamas, sans makeup or shower.

istillloveyou-crappy-harem-pants-simplicity1887-1

There are a few things that I do to allow for more photography time. I have the 35mm prime lens which allows for a 1.8 aperature. It’s slightly wider than the 50mm so it allows me to park my tripod only 8 feet away from me for a comfortable head-to-toe shot, without too much distortion. But a 1.8 aperature can only get me so far.

Let’s talk artificial lighting.

I took the above photo at midnight. I boosted up the ISO and lowered the aperature, but the light is still too harsh. That’s where lights come into play. Professional lighting systems can be expensive, so I made a hack to see if a pro lighting system was something that I should invest in. I’ve been asked by a few people what my solution is, so I figure I’d share it for all to see.

istillloveyou-ghetto-ikea-hack-studio-photography-lights-1

I’m using two Ikea LERSTA lamps. They’re cheap, portable and effective. I think I’d get a third lamp or a fourth if I were doing more night-time style shots, but the two lamps are great for small objects and for fill-light when the sun’s not doing what it’s supposed to.

Here’s how to do it:

istillloveyou-ghetto-ikea-hack-studio-photography-lights-2

Step 1

As you’re assembling the lamp, wrap the inner part of the lamp with tin foil. Make sure the foil is sort of crumpled so it will bounce more light around.

Step 2

Buy a daylight fluorescent bulb. They’re on sale at my local Home Depot. We’ve changed nearly all of our indoor lights with these. And they are awesome.

istillloveyou-ghetto-ikea-hack-studio-photography-lights-3

Step 3

Get a large bowl and cut out a circle from some white (like white, white) fabric. I’m using a white quilting cotton.

Step 4

Measure the circumference of your lamp’s opening, cut a length of thin elastic just shy of the circumference.

Step 5

With your sewing machine on zig zag stitch, stretch the elastic as you sew it onto the outer edge of the circle of fabric. It won’t be pretty, but it’ll look sort of like a shower cap.

istillloveyou-ghetto-ikea-hack-studio-photography-lights-4

Fit that over your lamp and done!

istillloveyou-ghetto-ikea-hack-studio-photography-lights-5

Now you can illuminate basically anything.

istillloveyou-sewing-silk-skirt-holiday-dress-3a

I used the two lamps and my room’s overhead light to light up the above outfit. Not bad for a 10:30 pm photoshoot, right? And since you’re using daylight bulbs to illuminate the room, there’s no need to adjust white balance. BOOYAH. Mic drop.

Was this DIY helpful? What will you light up?

Photography for Sewers at Sewing Summit

18 Comments

I had a fabulous time at Sewing Summit this year.

sewingsummit-heather-bailey-awesomeness

Can we all just geek out together right now? I met Heather Bailey (like the Heather Bailey)! She’s just as beautiful, inspirational and genuine as she is creative. I love her even more after spending time with her.

Of all of the keynote speakers of all of the conferences I’ve been to, she’s the first to actually participate in the conference. It shows how invested she is in the sewing community. I love that. I had a great time gleaning a few tips on sewing with leather, finding that balance lives where the unicorns live and learning to adopt centimeters in pattern drafting (and sewing).

My presentation went well. I had slides with notes, but of course I misplaced my notes right before the class so there were a few key tips that I forgot to touch on (always happens).

Here’s a re-cap of the slide portion of my 2-hour presentation at Sewing Summit. Sewing-summit-photography-01 I may be many things, but there’s one hat I don’t wear. I’m not a professional photographer. When asked if I’m a photographer, I correct and say, “I’m a photography enthusiast.”

Sewing-summit-photography-02 That said, I do know how to use my camera in manual mode. It never leaves manual mode unless someone else is shooting my camera for me. I’m going to share with you some things that I’ve learned about photography that I picked up in my college photography class and with nearly 7 years of blogging.

(more…)

DIY: The Studio

9 Comments

Over the weekend I worked my tail off painting the office/studio white. It was originally a buttercup yellow, which didn’t jive well with my plans for being the computer/photography studio. It was a ton of work, but I’m really happy with the room! I have yet to really organize it and make it look pretty, but I thought I would share with you what I did.

Maybe you can do something similar, too?

I just used a basic bright white (no pigments added) for the paint in a satin finish. Come to think of it, I probably could have gone for a semi-gloss, but what’s done is done. With the white paint already on the walls, it took all of two seconds and $10 to create a virtually seamless white studio.

I realized that the corner of the room was really going to be the best place I’ll have in the room (and the house) for lighting and space for a permanent photo backdrop, so I set out to buy some plywood and paint it white for a little platform. Lo and behold, while I was browsing Ikea’s As Is department, I came across their corner table top in white. It’s a much warmer white than I’ve used on the walls, but for $10, my work was done! I may recover this thing with a white vinyl in the future, but for now, it works.

Now I’m just struggling to get my dual monitors to have the same white balance. It’s incredibly hard to process my photos with the screens so different from one another. I’ve spent hours trying to calibrate them to be exactly the same, but my iMac’s screen is natively darker and warmer than the LED monitor. Chris doesn’t notice, but it’s a crazy difference to me. I need to get over it though.

I also had a heck of a time trying to get Felix to sit still for more than half a second so I could snap a couple shots of these adorable kiddos. Finally a little Mac plug kept him occupied enough. Penelope was accommodating, though.

I’ve been through so many different photography backgrounds in the last two years!! Let’s see what we’ve had:

  1. Ugly closet doors.
  2. White curtains on a rod.
  3. Grey yardage sewn to a curtain rod.
  4. White unprinted vinyl tethered to the ceiling.
  5. White walls and a white faux floor.

I think that last one should do the trick. I hope.


Thrifty: Shoes & White Balance

6 Comments

Yesterday I talked a bit about how I need to go out of my comfort zone a bit more when it comes to clothing. I do have some pretty awesome out-there clothes.

Like these shoes for example. Sarah thrifted them and gave them to me. They’re ridiculous and awesome at the same time. They’re also pretty dang comfortable, yet I’ve only dared to wear them once. I’m definitely going to wear them again and show you. Promise.

Also, have you noticed the all-over-the-place white balance around here? Maybe I’m the only one that’s bothered by it? Well, I lost the white insert to my Balens cap, so I’ve been winging it. Until today, when a nice package arrived on my doorstep. I ordered a really cheap white balance lens cap
from Amazon for $11. I highly recommend it.

The white balance on this sucker is a bit blue. But I think I’m okay with it (this is straight out of the camera). Thoughts?

Have you found any cheap tools that have changed your life? I’d love to hear about them.

mobile site