Posts Tagged ‘lettering’

Hand-Lettering with Pencils & Upcoming Workshops!

0 Comments

Hey friends!! Welcome here. I’ve got 3 upcoming workshops this summer (more in the works, fingers crossed). I hope to see you there! 

Beginning Brush Lettering Workshop | DRAPER, UT | JULY 19

Learn brush lettering based on more traditional foundations and how to manipulate those foundations to write some funky letters! All skill levels welcome, but it is geared more toward beginners. Lefties welcome!

Eventbrite - July 19 Brush Lettering Calligraphy Workshop

Penmanship Workshop | PROVO, UT | AUGUST 16

Learn the art of beautiful penmanship and how to harness your own style to tell your story. This is perfect for beginners, lefties and future brides! We’ll go through foundations, style and how to address an envelope. 

Eventbrite - Beginning Cursive Penmanship & Letter Writing Night

2-Day Brush Lettering/Digitization Intensive | NASHVILLE, TN | AUG 25-26

Join me in Nashville for a whole lot of fun with a 2-day lettering intensive with the pointed brush. We’ll dig deeper than in any other class in the two days. We’ll go letter-by-letter through variant options, work on word and compositional structure and style structure. At the end of the class, we’ll work on the beginning essentials of digitization by making our own personalized stamps with our artwork. All skill levels welcome. 

Paperinkarts - brush lettering event august 2018

I hope I can see you at one of the above workshops this summer. We always have a blast and I try to pack as much information as possible so you leave the workshop motivated, empowered and ready to continue your calligraphy journey.

Now let’s talk hand-lettering!! Calligraphy and hand-lettering can be intimidating. Especially if you’re just starting out and teaching yourself. That’s where the humble, yet mighty pencil comes in. The pencil’s got your back. In fact, I have my online class students pull out the pencil before they touch any kind of pen or marker. The master penmen use pencils, so you can, too. I’m really excited to have shared this fun and simple technique on KSL’s Studio 5 on how to incorporate pencil lettering into your every day creativity. Let’s do this, shall we?!?
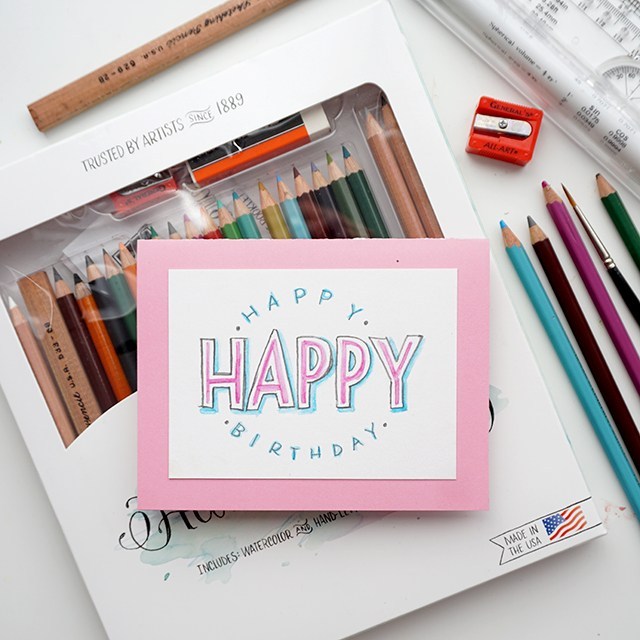
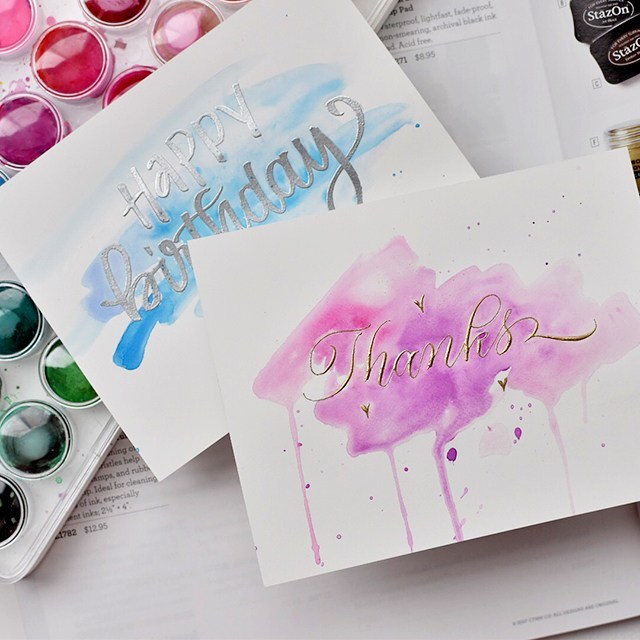
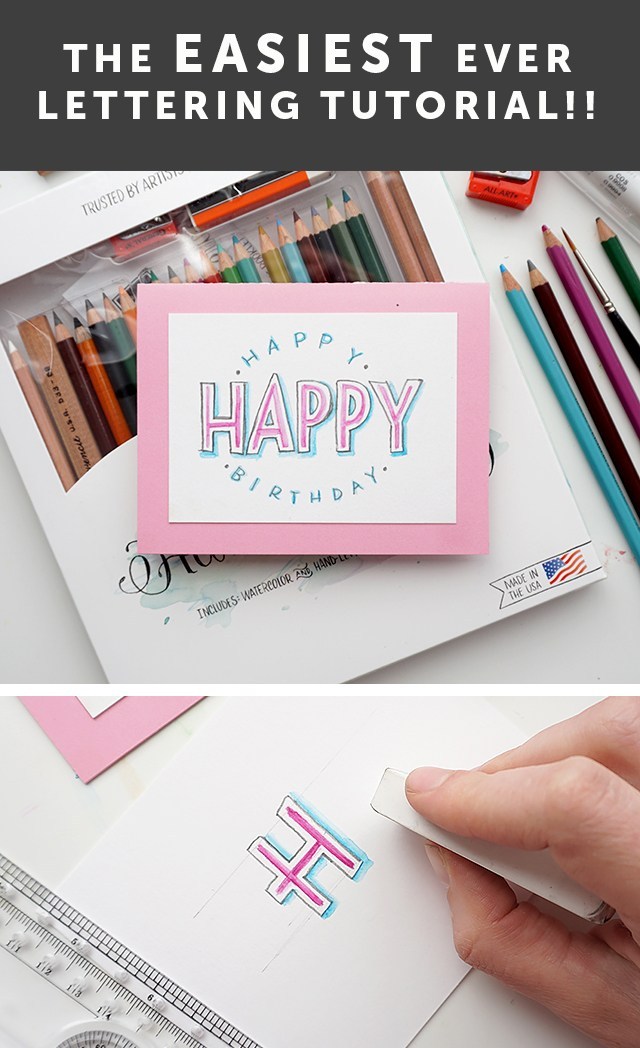
Isn’t this a fun card? You can totally make this in about 10 minutes. 

The cool thing about pencil is that you can erase it until you commit. So watercolor pencils you can erase until you add water. You can erase most pencils quite effectively until you commit by pressing really hard or going overtop in pen. You can see the difference between committing with pressing hard with a dark pencil on the right and a marker on the left. The cool thing is you don’t have to have fancy materials in order to be successful with your pencil lettering. Here’s what you need: 

  • Paper – use a mixed media paper if you’re using watercolor pencil.
  • Ruler – you gotta draw light grid lines or your lettering will be all over the place. Clear grid rulers are my fave.
  • Pencils – I’ve teamed up with General Pencil to create a pencil lettering kit, try it! It’s great.
  • Brush – I like small round brushes for this, but any brush you have on hand could also work!
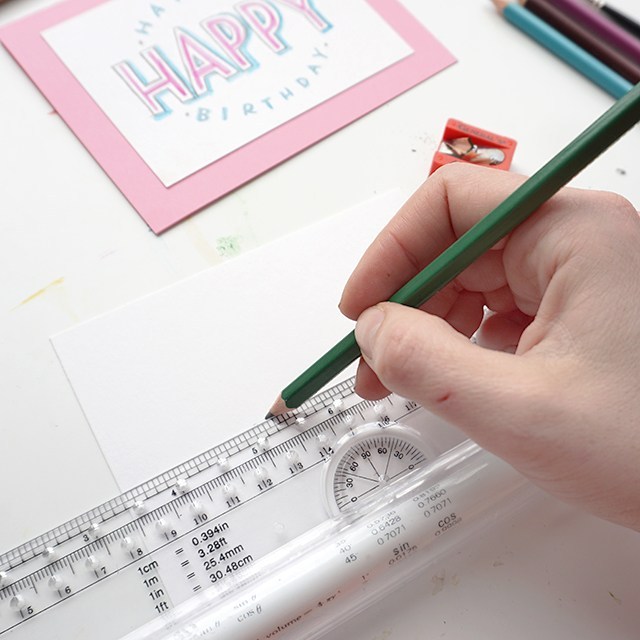
Step 1: Cut down your paper to size. I’ll leave it up to you as to what size you want to trim it down to. Get a ruler and mark out your top and bottom lines. The master penmen use a ruler to mark out guides, you should too. 
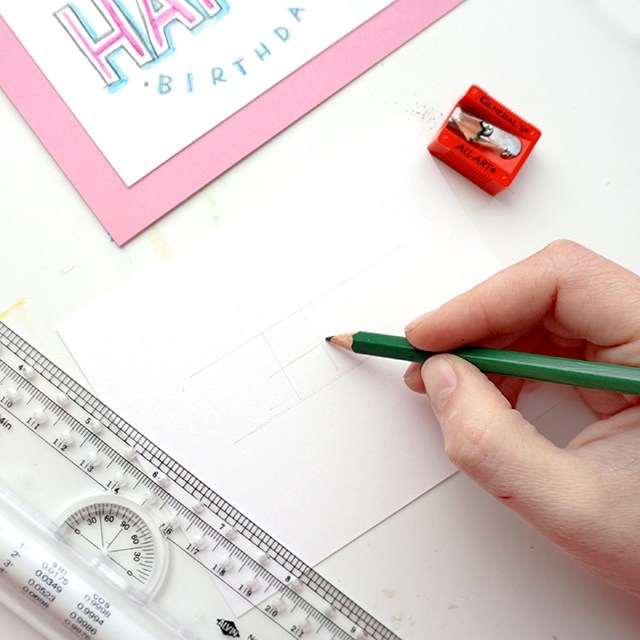
Lightly draft out your message. I find that short words in this style work best. Also, when drafting out your letters, make sure they’re generously spaced apart. Because we’ll be outlining around each letter, you’ll want to make sure you give yourself enough room for those outlines.
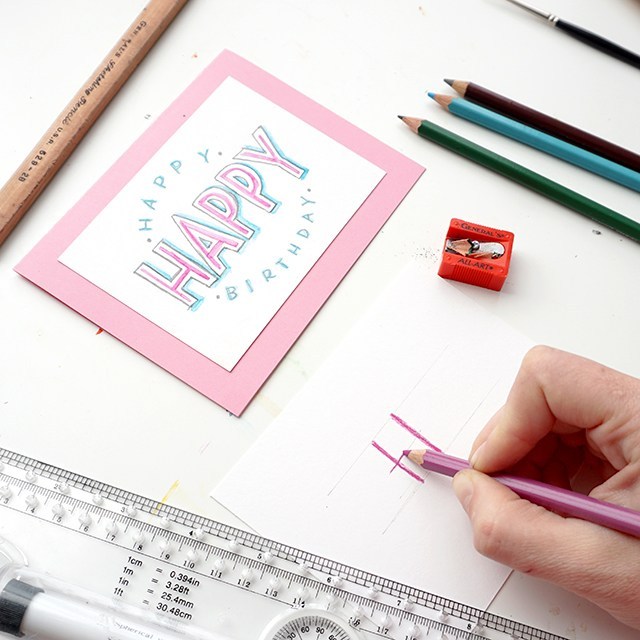
Grab a watercolor pencil and roughly mark out the outlines with watercolor pencils. For the sake of this style, pick two colors that you’d like to go together. Use the darker of the two colors for this part of the outline.
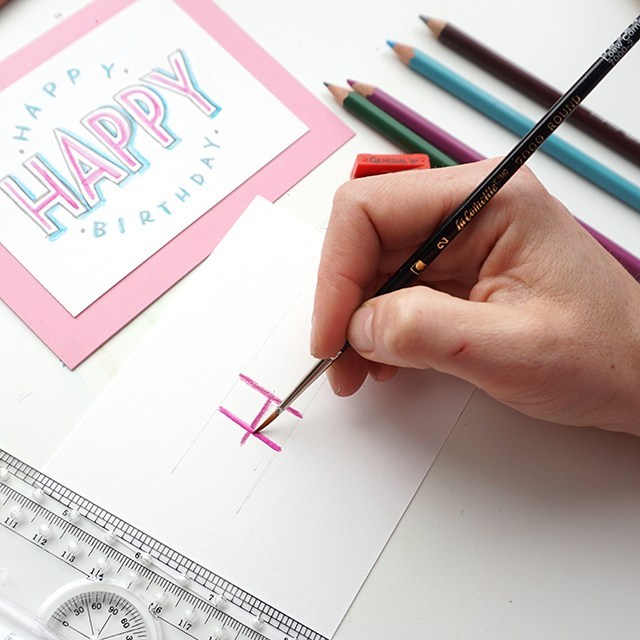
Wet a small round brush (this is a size 2 round) and smooth out the outline of your watercolor pencil.
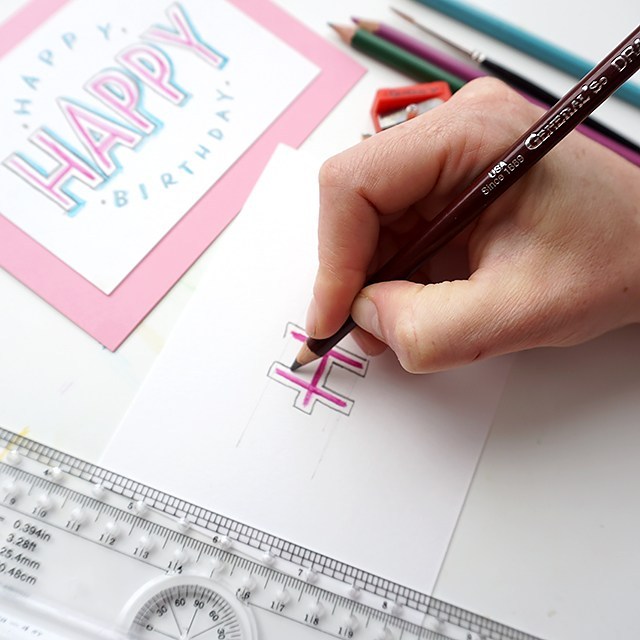
Leave a little bit of white space and outline each letter. I love the General’s draughting pencil for this. It’s hard enough to maintain a stable line, but it’s smooth and dark. 
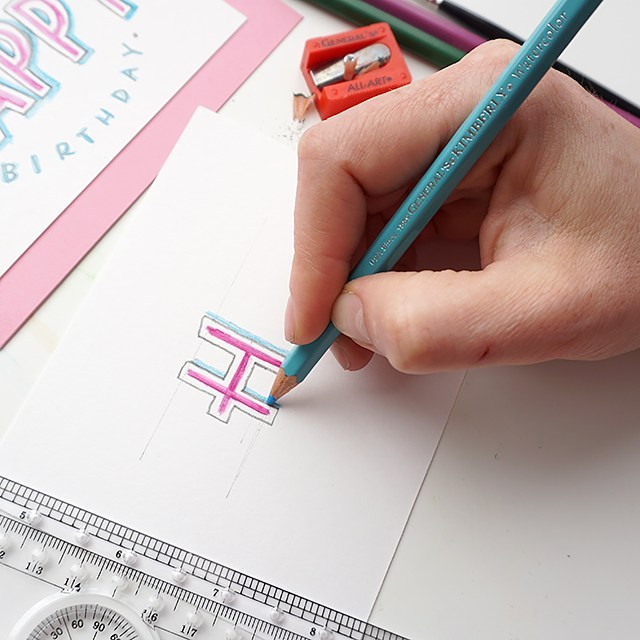
With your lighter color, outline the right-hand and bottom sides of your outline. You’ll use a light touch to lay down pigment to not disrupt the draughting pencil layer. 
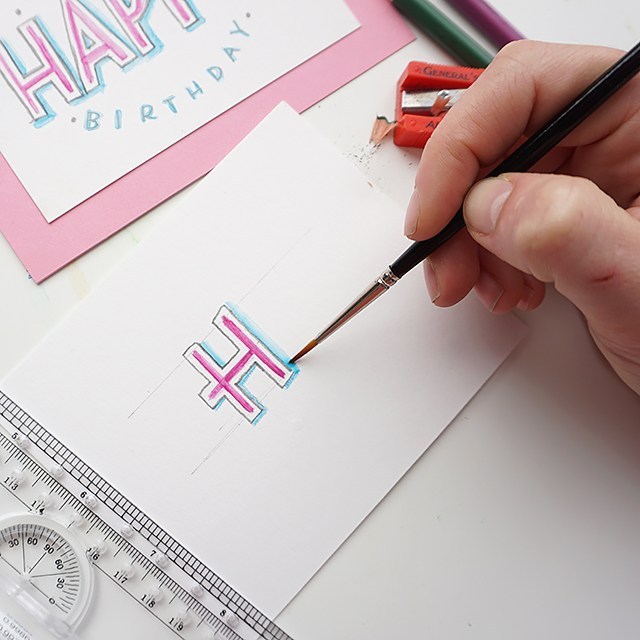
Using the same wet round brush, smooth out and soften the drop shadow you’ve created. 
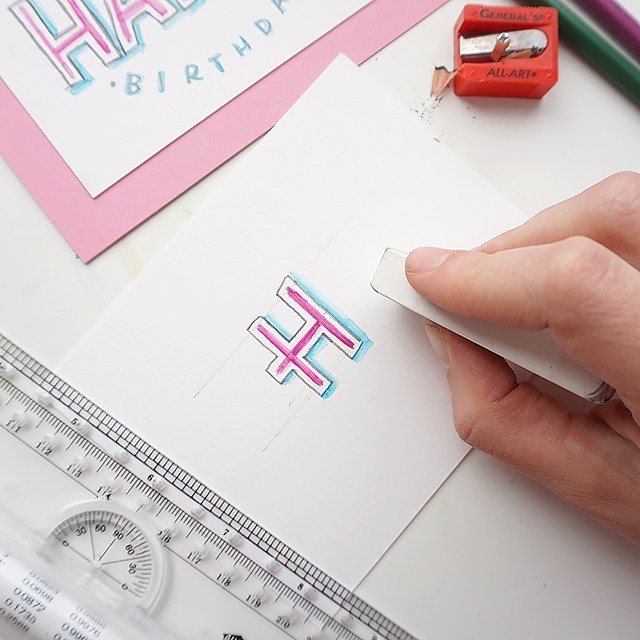
Once the watercolor is dry, erase away guidelines carefully. I like to use the corner of the eraser. 
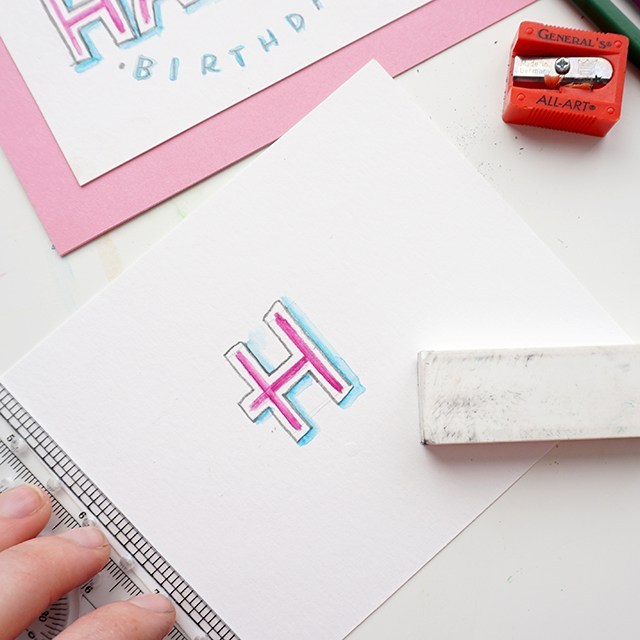
Bam! You’re done. You can send it as-is, or you can trace over the darker pencil marks in pen or marker to make the layout pop even more.

This tutorial is free for personal use. Affiliates are used to link to products I actually use and have. Your support here makes more content possible. Thank you!
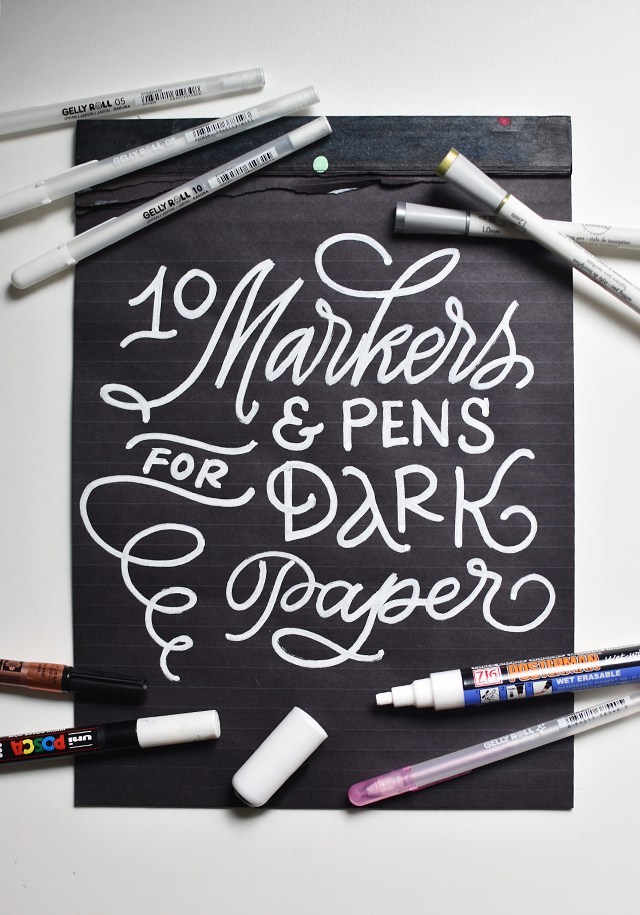
10 Awesome Markers for Addressing Dark Envelopes

0 Comments

Welcome if you’re here from Studio 5! I hope you stick around! I’ve got free printables, tutorials and more. :) Check me out on Instagram and give me a follow if you’re interested in more creative living. 

If you missed the segment, click here to watch.

One of the tricky things about addressing envelopes, if you’re not a calligrapher, is finding the right pen to do the trick! It’s especially tricky if you have dark envelopes and you want to make an impact in the mailbox. Which, if you know me at all, I like to bring out a smile when I send friends & loved ones snail mail. There are so many markers out there, this certainly is a very small cross-section of the ones you can find. This small collection of markers will serve you well as you work on darker papers. 

Let me emphasize the following: YOU DON’T HAVE TO BE A CALLIGRAPHER OR EVEN HAVE GOOD HANDWRITING TO ENJOY THESE TOOLS. But if you are a calligrapher or if you have awesome penmanship, you’ll find they’re also fun. 

And if your penmanship sucks? Check out my free penmanship tutorial and download right here. Want to learn brush lettering? Check out my online class right here!! Use code BRUSHLETTERING for a special discount! 

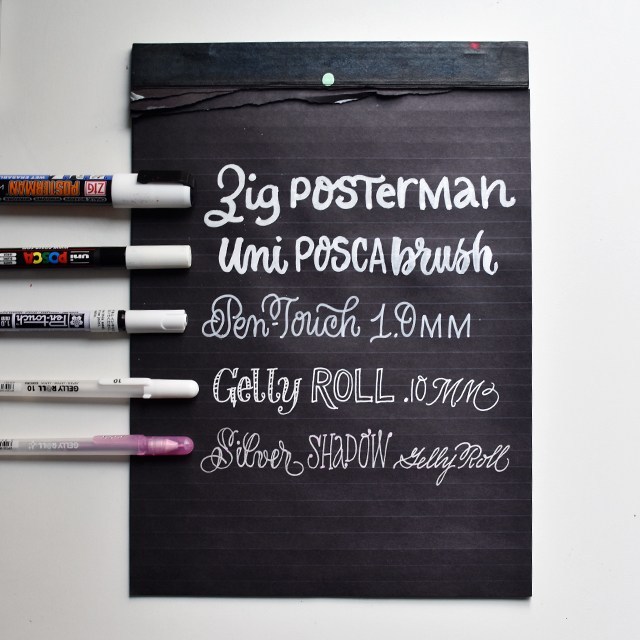
WHITES

Looking for this black paper? Get it right here.

Let’s talk about pretty white pens. They’re tricky because you want those whites to be as opaque as possible. You need that pop! My favorites, in order of largest marker size to smallest are: 

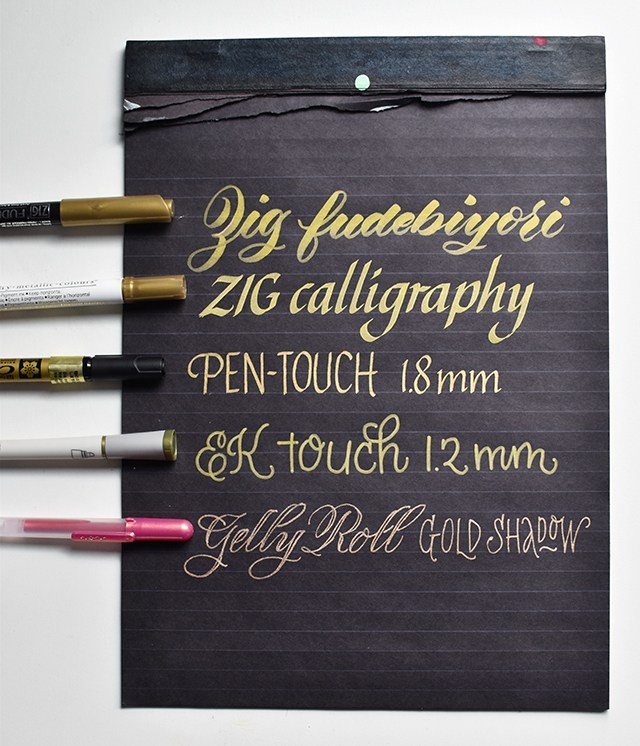
METALLICS

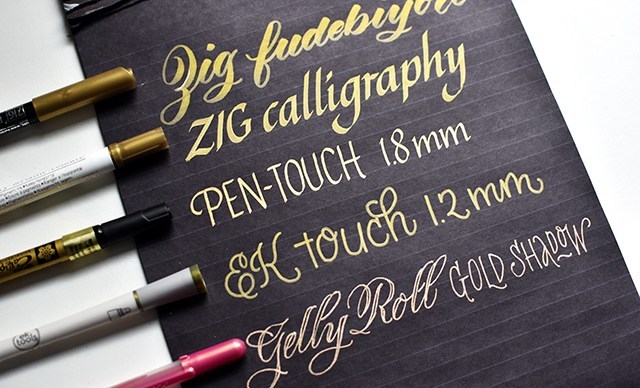
When it comes to metallics AND opacity on dark papers, we venture into super tricky territory. There are really only a couple of markers I’ve used and can recommend here. But I’ve found that for the most part, each of the ones I’ve used includes a gold, copper and silver. Silver often times looks a lot like white (BONUS!). The golds usually take on a more green tone, so I personally like to stick to the copper if I’m going for a gold/black kind of look. So here we go with the second list, again, going from largest to finest. 

And don’t feel intimidated if your penmanship isn’t incredible. These markers will take your writing to the next level. IF you’re worried about writing in a straight line, I would highly recommend getting a LetterMate right here. They’re little plastic life-savers. ;) 

STAY TUNED!! Next week I’m sharing a tutorial on how to address those little envelopes of yours quickly and effortlessly. Thanks so much for popping by! 

Affiliate links are used. By purchasing through my affiliate links, your pricing doesn’t change, but it supports this blog and new content here. Thank you!
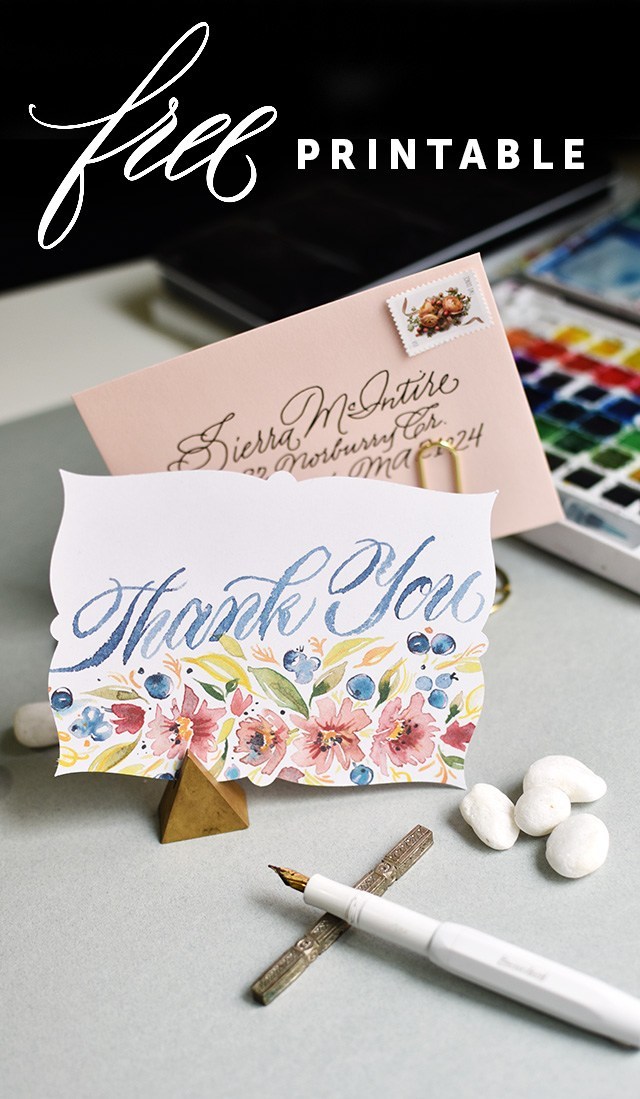
2017 Thank You Printable

9 Comments

The time of year has come where it’s time for the annual Thank You freebie! I love doing this because it gives me a chance to work on styles and techniques I don’t always get to do on a regular basis. For this year, it meant I got to put the watercolor floral classes I’ve taken from Natalie Malan to use. I wanted to go for a slightly muted palette, but it only worked slightly. It’s like a bright, muted palette. ;)

Also, I feel like I must mention that this month completes the 10th year I’ve been blogging! I can’t believe it’s been that long. So much has changed: 6 moves, 3 children and a few career changes to say the least. I didn’t know I would be blogging this long. But here we are! ‘Tis the season for gratitude, so I may as well express that I’m so grateful for the opportunities that blogging and social media has given me. I’ve made dear friends, I’ve traveled, I’ve learned so much and I’ve felt the creative inspiration through the connections that I’ve made. It’s been pretty awesome. Will I still be here, writing in another 10? We shall see! 

Check out the a video of my process here:

This year’s Thank you takes on two forms. One is a plain, 5.5×4.25 rectangle with cut lines for you to follow, the above is a suggestion. You can download the JPG and use Silhouette’s print & cut feature to make a gorgeous full-bleed card with a scalloped edge. See below for the tutorial! 


You certainly don’t have to have a Silhouette in order to take advantage of this printable. Just click The download link below with the description “hand cut”. :) Just giving you some fun options.

DOWNLOAD SILHOUETTE FILES HERE


But I’ve got TONS MORE ‘Thank You’s. Check out the whole list of past years’ printables below!

Want to learn calligraphy? Like the brush lettering I use here? Check out my class on Calligraphy.org. I’ll give you one-on-one instruction to help you get there. We start from the very basics, but because of the personal nature of the instruction we offer off-script learning for the more advanced letterer. Use code BRUSHLETTERING for a 10% discount on the class. :)

Materials used for this DIY: 

This printable is free for personal use only. Any redistribution or commercial use of this printable without written consent is prohibited. © Melissa Esplin 2017. Affiliate links used, by purchasing through an affiliate link, you support MelissaEsplin.com and the free content provided here. Thank you for your support! 


Embossing Hand-Lettering & Calligraphy

0 Comments

Close To My Heart sent me a sweet care package of embossing goodies to try with calligraphy. I’ve had a blast ever since they showed up on my doorstep! It’s been so fun to make cards and address envelopes with my new gadgets. And now I want every color under the sun to use for embossing! The raised texture is fantastic. And I’ve been able to get reliable results time after time with my pointed pen and my pointed brushes. It’s definitely a worth-while investment. 

Materials used: 
Gillott 404 Nib 
Oblique Holder 
Strathmore Bristol Paper
Size 2 Liner Brush
CTMH Embossing Powder
CTMH Heat Tool
CTMH Watercolors
Glycerine

I found that the Versamark liquid (for refilling stamp pads) was too sticky to use as ink, so I opted for glycerine. I’m glad I was able to find a suitable substitute as the glycerine doesn’t gum up my nibs or brushes. That said, I do like to use my cheaper nibs and brushes for this particular activity. I don’t want to be destroying my sable hair brushes in the process! 

Check out the video or read through the post details to find out how to emboss your own lettering!


  1. Dilute 1 part glycerine and 1 part water to make your ink. It helps to use a pipette to dilute with water so you have good control. 
  2. Pen or brush your words/phrase/name on the paper. Use a nice quality paper so the glycerine doesn’t bleed. Before lettering, make sure to scrape or drip off excess “ink” so you’re not laying down too much glycerine. It can affect how the embossing happens. 
  3. Place your paper over a scrap sheet, I like using a thin sheet of paper so that I can easily clean up excess embossing powder. 
  4. Pour a generous amount of embossing powder over your design. Tap excess off the paper onto the scrap sheet. Set project aside and funnel excess powder back into the embossing powder jar. 
  5. Heat your design with a heat tool. Keep the tool 2-4 inches away from  your work and move the tool as the powder melts. 
  6. Optional: Add a watercolor wash over your work. 
  7. For best results, the watercolor wash should happen after. The watercolor resists the embossed work, so no need to do it prior. If you do happen to do it beforehand, you may find the glycerine bleeds over the wash and your lines will get fuzzy. 

Products from Close To My Heart (CTMH) were provided for this video. All thoughts and opinions are my own. The affiliate links used help support this blog and the tools used for making more tutorials, reviews and content. Thanks for your support!

3rd Annual Halloween Pic or Treat

0 Comments

I can’t believe I’ve been doing this for 3 years now! It’s my new favorite tradition: hosting a photobooth for trick-or-treaters. It’s near impossible to get photos of your kids on Halloween, let alone ones that are well-lit and show off the whole costume. So each year I open up my home to our neighbors to swing by and grab a photo.

I have a printer that connects up with the booth so everyone walks away with a physical print of their photo. This year, we had people hit up our house first because they knew that we were the “photo house”. It just makes my day.

melissaesplin-halloween-chalk-pic-or-treat-1

For new neighbors and visitors of our neighborhood, I made a sign detailing the photobooth and how it works. I can only imagine a parent might be a little bit hesitant at first that their kid is invited into a stranger’s home to “take photos”. Gross. So I put it in clear writing that images are not distributed in any way after the event. We also had candy out for those who wished to opt out of the photobooth. Our neighborhood gets a steady flow of trick-or-treaters each year, so there’s usually a small queue lining out the door. It’s a fun social thing. I imagine if our neighborhood did a trunk or treat, this would be a fun thing to set up for that, too.

melissaesplin-halloween-chalk-pic-or-treat-2

I winged the signage without a ruler, and I’ve got to say I’m pleased with the outcome. I’ve been practicing my chalk work ever since taking Skyler Chubak’s chalk lettering class. It’s been most helpful!

melissaesplin-halloween-chalk-pic-or-treat-3

My sister was there as I was setting up the booth. It took me way longer than it should have to set everything up because of dumb technical difficulties. ugh. Thankfully we worked through those!

melissaesplin-halloween-chalk-pic-or-treat-4

Penelope and her BFF Kate went as twin wolves. They are both obsessed with everything wolf. It’s adorable.

melissaesplin-halloween-chalk-pic-or-treat-5

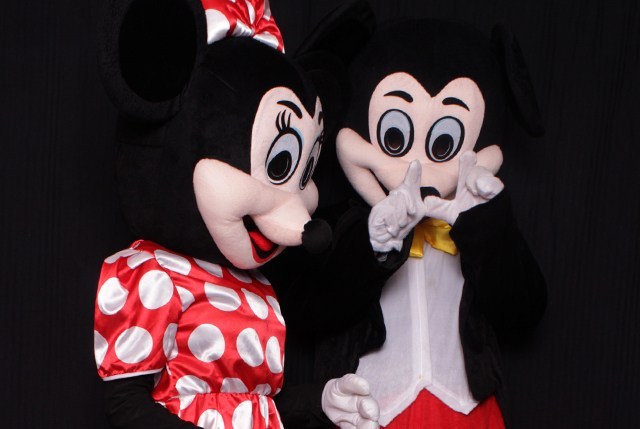
Even Mickey & Minnie showed up.

melissaesplin-halloween-chalk-pic-or-treat-6

I didn’t do much by way of dressing up. Thanks to Penelope for the witch’s hat. Junie wore a hand-me-down from Felix.

melissaesplin-halloween-chalk-pic-or-treat-7

She’s too dang cute.

melissaesplin-halloween-chalk-pic-or-treat-8

Felix is wearing a batman costume meant for 3-year-olds, and has been sporting it non-stop since Halloween. He loves his “Ba-MAN”.

It was a glorious year for us. As disappointed as I was to not have made a single costume, it was nice to keep things relatively simple. Best Halloween yet. Next year, maybe we’ll do a family costume. I had better start planning now.

mobile site