Posts Tagged ‘decorating’

Thrifty & Chic: Penelope’s Bedroom

70 Comments

IT IS FINISHED!! I’m finally done decorating Penelope’s room. Well, done until we move (likely soon). I’m very excited to share these photos with you! While I felt like I splurged a lot on Penelope’s room, I did manage to score some great deals along the way.

Here’s the breakdown. If you don’t see it listed here, I had it on-hand already.

  • rug – Urban Outfitters – $45
  • table – DI – $2
  • chairs – Ikea – $30
  • yellow box – DI – $1
  • yellow basket – DI – $1
  • paper for garlands – Robert’s – $2
  • paint for nightstand, desk & crib – WalMart – $25
  • lampshade – Target – $17
  • lamp – WalMart – $12
  • yellow frame – DI – $1
  • watering can – DI – $1
  • white wooden shelf – $3
  • fabric for chevron pillow – DI – $2
  • frame for LOVE poster – Ikea – $22
  • trash bins for toys – Ikea – $50
  • faux Eames rocker – Caitlyn Creer – $90
  • TOTAL – $304

If I could have had my own way with this space, Penelope would have white walls, teal scalloped border with teal ceiling & white hardwood floors. Lemme just daydream about this for a minute. SIGH. I actually hate this disgusting tan wall color. Any house that I actually own will never, ever have tan/taupe/beige walls. Ever. Besides that, I really love Penelope’s room. It’s fun & bright. The white furniture definitely opens up the small 8’x10′ space.

Let’s talk details. Penelope has never had her own room before, she’s only ever had a closet. Not much to decorate there. When we moved to our little house, we were given a few pieces of furniture from family members to help us get started. My mom gave us her desk & nightstand from her childhood. I’ve always loved these pieces & was incredibly, incredibly excited to use them for Penelope’s room. They have such fabulous feminine details! The two pieces were slightly mis-matched, so I painted the wood white & fixtures yellow to modernize the furniture a bit more. I think they turned out gorgeous!!

Chris’s parents kindly handed down their crib. THE crib that they used on all six of the Esplin kidlets. THE CRIB. Can I tell you how utterly sweet it is to be able to use such beautiful, sentimental furniture?!? I love it. The crib was in need of a little facelift; I thought so at least. Chris was very resistant. I had built up this image in my head of a freshly painted white crib with matching white furniture, so it was very difficult for me to let that go. Just before I did, Chris kindly relented on the condition that I did all the painting. I’m really happy with the end result (see first pic)!

The Eames rocker was a great deal. Caitlin Creer, interior designer + blogger, hooked me up with the rocker and came over to my house to help me rearrange the furniture in the room. So awesome. The furniture configuration is a lot more open, thanks to her! Sometimes it’s so necessary to have a second opinion on stuff like this.

The toy bins were also the brain child of Caitlin. I was thinking of making some sort of toybox using her old crib, but that would’ve required a lot of time and mind-grapes on my part. At Caitlin’s suggestion, I headed over to ikea & coughed up $50 for the cans. I seriously don’t spend that kind of money on containers. Perhaps if I had been diligent enough with my thrifting, I could’ve found something similar for $4-15, but I was impatient & my aunt had given me a giftcard to use on something as frivolous as trash bins.

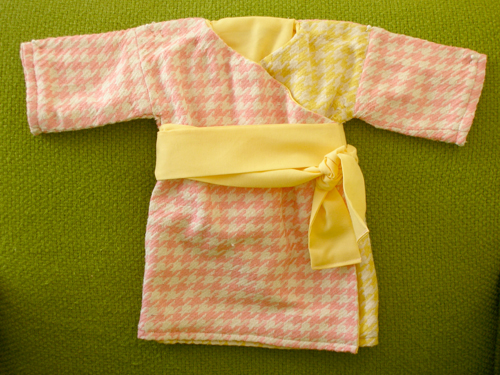
The artwork & dress above the trash bins were also hand-me-downs from my mom. My sisters & I wore that dress & Penelope wore it too. The artwork is a cross-stitch of a bunch of teddybears in tutus. AW. My mom made that back when we were little. Between my sentiments & Penelope’s love for dance, I thought I could find the perfect place in Penelope’s room to hang it.

The chairs were also another Ikea splurge, but they’re so darn cute I couldn’t pass them up! Isn’t Penelope so sweet playing lunch with her baby? Also, I didn’t mention it before. . . I love the rug I found for Penelope’s room. Well, I didn’t find it. Deb over at Fresh Nest did. I emailed her asking where I could find an inexpensive, bright, non-cheesy rug for Penelope’s room and she responded with a great article on resources for awesome kid’s rugs.

So, there you have it. I did Penelope’s room in just over $300. Not the best deal ever, but not bad. Right?

• UPDATE •

Here are a few links to see the 8 month journey of Penelope’s room & more info on the details I didn’t mention above:

Thrifty & Chic: Bedroom Edition

88 Comments

While looking for rentals last year, our place was listed as a two bedroom. Well, it wasn’t really. It has one bedroom upstairs & one downstairs in the unfinished basement. The second bedroom wasn’t really habitable before we moved in. We liked the finished part of the house, so we signed a rental agreement under the condition that the owner would make the second room liveable, i.e. remove the mysterious puddle of water in the middle of the floor, install carpet, paint the walls, install a ceiling and add a rod in the closet to make it functional. You know what they did? They installed the cheapest, ugliest carpet they could find and stapled (YES) faux wood paneling to the ceiling. See. . .

We didn’t have a closet OR a dresser for nearly two months. IT. WAS. AWFUL. Our landlord wasn’t going to do anything about it, either. So, Chris (the awesome husband that he is) installed a metal rod to the ceiling studs of the closet using a bunch of industrial chains. See, we couldn’t just put any rod in because the closet wasn’t/isn’t framed. Yup. The landlord’s grandson was in the process of ripping apart the studs of the closet to refinish the basement when he got accepted to dental school. Our basement was never finished.

We lived in this dump for about 5 months. I was so sick of sleeping in a dungeon, I made Chris fix it up with me. Now it looks like this. . .

Sigh. This was a much needed improvement. If we actually owned the place I think we would have spent more time & money fixing the carpet, trim, door & closet but considering we may move out of this place any time it was just the right amount of investment. Here’s what we did:

  • painted the walls white
  • added a new light fixture
  • stapled white bedsheets to the ceiling
  • installed old kitchen cabinet to the wall for storage
  • made a shelf (from scratch! Chris is awesome), installed it & painted it white
  • added a headboard
  • hung artwork
  • added curtains to hide the closet
  • added curtain to the window

Here’s what we spent:

  • Paint: $28
  • Ikea light fixture: $30
  • White bedsheets: $18
  • Lumber for shelf: $7
  • Headboard: $8
  • Milk glass vases: $3
  • Brass cages: $1.50

Awesome, right? We managed to give this room a complete face-lift for under $100!

I love my new headboard. Susan pointed it out for me while we were thrift shopping together. I love the simple design & the rich color. Some day I think I’ll recover it with a hounds tooth or chevron pattern. Wouldn’t that look sharp? It works well in this room for now.

Our room is also rather A-symmetrical. Because of the off-kilter window & random raised-wall thingy, we went for an A-symmetrical look with decorating. Certainly not my typical style for decorating, but it works. I’m still not sure how I feel about how the frames are hung. I’ll probably rehang those at some point.

The cabinet (above) was from the previous kitchen & just taking up space in our basement. We painted it white & installed it on the wall. It’s the perfect place for my accessories & shoes. We had an awfully hard time finding a dresser when we moved in, we just opted to buy stackable Ikea bins instead. They’re not as gorgeous as the dresser I have in mind, but they’re cheap & functional. We figured it was better to buy these bins than a dresser we didn’t like. This way, if we find the perfect dresser we’ll just repurpose the bins as storage for my growing mounds of fabric or something.

This shelf was in the kitchen of our last apartment, but works perfectly in this little nook by the bedroom door. We stash our pocket contents here when we come in for the night.

For the longest time we didn’t have anything covering our closet. It’s so nice to finally have something hiding all that chaos.

I found these brass cages at the thrift store just last week. Aren’t they fun? I wonder what the original owner used them for.

Here’s my favorite decoration: our death masks. We made those when we were dating. Such a great reminder of our courtship!

There you go. We no longer live in a dungeon. Hip, Hip HOORAY!


Additional Info:

  • We got our bedding & shams from Target 4 years ago as a wedding gift.
  • We did not paint the ceiling (the reason why I covered it with bedsheets) before attaching the bedsheets.
  • We were really lazy & just painted right over the wood paneling. No priming. Next time we’ll prime before we paint, but it doesn’t really matter since we’ll likely move the end of next month.
  • Since the house has an unusually tall basement for a home built in the 1930s, stapling the bedsheets to the ceiling makes the room feel cozier, but not smaller.

•I M P O R T A N T•

I’ve received a few emails from concerned readers regarding the code of this bedroom. The shelterpop article was actually a little misleading. There is a window in the room (as evidence by the light in the after photos), it’s just covered by a curtain. The window measures about 2’x3′, which is pretty incredible for a basement window of a house built in the early 1900s. The window is also above ground (nice!). Bottom line, it does count as a room as far as Utah rental laws are concerned. It was just a poor excuse for a room before I got my hands on it. Additionally, we don’t live there anymore. Our current bedroom windows are GIGANTIC! Hooray for loads of natural light!


Penelope’s Birthday Party Part II

17 Comments

The party was organized chaos. I didn’t take very many photos of the festivities, but I did manage to document the food table. We had Bee’s lemon water (a delicious homemade beverage that’s clear – perfect for living room dining), pulled pork sandwiches, clementines, bananas, cut veggies, chips and cake. The food was all pretty low-key except for the cake, which took a few hours to make entirely from scratch. I made a white cake with lemon curd and lemon frosting. It was deliciously moist and dense. MMM! I’ll make it again and share the recipe with you, if you’d like.

I used the Silhouette to cut a P out of paper to use as a stencil for the decorative sugar. It kind of looks gritty as if I spray painted the P on there. I like that.

I kept the decorations simple by using balloons and a handmade garland using the same paper I used for the envelopes. It was really easy to make. If you’d like a tutorial for the garland, comment! I was going to make the vellum mobiles as seen on Oh Happy Day, but I didn’t have enough time to run to the store for more paper, so I opted to make the strips into a garland instead. The vellum mobiles would’ve looked really rad, had time been on my side. I also made Penelope’s party favors using the envelope paper and a variation on the petal box template (cut with the Silhouette). I filled the boxes with hard lemon candies and candy orange slices.

The festivities were really simple: eating and dancing. It was great to keep things simple, otherwise it would’ve been like hearding cats. Plus, after spending so much time on the invitations, I wasn’t about to plan a creative party curriculum. I’m much too lazy for that. The kidlets enjoyed dancing, screaming, fighting over balloons and playing hide and seek in the ikea garbage cans that we use for storing Penelope’s toys. I say it was a great success! Also, the kids were so entertained, us parents had a great time catching up.


Click here to read part I: The Invitation

Click here to read part III: The Thank Yous

A Dash of Christmas on Our Front Door

14 Comments

I found the most lovely no-sew, no-glue wreath tutorial online last week thanks to twig & thistle’s lovely wreath tutorial round-up. Most tutorials I find these days end up collecting dust in my delicious account these days, but not this one. It uses felt + ruffles, the two most trendy things on the crafty interwebs these days, so there was no denying it.

Domestifluf Wreath 3

I added my own little pom pom mistletoe to the mix.

domesitfluf wreath 1

Sadly, I didn’t find any felt colors that I was happy with, so I used some scraps from my favorite Fabmo. Making the wreath wasn’t hard at all, all it really took (besides the materials themselves) was a good hour+ of tv and a thimble. Not Bad, eh?

Domestifluf Wreath 2

Giddy like a 12 year-old-girl is probably the best way to describe my post-project mood. After I hung up my festive little wreath I couldn’t help but point out it’s loveliness to Chris every 20 seconds. Thankfully I have a very indulgent husband who agreed with me. You can find the fabulous tutorial at domestifluf.

{no} Labor Day

8 Comments

I LOVE Monday holidays. They’re such a great way to start out the week. Since I’ve been working partly full-time it was so great for a little R&R. I’m soin love with wedding blogs and party planning blogs I’ve been DYING to have a few festivities of my own. Monday provided the perfect opportunity to par-tay.

the spread

Our decorations were simple and cheap. Cheap as in practically zero dollars. Here’s how I decorated:

  • I refinished the green table (more on that later)
  • drilled some holes in the fence
  • draped some old curtains over the fence
  • hung some old cabinets
  • put up the bunting (in reverse) from Penelope’s birthday
  • draped a yellow table cloth over my craft desk

the food

_dsc0376

All these things I had just lying around. I think what made it all unique was that I brought the inside, out. I think it worked really well. Dinner was really simple, too. We don’t have a grill (yet), so we did buffet-style burritos. I took care of the black beans (recipe courtesy of Cafe Johnsonia–Thank you!!), meat, drinks and dessert while everyone else chipped in with the rest. I cooked the black beans overnight and the chicken cooked all day in the crockpot. Basically, my work was all done for me. I also made Fraiche frozen yogurt with fresh peaches and Blackberry Lemon water (recipe to come). All of the fresh food was delicious and very easy to make.

the metal trays

In addition to dying to throw a party, I’d been wanting to use my new stainless steel vintage lunch trays. They were perfect for eating outside and on the ground. Did I mention each tray weighs as much as a toddler? They’re only for serious eaters.

_dsc0378

We had a lot of fun. It was so great to socialize with my new friends Alma & Allison and their families. Blog stalking is the new way to make friends these days. Serious.

mobile site