I’ve had the skirt of this dress in my head for a while now. It’s simple, too. Three pleats in the front and three in back.

So for Easter I drafted up a pattern for the skirt and I thought I’d share the tutorial with you.

The skirt itself is really simple, pretty much straight lines.

I used this fabric from Kollabora. I love the tie dye, mottled look of it. It’s a cotton twill, perfect for heavy projects. It may be a bit stiff for this kind of skirt, but I couldn’t help myself. I will be making some pants for Felix out of this and I think those will be perfect.

This was my second invisible zip insertion and it went even better in this than the last. Probably because this fabric is much more responsive than chiffon. Perhaps? I then thought how I could make it out of jersey. And I love my jersey version, too.

I made it out of a stripe jersey, it’s soft and wears totally different. This was easier to sew up as I didn’t have to work with any fasteners because of the amount of stretch.
It’s still pretty cold around my neck of the woods, so I’m not about to wear shorter skirts without stockings any time soon. But I couldn’t help myself. I’m just itching for warm weather!

Click the read more button for the full tutorial.
First Outfit Details:
- top: H&M
- belt: thrifted
- skirt: handmade
- shoes: thrifted
- earrings: etsy
Second Outfit Details:
- top: handmade
- skirt: handmade
- shoes: thrifted
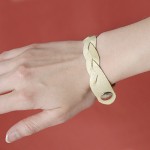
- bracelet: handmade
Oh! And lookie, I just found a skirt you can purchase that’s very similar, but much less expensive than the Kate Spade dress version. Check out the awning stripe pleated skirt.

You’ll need:
- ruler
- pencil
- butcher paper
- 2 yards fabric
- invisible zipper
- clasp
- sewing machine
Get your measurements. Use the above chart for those measurements and chart them out on a large sheet of paper.
All seam allowances are 5/8 inches.

Find the center. This is the center point of your middle pleat. Measure 3 inches to either side. Then measure a 4 inch (or if you have a really tiny waist, 2-3 inch) gap on either side and mark out the next bank of pleats. Bring the pleat edges to the centers. Center the excess behind the sewn pleat.

This is what it will look like when those pleats are sewn and pressed.

Sew one side, right sides together.

Cut your waist band at 5 inches tall and 1 1/4 inch wider than your waist measurement (2 seam allowances). Fold the seam allowances in and fold the waistband in half lengthwise.

Sew right sides together.

Add your zipper (I just used zipper insertion instructions).

Sew right sides together of your skirt and add the clasp at the top of the waist.
Hem your skirt with a rolled hem. Fini!
NOTE: If you’re using a stretchy knit (40-60% stretch). . . Before you add the waistband, sew both sides of the skirt together. Then sew the waistband together (use a negative 1 inch seam allowance here). Then pin the waistband to the skirt (right sides together). You’ll have to stretch the waistband a bit as you sew. Then finish the garment with hems.
This tutorial is free for personal use only.
Blue twill fabric was provided by Kollabora.com.


Great tutorial..
xo janika
I am in love with this silhouette of skirt right now. You look lovely! Your hair is so pretty! I am planning on making this skirt. Esp. love the striped version.
sincerely,
Laura Chavous
PS: thank you again for saving my email account by alerting me of the untimely hacking. ;)
i like the striped version too
I love this skirt!
I don’t know much about sewing clothing and I was wondering if this skirt could be made to fit slightly below the waist?
Gorgeous!!! By the way, the tutorial says “right side” for both shades of pink :)
LOVE the skirts!! :) I think the stiffness of the first fabric lends to the great a line silhouette. :) Your zipper looks flawless. So is the striped one just a pull up skirt? (with no closures at all?)
So cute! The fabric is beautiful. I can see why you choose it. I just did this http://wkdesigner.wordpress.com/2008/07/27/convertible-dressing/ in a stripe. I’m excited to try your! Thanks for sharing!!!
I’d been thinking about making a pleated skirt similar to this – LOVE it in the cloud-like fabric! Thanks for the tutorial. :)
The idea of making my own skirt is a little terrifying, but I want one just like this so bad! Time to dust off my sewing machine
Love this! Especially the knit version. And your hair, those curls are great :)
Love this. so pretty. thanks for the easy tutorial.
Just gorgeous – both of them. Going into winter down here so this would be perfect with wool tights and boots!
So cute & looks really do-able! I’ll probably be whipping this tutorial out when I need some skirts for my mission! Thank you!
i love the striped version! and your nails are an awesome color.
[…] Tutorial: Kate Spade Inspired Skirt – 1 freebie(s)? […]
[…] pleated skirt isn’t something everyone can pull off but if you’d like to try, Melissa Esplin has a tutorial for […]
I love both skirts! Pleats are my favorite. And the galaxy fabric is so cool.
I love them! Especially the stripes! looks comfy AND classy!
Melissa!! Oh my gosh I freaking love you, this is EXACTLY what I’ve been looking for for my next project. Thank you so much!
[…] needs Kate Spade when you can make this pleated skirt […]
i love the cloud-like fabric and the pleats!
I linked to your tutorial on my blog – thanks for sharing!
?, doro von Hand zu Hand
[…] I’m a sewing amateur, but I need to make this skirt […]
I like your pattern better than the one mentioned in your instruction.
Absolutely loved this tutorial! Made myself this skirt in turquoise blue! It was so easy to make. Much easier than expected, because it looks so chic.
Awesome post, its easy to see you know what you are talking about. I bookmarked this blog and will return, Merry Christmas!
HelloBTW – Im up to about 100 visitors per day.Anyway, what do you think about strike?
Great skirt, I’m totally in love with the design! I just started making one, but I’m stuck at the pleats. I pinned the pleats, but it comes out too wide. How wide should the pleats be, and how far apart should the pleats be? I made my pleats 4 inches apart, and 4 inches wide, but that made the overall skirt width too wide for my waist measurement. Am I doing something wrong?
Thanks!
Love this!! I’m a novice as well and also stuck on the pleats. Not sure if my math is right, but my pleats seem too narrow. I’m also using one piece of fabric rather than a front and back.
Bridget & Ester – I just realized how that may not have made sense. I’ve clarified with a new photo and text. Hopefully that solves the issue.
Thanks so much for clarifying- can’t wait to finish my skirt!
Thanks again for the awesome tutorial!
Yes! Despite your helpfulness I managed to mess it up. So my pleats will be a ruffle! I’m attempting it again for my daughter. Sew power!!
im wondering if this would be able to be done with elastic instead of a zipper
I don’t think you would get the same effect with a woven and an elastic band, but you could do it with a stretch knit, I’m certain.
I’m stuck on the waistband. I folded mine in half and sewed the right side of the waist band to the right side of the skirt, as described. I sewed the band to the skirt with the raw edges up, so that when I folded the waistband up, it covered the stitching. But now I realize that your finished skirt has stitching on the outside of the band. Also, your zipper somehow looks tucked up inside the waist band when it’s zipped up. How did you do that? Did you only sew one edge of the waistband to the front of the skirt, and then one edge to the back? I’m realizing that now when I put the zipper in, it’s going to look all wrong, or the zipper is going to go up to the bottom of the wait band, not really tucked up inside it. I read your instructions like five times and I’m still lost. How exactly did you do your waistband?
I only sewed the zipper to the body of the skirt, the waistbands that I sew like this usually have a button or some kind of clasp enclosure, and I topstitch over the waistband to give it a neat look. I attatch the front part of the waistband first, tuck in the raw edges on the sides and along the top, then sew everything down next. Hopefully that clarifies.
this is awsome, you are very kind to share this tutorial with us. thank you!
[…] { tutorial by Melissa Esplin here } […]
[…] box pleated skirt designed by me using these tutorials (here, here, here and […]
may i ask, what is a negative seam allowance? subtract an inch from the length of the waist band and stretch as you go? also, what does “waist/2” mean? divide by 2? thank you for this tutorial! looking forward to trying it!
Negative seam allowance means that you subtract. Because of the stretchy nature of the material, it should be smaller than your measurements in order to fit. Waist ÷ 2.
thank you! figured out the ➗ after thinking it through for a moment! now to decide of my fabric is stretchy enough! thanks again!
[…] to boost your Me Made wardrobe? Check out these super quick skirt and trouser makes: 1, 2, 3, 4, 5, 6, 7, 8, […]
[…] from a cotton jersey knit I got from Girl Charlee, again about a year ago. The skirt is modeled after this one, except the knit isn’t stretchy enough not to have a zipper. And I completely messed it up by […]
[…] for it! So I ordered a yard and a half. I began looking for online tutorials and decided to follow Melissa Esplin’s Kate Spade skirt. I started marking where the pleats would go but quickly found out I didn’t buy enough fabric […]
Just found this tutorial, it looks amazing and I can’t wait to try it!! :)
[…] next in line is the Kate Spade inspired skirt tutorial by Melissa and I’m totally loving the way it turned out. What a chic addition to the […]
Hi Melissa, I was just about to start planning and making this skirt but none of the images are downloading. How do I work out the width of the fabric from my waist measurements. Many thanks!
I don’t know what happened there, but I just re-uploaded all tutorial images. You should be able to view everything now.
fantastic. Thank you so much!!!
[…] There are so many awesome factors and facts about this lovely and funky styled skirt that you would love to have for a fun summer day dress up while going out. It has been made out of a lovely and thick fabric with tie-dye of blue and white making it look so gorgeous and quirky. Then there is a hidden zipper and the pleats on the back and the front, and you can learn it all here melissaesplin […]