I threatened that I would post iPhone case tutorial nearly a month ago and here I am
finally getting around to actually doing it. I really liked the old case that I had, it was just slightly impractical to had an unprotected phone to Penelope when she wanted to play her games. I decided that I needed to have a case that could stay on and actually protect my phone from grubby little hands. When I decided to embark on my noble quest, our computer was out of commission, so any designing I did was the old school way with a ruler and a pencil. That method took forever. Also, I kept running into wall after wall of design flaws. BLERG.

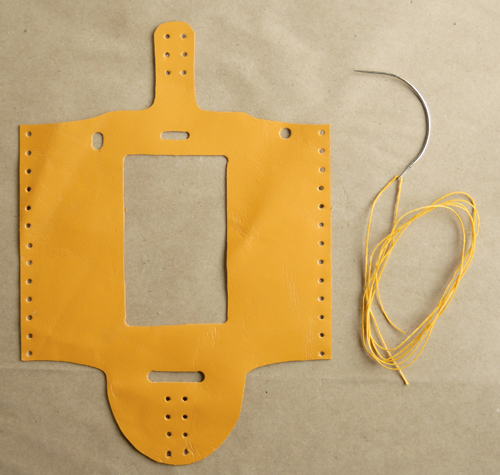
After I got my computer back and I had a great brainstorm session with the hubs, I completed the pattern. It's pretty awesome, if I do say so myself.

Doesn't the corsetted back look hott?
 The pros to this case:
- Penelope can't press the home button, because she can't see it. So, she's stuck watching her little videos or playing her games and can't post random tweets from my phone.
- The leather makes for a better grip. It's not going to slip out of mine or Penelope's hands.
- The phone is protected from minor bangs and drops.
The cons to this case:
- It's sewn in. So if you have to take it to the Apple store (which I do), you might need to un-pick the sewing. No big deal, but slightly annoying.
- the sides of the case don't lay flat. Although, time and scoring the inside of the leather remedies this problem.
It's been about 3 weeks since I've had the case on my phone, and I really like it a lot. I feel like it's protected all the time and it just looks funky fun. I get comments on the stitching ALL the time. If you're looking to cover your iPhone, I hope you give this little tutorial a try. Click on the Download button below to download. Enjoy!

This printable is free for personal use. If you would like to use this printable commercially, please email me. Thanks!