Posts Tagged ‘tutorial’

Printer-Friendly Christmas Winter Holiday Kids Craft PRINTABLE

0 Comments

Last month I was assigned the task of treat for my kids’ respective class parties. The treat is a tricky thing. Thankfully there were no gluten allergies in the class so I really only had to steer clear of nuts. I, however, wasn’t too thrilled about the printable options I saw on Pinterest. Clever ideas, but All of them used up SO. MUCH. DAMN. PRINTER INK!!! What the heck guys? I don’t want to spend $45 on printer ink for some dumb treat that’s totally going to be tossed aside. But I also didn’t want to go so minimalist that it wasn’t going to be cute. Because cute is everything. 
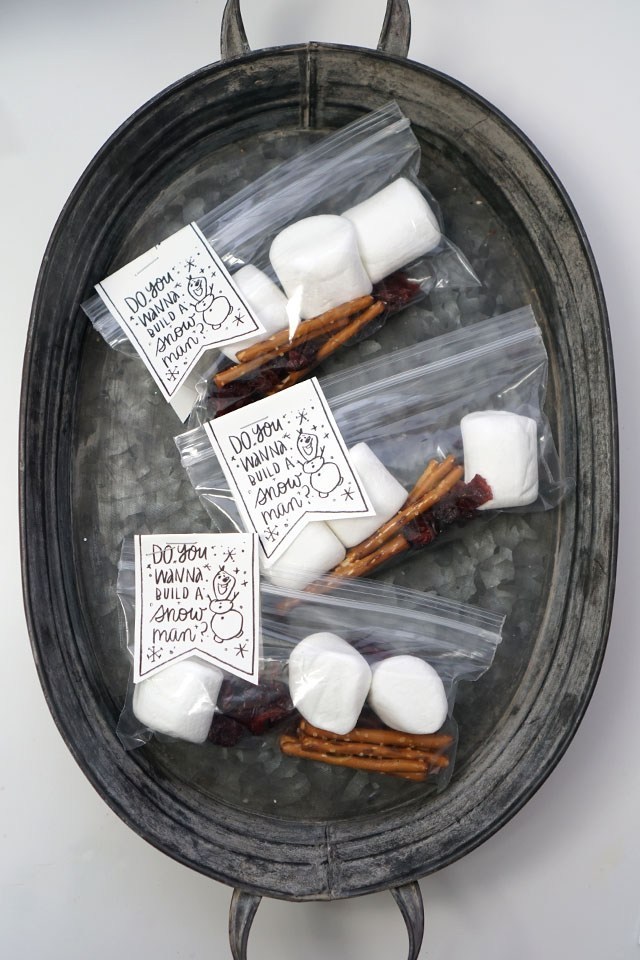
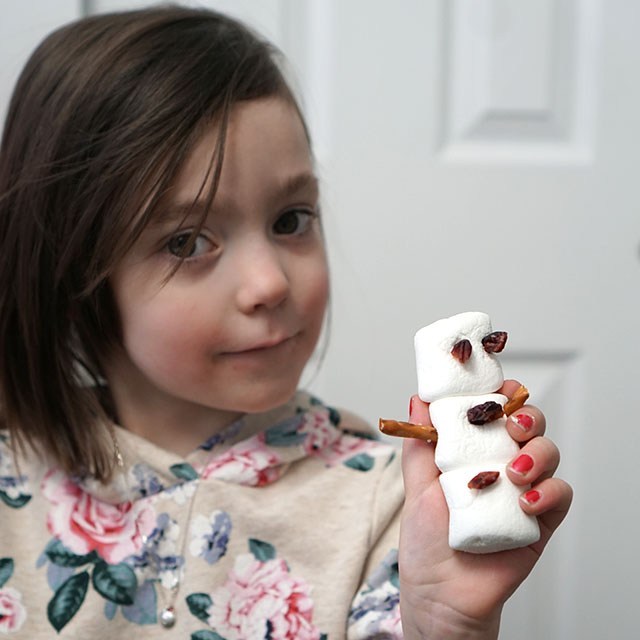
I came across this Do You Wanna Build A Snowman treat idea and decided I would do my own, printer-ink pocketbook friendly version. I have to hand it to whomever thought up this particular idea in the first place. Brilliant! The kids in my daughter’s 4th grade class and the kids in my son’s life skills class LOVED IT. The fact that it not only held the attention of wiggly 10 year olds, but it wasn’t frustrating for kids with special needs to enjoy too. 
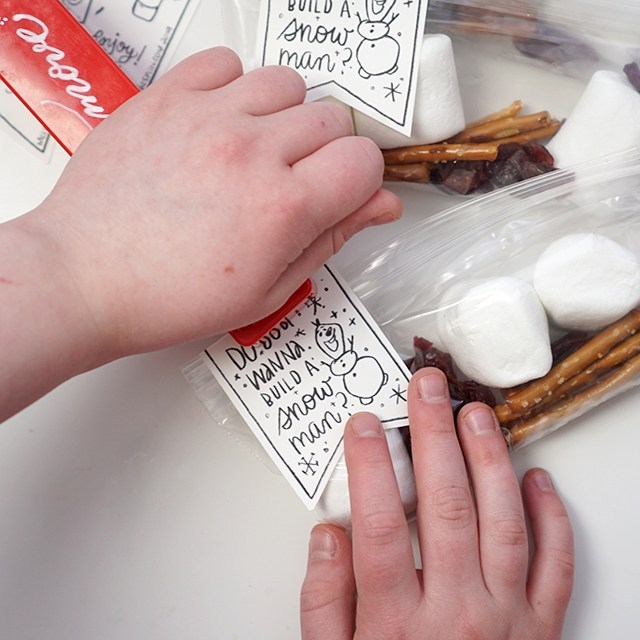
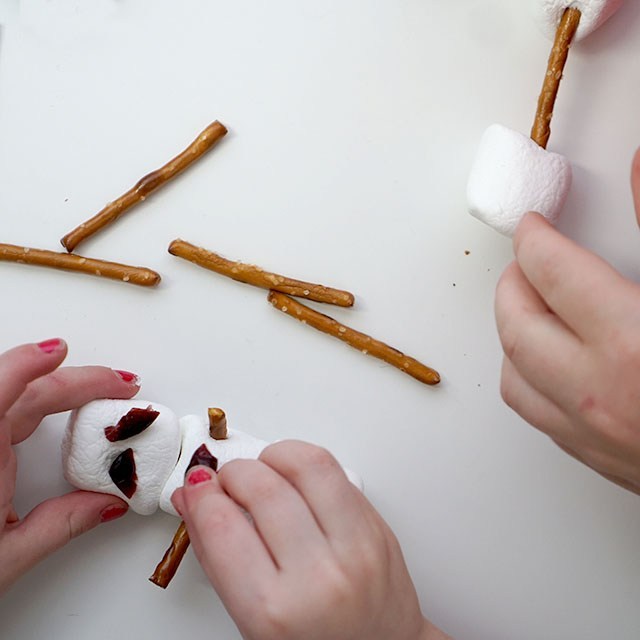
I share this with you now. In January. Because building snowmen doesn’t need to just happen in December. We even get snow the end of may, so this is an easy anytime craft when kids are bored. And they can get clever with it and do so much more than just a snowman. 
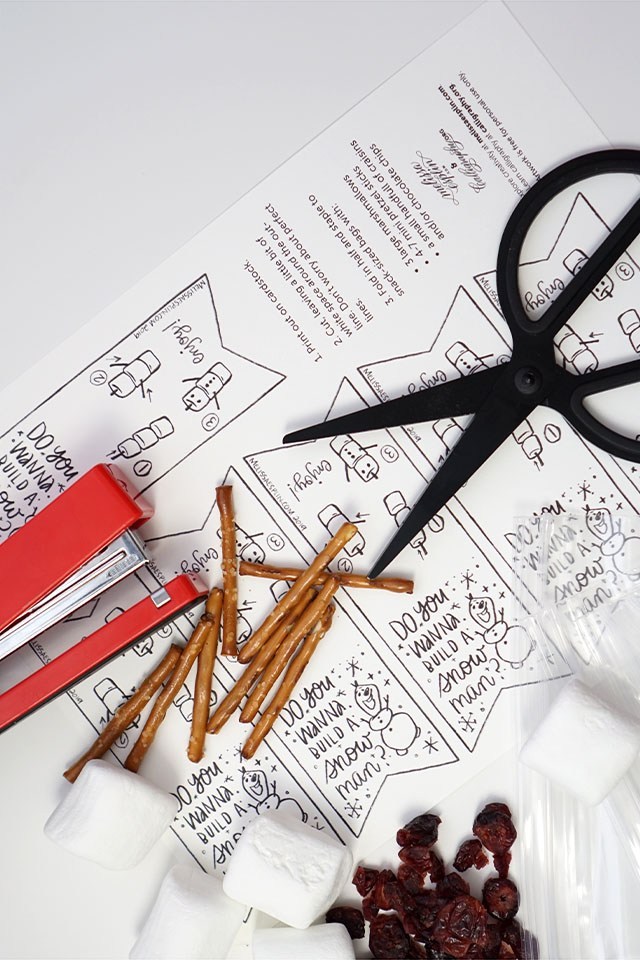
CLICK HERE TO DOWNLOAD

It’s pretty easy to pull together too. Here’s what you need: 

  • Printable (prints 6 per page)
  • Card stock (this is my fave!)
  • Large marshmallows
  • Mini pretzel sticks
  • Craisins or chocolate chips
  • Snack bags
  • Scissors
  • Stapler

Print out the printable. It’s black and white and fits 6 to a page. Easy peasy, doesn’t use up tons of ink and has plenty of margin on the sides for your at-home printer. I used this paper to make it look nice. 
Cut out the printable, leaving white space around the pencil line. You don’t have to do this, but I think it looks nice. Don’t worry about perfect lines. Organic lines will match nicely with the style. 

Fold over the tags, not quite in half. Just so you don’t have the other side’s design peeking over on the front.

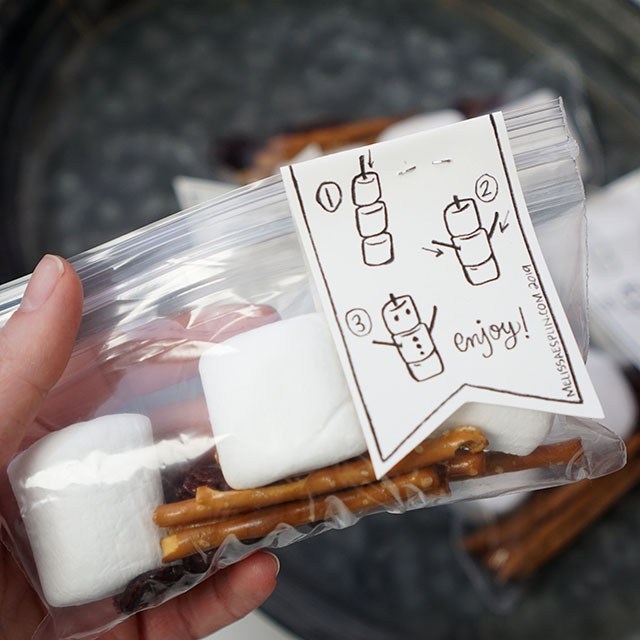
Fill each bag with 3 large marshmallows 4-5 pretzels and a small handful of craisins or small chocolate chips. Close. 
Staple the tags to the snack bags. I personally prefer the look of the tags on the top left, but that’s just me and my OCD. ;) ENJOY!! 
This freebie is free for personal use only. Alteration and redestribution of this is prohibited. 

How to Hang a Gallery Wall Vignette

0 Comments

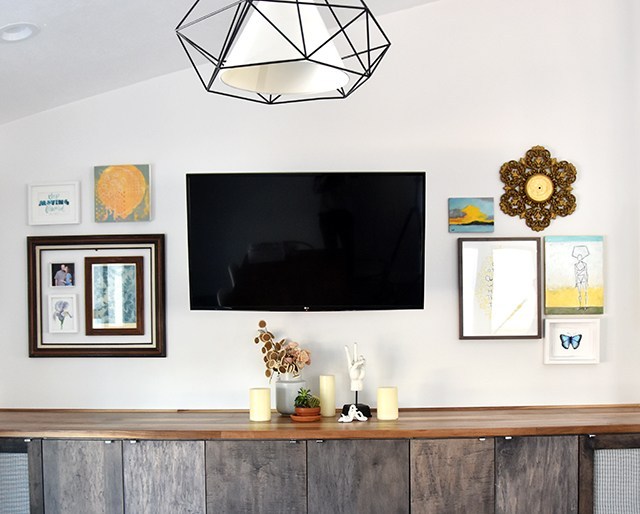
I’ve wanted to share this with you for some time now. Creating gallery wall vignettes with a wide variety of artwork and found objects is what my house is made of. Just a couple weeks ago, Hayley and I set out to hang artwork on the walls of our entertainment space in the new kitchen. Over the next few months, I’m going to share with you the updates that we’ve made over the course of the last year (still ongoing :/). So to kick it off, I’m sharing with you the process I use for hanging artwork on the walls. 

I love taking medium to small sized blank walls and create little galleries with a wide range of artwork and objects. I hope this can serve as inspiration and motivation to get your creative side going and hanging some artwork!! 

As an introduction, this space is quite the multi-functional spot. We dine and craft and relax in this space. We have no formal dining area, so I wanted to tone down the gigantic black box in the middle with some lively artwork and clean up the bar from the artwork I had piled on there so we could use it as a buffet when company comes over. Getting the art from the counter to the walls really cleaned up the space so much. So let me take you through the space….

So let’s get on to hanging artwork! 

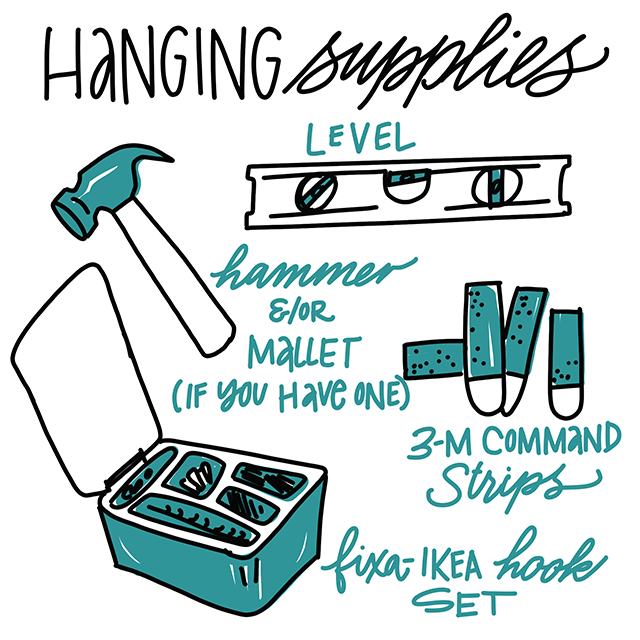
These are my must-have tools for hanging art work. 

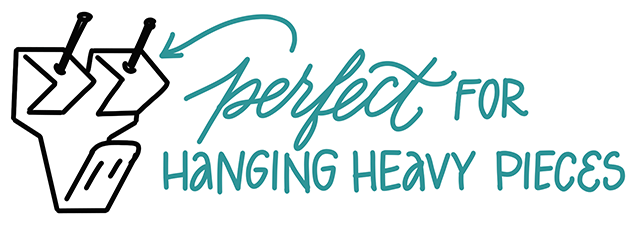
I really love the above hangers. They’re really stable and great for heavy pieces, especially if you’re not hammering into a stud. You can find these at home depot, but they’re in various sizes in the Fixa set. Seriously, $5 very well spent there. I’ve had that little set for a couple of years, and it’s well worth it. It’s self-contained which makes it easy to keep from the children “playing” with the materials.  

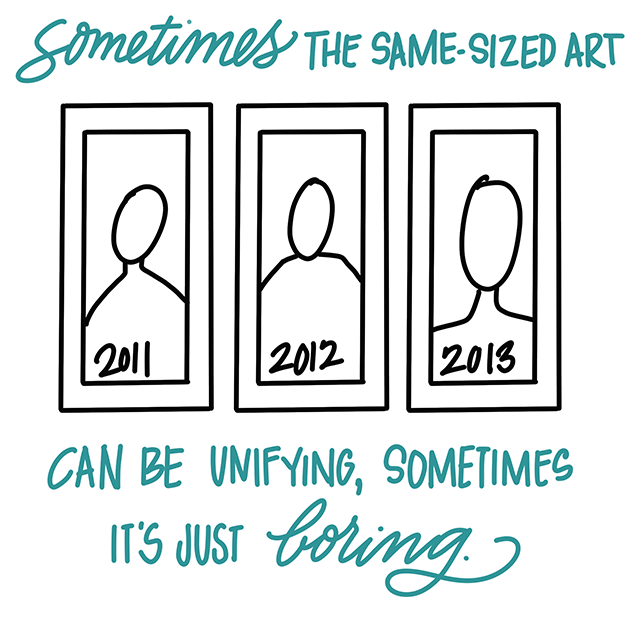
Finding ways to unify pieces is great. Sometimes if you have a variety of styles that you want to bring together (like, for example, family portraits in a wide range of eras and styles). But hanging artwork on every wall in your house in the exact same frames gets really stale. So start collecting art and objects in a wide variety of sizes, shapes and frames! This is where being a little scatter-brained and ADHD comes in handy. 

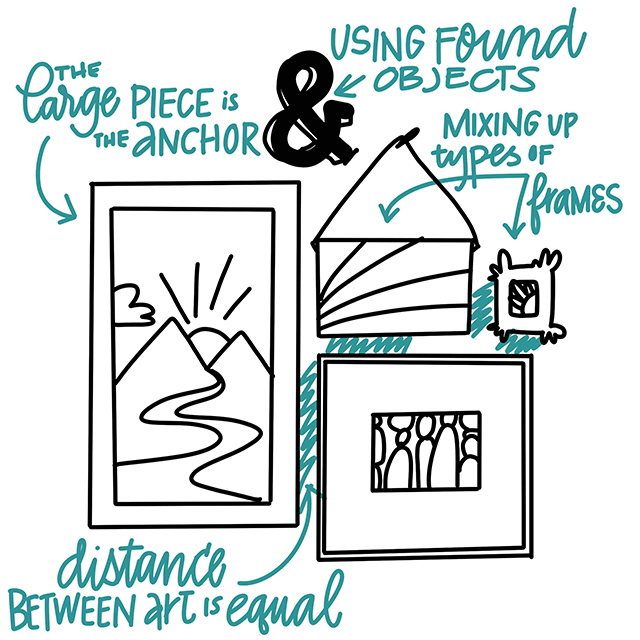
Collecting a variety of prints, original art, found objects gives you lots of variety, texture and depth. But by having a variety, you need to find ways to bring back unity. 

Grouping pieces together that have similar color schemes and making sure that art is spaced evenly brings in consistency that the eye enjoys. 

HOT TIP: if you stand back from your grouping (whether on the wall or the floor as a mock-up), defocus your eye. You’ll see what spots are visually more heavy and where to add pieces. 

Gallery walls don’t need to fit into a tight rectangular shape. As you’ll see from the grouping on the top right hand side, that it peeks out of the rectangle, but it takes up roughly the same negative space as the tighter grouping on the left. 

So what do you think? Will you be hanging art vignettes on your walls any time soon? 

FREE Address Template + Tutorial

3 Comments

This post is sponsored by Tiny Prints. They provide excellent quality printing and amazing printing options to make your holiday cards stand out this year. #ad

It’s my favorite time of year!! I love sending snail mail to loved ones, and getting lovely letters in return! It’s ALL I could ever want for Christmas. But I do admit, it can be stressful, looking at the daunting task of addressing every single envelope by hand. 

Sure, there are services that will do all the work for you (Holla Tiny Prints! They have mail services available!), but if you want to send out a hand-written address, I’ve got you covered. 

CLICK HERE TO DOWNLOAD PRINTABLE TEMPLATE

CLICK HERE TO DOWNLOAD THE DXF SILHOUETTE CUT FILE

FIRST, get a marker or pen you love (I’ve mentioned my favorites for dark envelopes RIGHT HERE). Second, get your envelope template. The envelope template will not only help your addresses look beautifully aligned and awesome, you won’t have to give it a second thought. Just place the template overtop your envelope and write away. If you’re still intimidated by the whole thing, Here’s a video breaking down my must-do tips & tricks: 

Here’s what you’ll need to make this happen: 

For using a printer: download the printable template. Print on thick card stock and cut out solid black lines with a craft knife. 

For using a Silhouette cutter: download the DXF file. Import file to library, add artwork to your artboard, size to 5.25×7.25 and cut out on stencil material (seriously, this stuff is fantastic) or extra thick card stock. 

Sure, you can use fancy-pants ink and nibs and make it all formal, but you don’t have to. Even something as simple as your own handwriting in a large marker will look AWESOME. Trust me, everyone will tell you how awesome your cards were this year. Pinky promise. 

And if your penmanship sucks? Don’t worry. Here’s a quick freebie on how to improve your penmanship. But if you want to learn calligraphy (good penmanship isn’t a pre-requisite), check out my online classes in both brush lettering and modern calligraphy. We include personal feedback/coaching so you’re not alone in your journey. 

Can we stop and talk about how lovely the Tiny Prints designs are this year? And how amazing our photos turned out? We did a super quick session with the lovely Kristin Hale & despite how awful our children were behaving (they were all OVER the place), she still managed to get some fantastic ones that I will LOVE forever. 

From our family to yours, Happiest Holidays! 

This freebie and tutorial is free for personal use only. This post is sponsored by TinyPrints, but all thoughts and opinions are my own. Affiliate links used for materials. 


2017 Thank You Printable

9 Comments

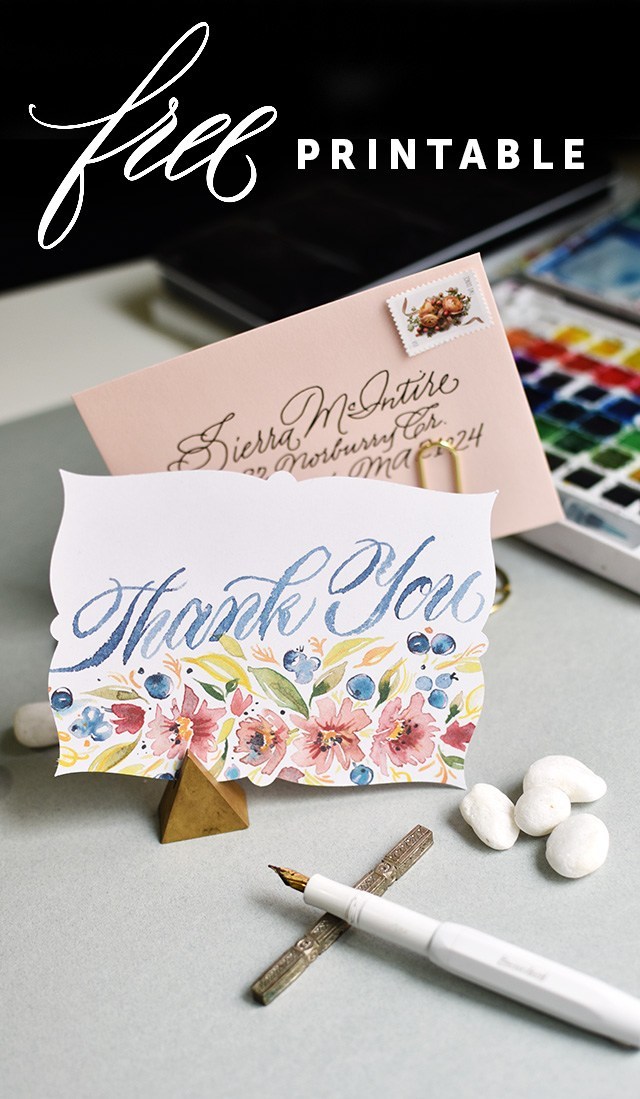
The time of year has come where it’s time for the annual Thank You freebie! I love doing this because it gives me a chance to work on styles and techniques I don’t always get to do on a regular basis. For this year, it meant I got to put the watercolor floral classes I’ve taken from Natalie Malan to use. I wanted to go for a slightly muted palette, but it only worked slightly. It’s like a bright, muted palette. ;)

Also, I feel like I must mention that this month completes the 10th year I’ve been blogging! I can’t believe it’s been that long. So much has changed: 6 moves, 3 children and a few career changes to say the least. I didn’t know I would be blogging this long. But here we are! ‘Tis the season for gratitude, so I may as well express that I’m so grateful for the opportunities that blogging and social media has given me. I’ve made dear friends, I’ve traveled, I’ve learned so much and I’ve felt the creative inspiration through the connections that I’ve made. It’s been pretty awesome. Will I still be here, writing in another 10? We shall see! 

Check out the a video of my process here:

This year’s Thank you takes on two forms. One is a plain, 5.5×4.25 rectangle with cut lines for you to follow, the above is a suggestion. You can download the JPG and use Silhouette’s print & cut feature to make a gorgeous full-bleed card with a scalloped edge. See below for the tutorial! 


You certainly don’t have to have a Silhouette in order to take advantage of this printable. Just click The download link below with the description “hand cut”. :) Just giving you some fun options.

DOWNLOAD SILHOUETTE FILES HERE


But I’ve got TONS MORE ‘Thank You’s. Check out the whole list of past years’ printables below!

Want to learn calligraphy? Like the brush lettering I use here? Check out my class on Calligraphy.org. I’ll give you one-on-one instruction to help you get there. We start from the very basics, but because of the personal nature of the instruction we offer off-script learning for the more advanced letterer. Use code BRUSHLETTERING for a 10% discount on the class. :)

Materials used for this DIY: 

This printable is free for personal use only. Any redistribution or commercial use of this printable without written consent is prohibited. © Melissa Esplin 2017. Affiliate links used, by purchasing through an affiliate link, you support MelissaEsplin.com and the free content provided here. Thank you for your support! 


Easy Suminigashi Tutorial

0 Comments
Iron provided by CHI® and Bed Bath & Beyond. Whether taking the wrinkles out of a new bedspread or curtains as the finishing touch on a home décor project, ironing your favorite outfit for a special occasion or flattening paper for artwork the CHI® Electronic Retractable Clothing Iron is the bee’s knees. 


SUMINIGASHI!! This marbling technique is so super awesome. It’s one of those projects that doesn’t really require a whole lot of space or preparation. I had everything on-hand for this project, so there was little barrier to entry here. 

HOWEVER, there was a little bit of a learning curve. Check out this little video Hayley and I made about our discoveries through trouble-shooting (the tutorial is at the end if you want to skip to the end there, too). 

In a nutshell, here’s what we found: 

  • Cold water works best
  • You can use soap to help disperse the ink, but you need a large water bath in order to keep the ink from dropping from the surface
  • Use only sumi ink if you plan on using a smaller water bath (we used a kitchen dish for note cards and envelopes)
  • Not all sumi inks work well. Of the sumi inks I have, Yasutomo worked the best
  • We read elsewhere that these colored inks work well, if you want to add color
  • The first paper you pull is often the “first pancake”, don’t stress if it doesn’t work well
  • You can get 3-7 pulls off of one ink application, the ghost images are subtle like Carrara marble


Don’t feel like watching the video for the tutorial? Here’s the cliff’s notes version: 

SUPPLIES:

  • sumi ink
  • paper (we loved the crisp results of bristol paper, but anything works!)
  • cold water
  • water container
  • diluted soapy water (only if using a larger container)
  • brush
  • tooth pick or eye dropper
  • the bestest iron ever (yes, a clothing iron)

If you’re doing this project with little people, you may want to add aprons, rubber gloves and a drop cloth to the mix (especially if you’re doing larger ink baths). 

Fill your container with cold water. I chose to use a small container for the video, but I’m on Studio 5 on Tuesday sharing how you can do it with soap and a larger container. So either can be done. 

Get your ink brush wet and load it up with sumi ink. Barely tap the surface of the water and watch the water disperse along the surface. 

Add more dots along the surface, spacing them randomly apart. the longer your brush touches the surface, the larger the dot. 

Get as many dots as you want, until you feel happy with the blank space to ink ratio. 

With a toothpick or eye dropper, drag the tool along the surface to pull and move the ink around. You’ll get little swirls all over. 

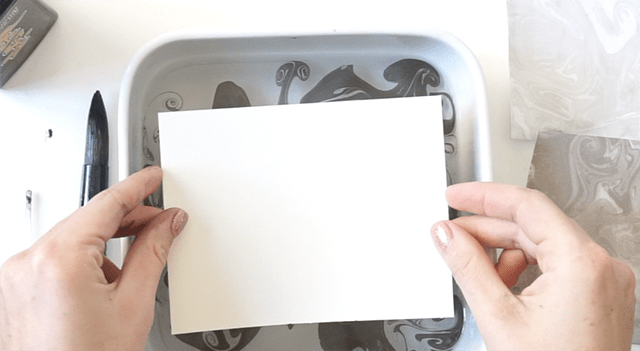
Grab your paper and submerse the first paper entirely. 

Pull your print and place on a cookie sheet to dry. If you’re doing envelopes, touch only the surface of the water to the front of the envelope. Hold the envelope by the flap so it doesn’t get wet (otherwise it will seal shut as it dries). 

Now what do you do when the paper dries?? It’s so annoying when papers dry all curly and whatnot. And they will. So iron them! A huge shout out to CHI Heat tools and Bed Bath and Beyond for providing me with a brand-new iron for my sewing and paper crafting. 

I’ve been a Rowenta gal for a long time, but it wasn’t hard to make the switch. It’s light-weight, yet substantial, the plate is silky smooth, the heat time is short, the reservoir for steaming is twice the size of my old one and it has a retractable cord. All wins in my book. If you’re in the market for a new iron, this is it. 

For ironing paper, get a cutting board (something smooth, yet will take heat) and a piece of quilting cotton. Set the iron to COTTON with NO STEAM. Place the cotton over the paper you’re about to iron and press for 15-20 seconds, moving the iron as you go. Flip the paper around  and repeat. The paper may want to curl in the direction of its grain, but it will relax once it cools back down. 

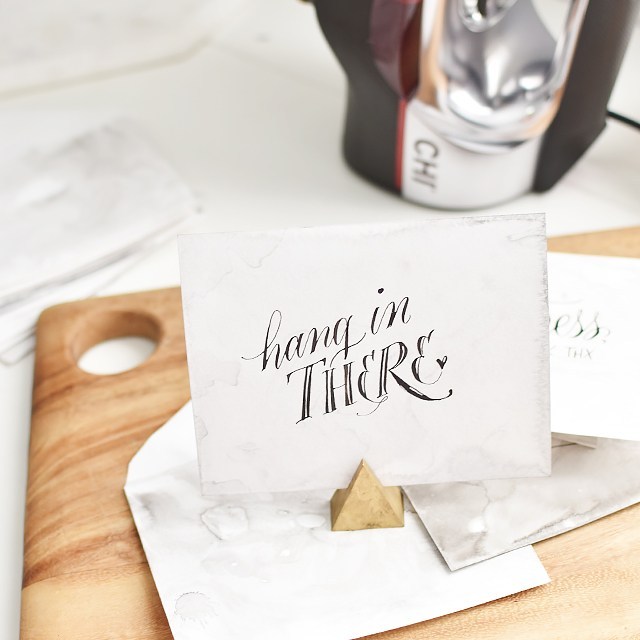
Pretty fun, right? I would recommend doing this in batches to save time. The print or write your desired phrases overtop! 

This post is sponsored by CHI® and Bed Bath & Beyond. All opinions are my own.

mobile site