Iron provided by CHI® and Bed Bath & Beyond. Whether taking the wrinkles out of a new bedspread or curtains as the finishing touch on a home décor project, ironing your favorite outfit for a special occasion or flattening paper for artwork the CHI® Electronic Retractable Clothing Iron is the bee’s knees.
SUMINIGASHI!! This marbling technique is so super awesome. It’s one of those projects that doesn’t really require a whole lot of space or preparation. I had everything on-hand for this project, so there was little barrier to entry here.

HOWEVER, there was a little bit of a learning curve. Check out this little video Hayley and I made about our discoveries through trouble-shooting (the tutorial is at the end if you want to skip to the end there, too).
In a nutshell, here’s what we found:
- Cold water works best
- You can use soap to help disperse the ink, but you need a large water bath in order to keep the ink from dropping from the surface
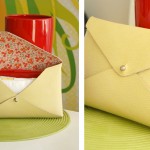
- Use only sumi ink if you plan on using a smaller water bath (we used a kitchen dish for note cards and envelopes)
- Not all sumi inks work well. Of the sumi inks I have, Yasutomo worked the best
- We read elsewhere that these colored inks work well, if you want to add color
- The first paper you pull is often the “first pancake”, don’t stress if it doesn’t work well
- You can get 3-7 pulls off of one ink application, the ghost images are subtle like Carrara marble

Don’t feel like watching the video for the tutorial? Here’s the cliff’s notes version:
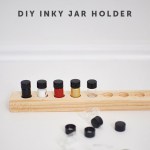
SUPPLIES:
- sumi ink
- paper (we loved the crisp results of bristol paper, but anything works!)
- cold water
- water container
- diluted soapy water (only if using a larger container)
- brush
- tooth pick or eye dropper
- the bestest iron ever (yes, a clothing iron)
If you’re doing this project with little people, you may want to add aprons, rubber gloves and a drop cloth to the mix (especially if you’re doing larger ink baths).

Fill your container with cold water. I chose to use a small container for the video, but I’m on Studio 5 on Tuesday sharing how you can do it with soap and a larger container. So either can be done.
Get your ink brush wet and load it up with sumi ink. Barely tap the surface of the water and watch the water disperse along the surface.

Add more dots along the surface, spacing them randomly apart. the longer your brush touches the surface, the larger the dot.

Get as many dots as you want, until you feel happy with the blank space to ink ratio.

With a toothpick or eye dropper, drag the tool along the surface to pull and move the ink around. You’ll get little swirls all over.
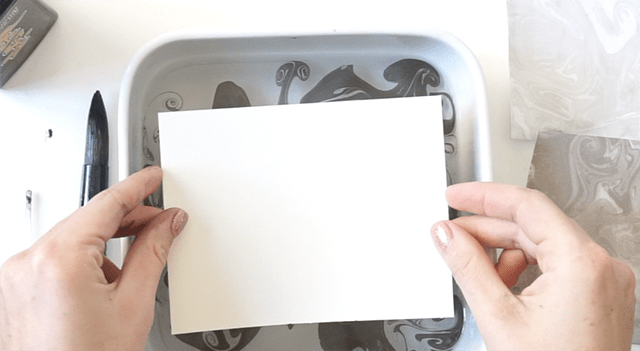
Grab your paper and submerse the first paper entirely.

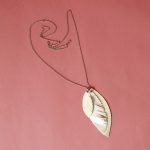
Pull your print and place on a cookie sheet to dry. If you’re doing envelopes, touch only the surface of the water to the front of the envelope. Hold the envelope by the flap so it doesn’t get wet (otherwise it will seal shut as it dries).

Now what do you do when the paper dries?? It’s so annoying when papers dry all curly and whatnot. And they will. So iron them! A huge shout out to CHI Heat tools and Bed Bath and Beyond for providing me with a brand-new iron for my sewing and paper crafting.
I’ve been a Rowenta gal for a long time, but it wasn’t hard to make the switch. It’s light-weight, yet substantial, the plate is silky smooth, the heat time is short, the reservoir for steaming is twice the size of my old one and it has a retractable cord. All wins in my book. If you’re in the market for a new iron, this is it.

For ironing paper, get a cutting board (something smooth, yet will take heat) and a piece of quilting cotton. Set the iron to COTTON with NO STEAM. Place the cotton over the paper you’re about to iron and press for 15-20 seconds, moving the iron as you go. Flip the paper around and repeat. The paper may want to curl in the direction of its grain, but it will relax once it cools back down.
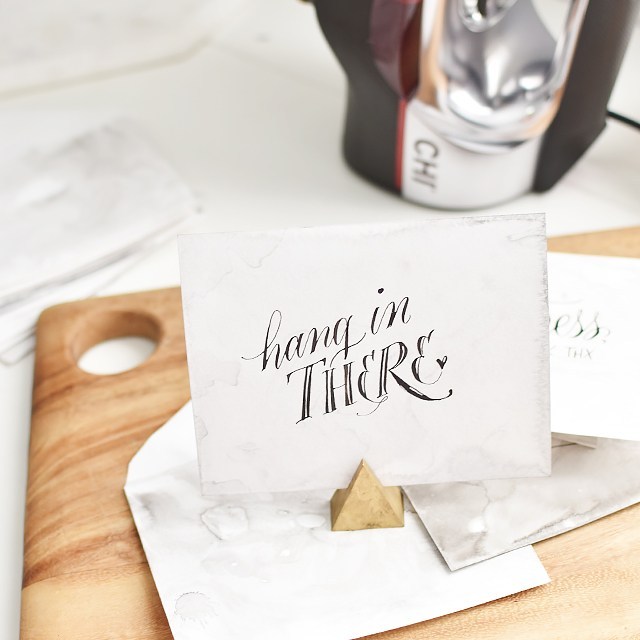
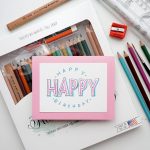
Pretty fun, right? I would recommend doing this in batches to save time. The print or write your desired phrases overtop!
This post is sponsored by CHI® and Bed Bath & Beyond. All opinions are my own.